

Tour Manager

Theme Documentation

What is the installation process for the templates?

There is not much to the process of installing a template.
Step 1 These steps will walk you through installing a theme using WordPress Administrator.

Start by going to your WordPress admin panel.

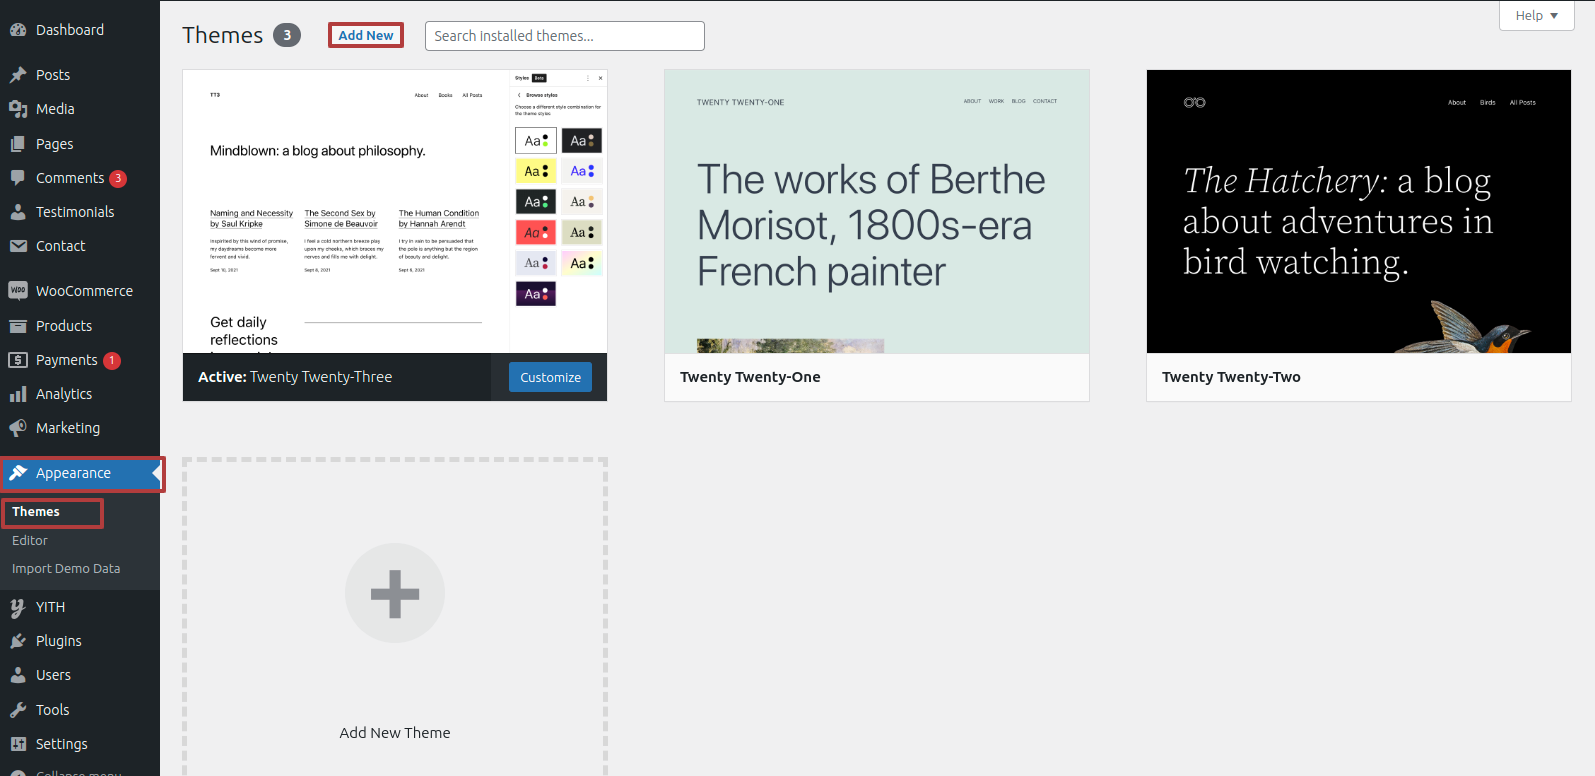
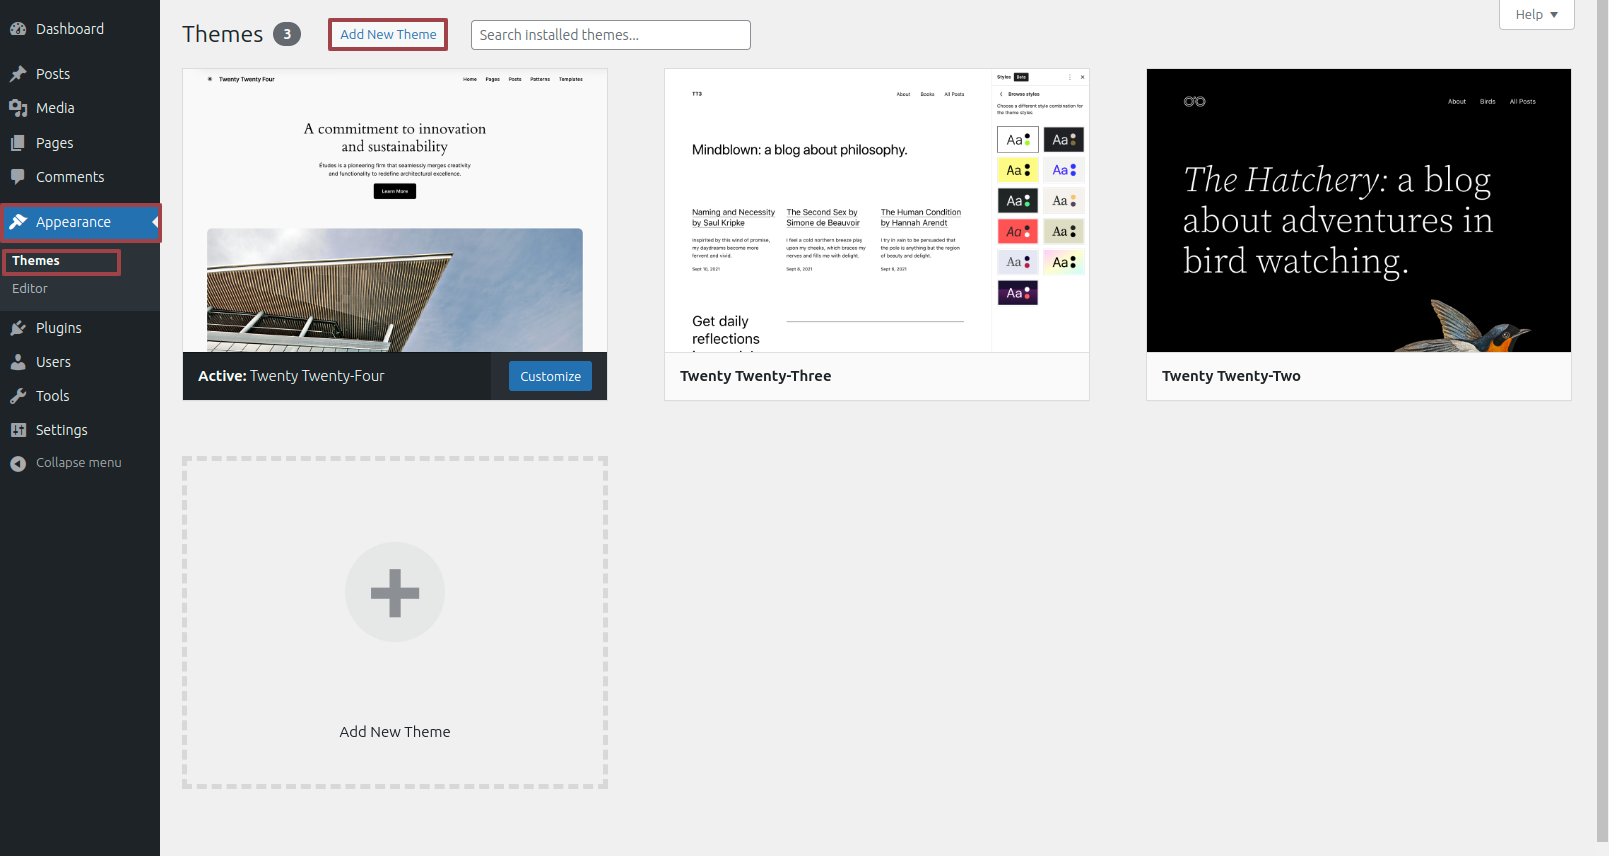
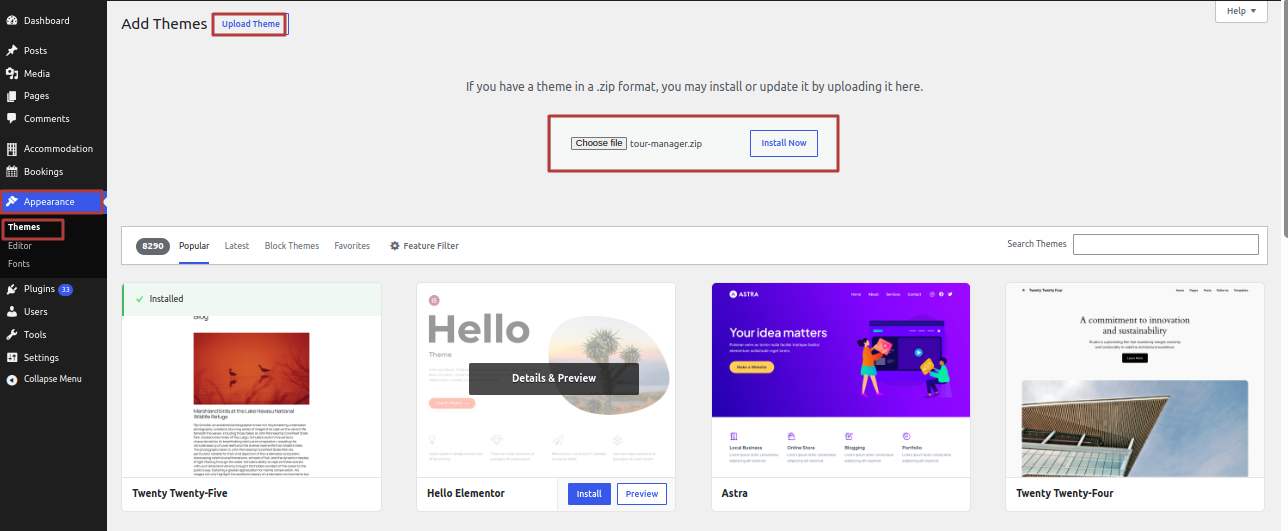
Open "Appearance" to change your theme's settings. ===> then choose "Themes"


Step 2 After arriving at the themes page,choose"Add New" from the drop-down menu


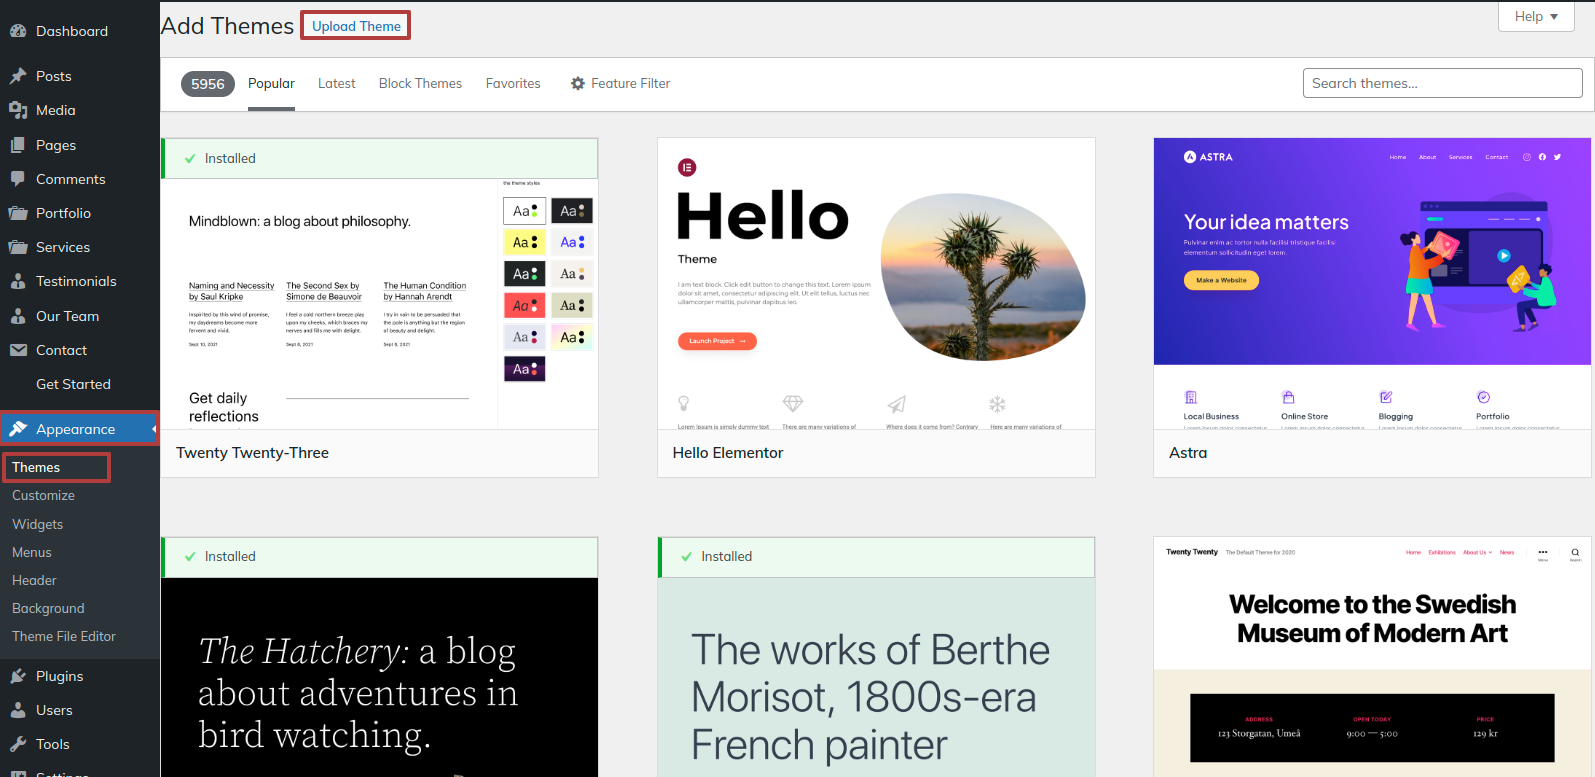
Step 3 It is important to click the "Upload Theme" button.


Step 4 Once you've selected your favourite organic-online-shop.zip theme, click the Browse and Now Installing buttons.


WordPress will now install the preferred theme and provide you a success message along with a preview of the theme that you may activate.


Part on Formulating the Best Edit Site

In reference to the Edit Site Configuration.

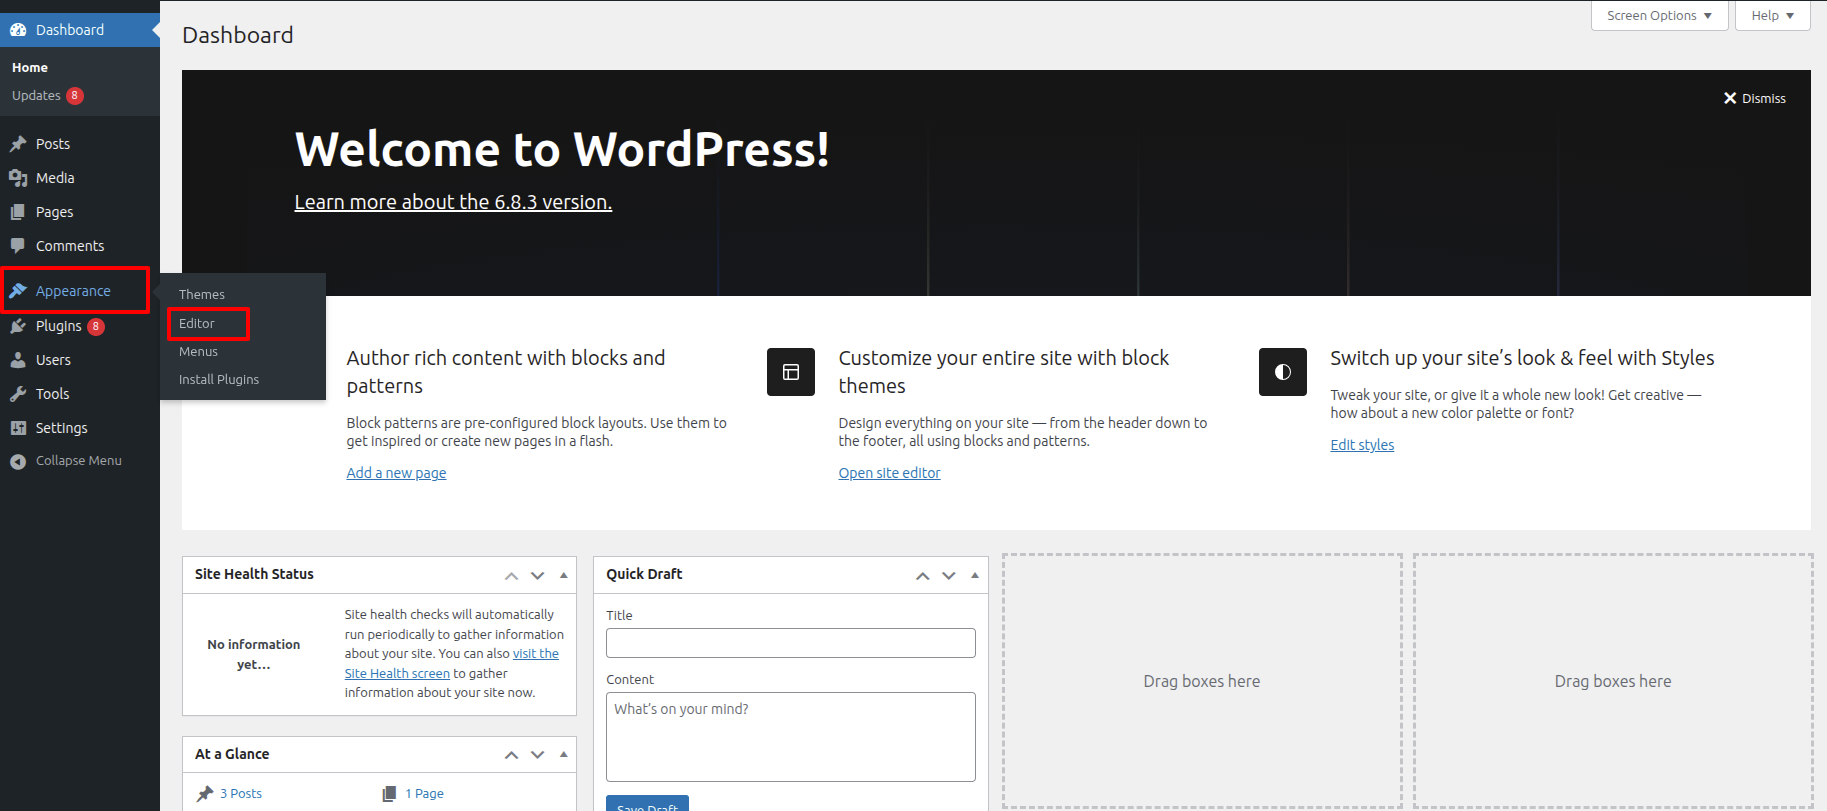
Step 1 Open "Dashbord" to change the theme ===> By selecting "Appearance" ===> Go now to the "Editor"


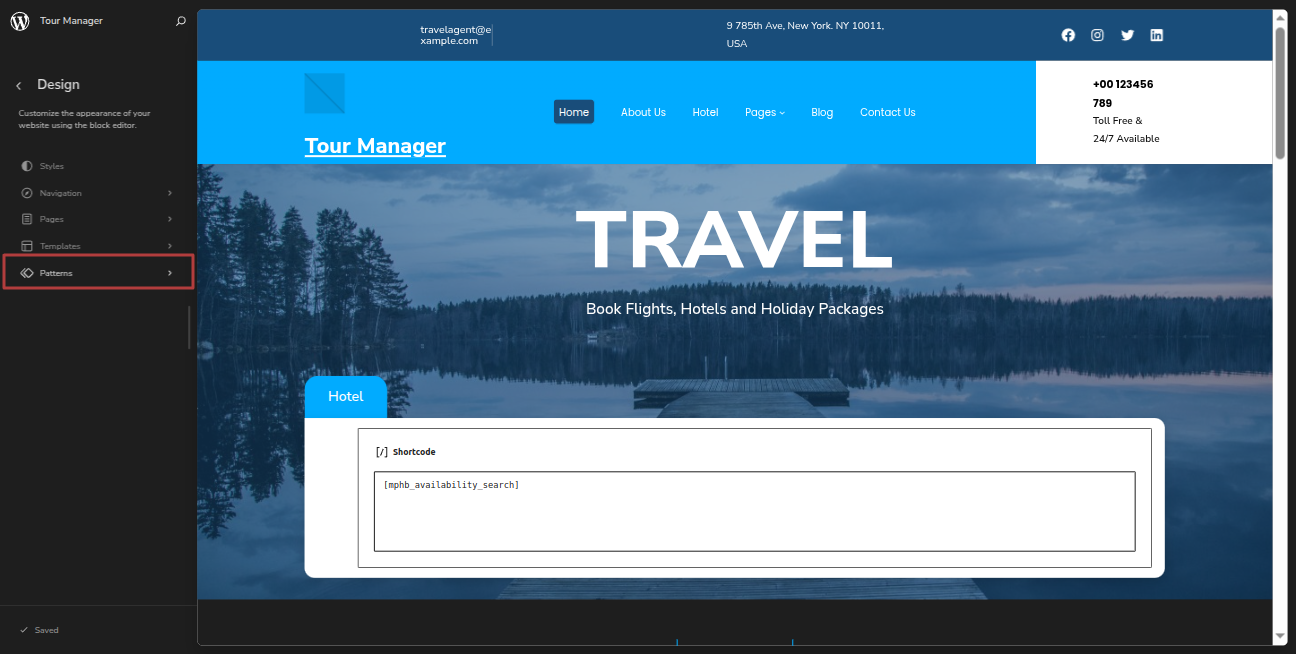
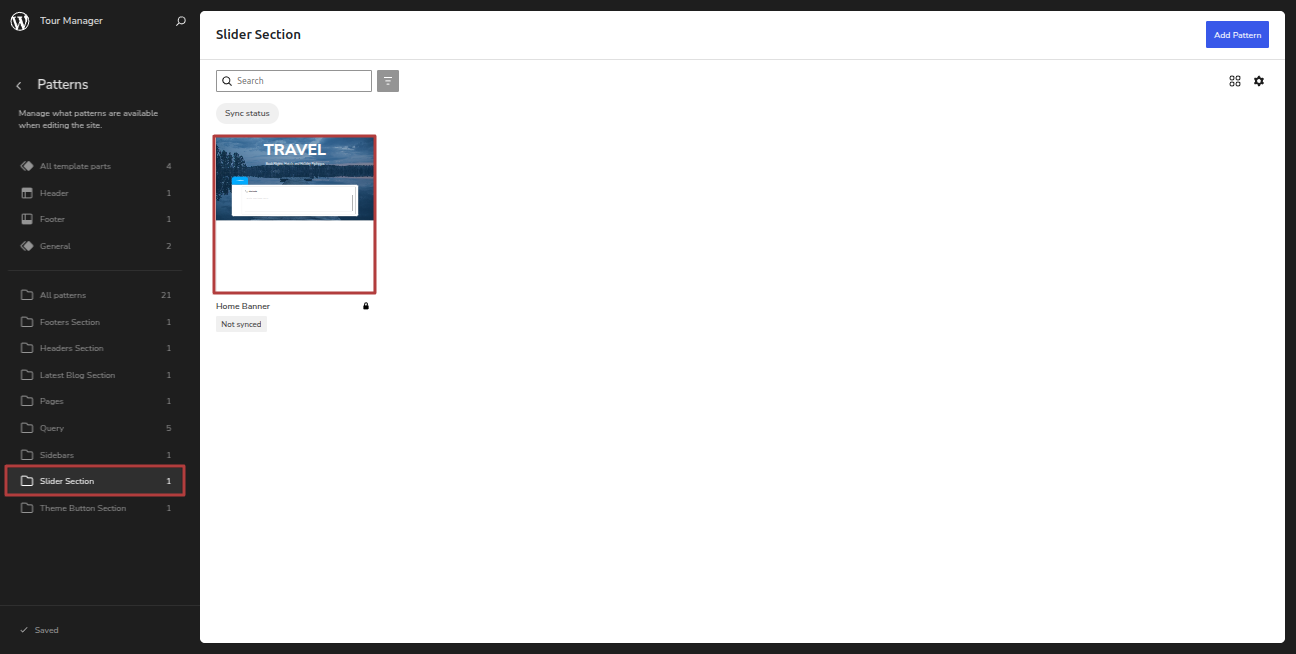
After clicking on the Editor, you will reach the Design than click on the Pattern.


In the pattern, you will find Header, Footer, Banner, you will find every section, you can select it with one click.


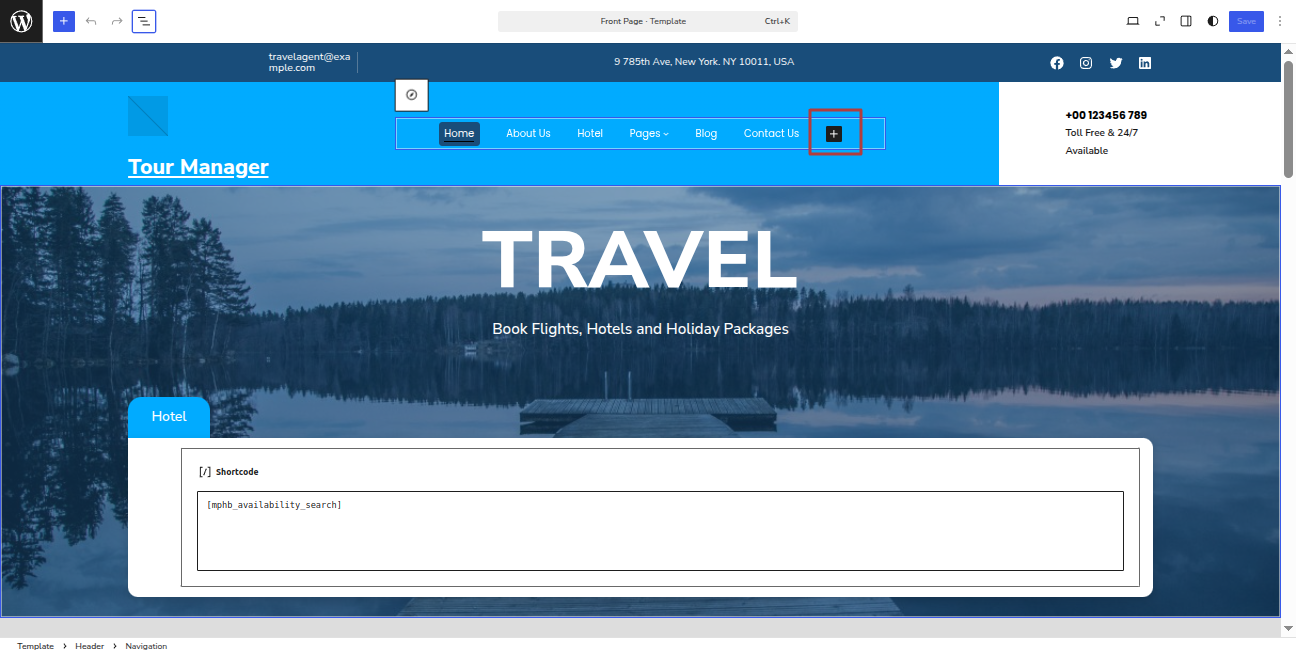
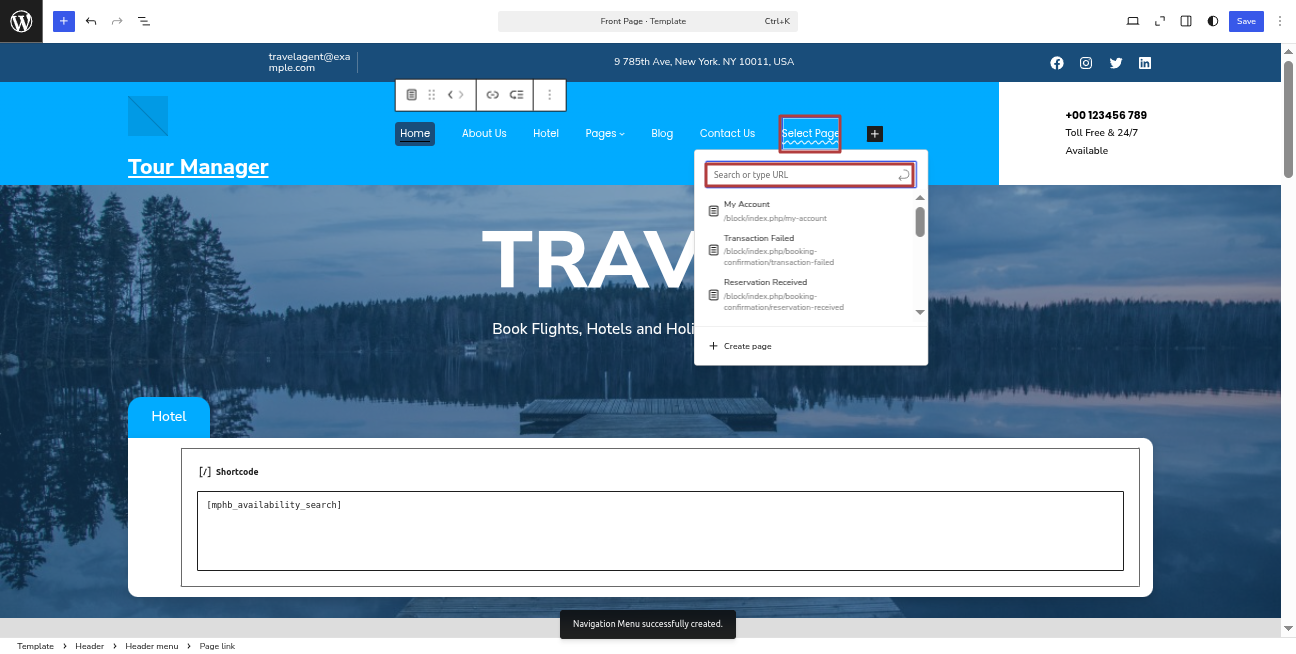
In what way may I set up Navigation?

Section Concerning the Creation of the Navigation

Step 1 Open "Dashbord" to change the theme ===> By selecting "Appearance" ===> Go now to the "Editor."


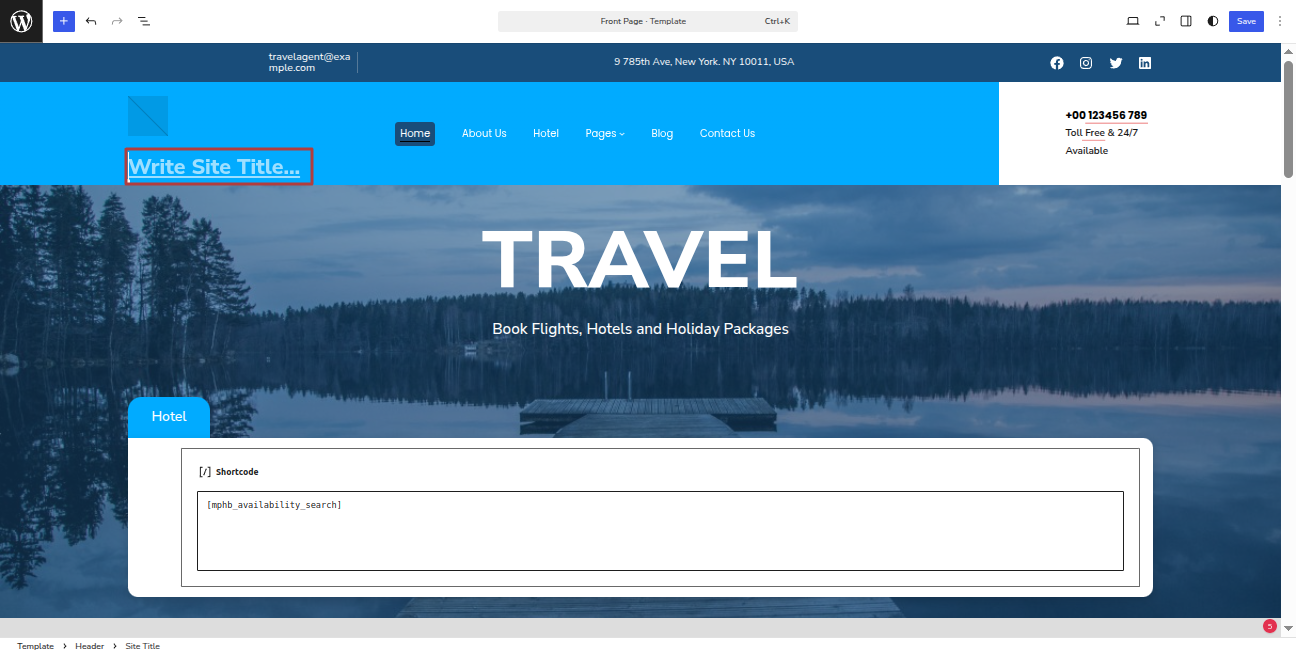
Part Regarding Creating the Site Identity

Including the header with the logo.

Step 1 Open "Dashbord" to change the theme ===> By selecting "Appearance" ===> Go now to the "Editor"


It will be shown in this format in the Header Section.


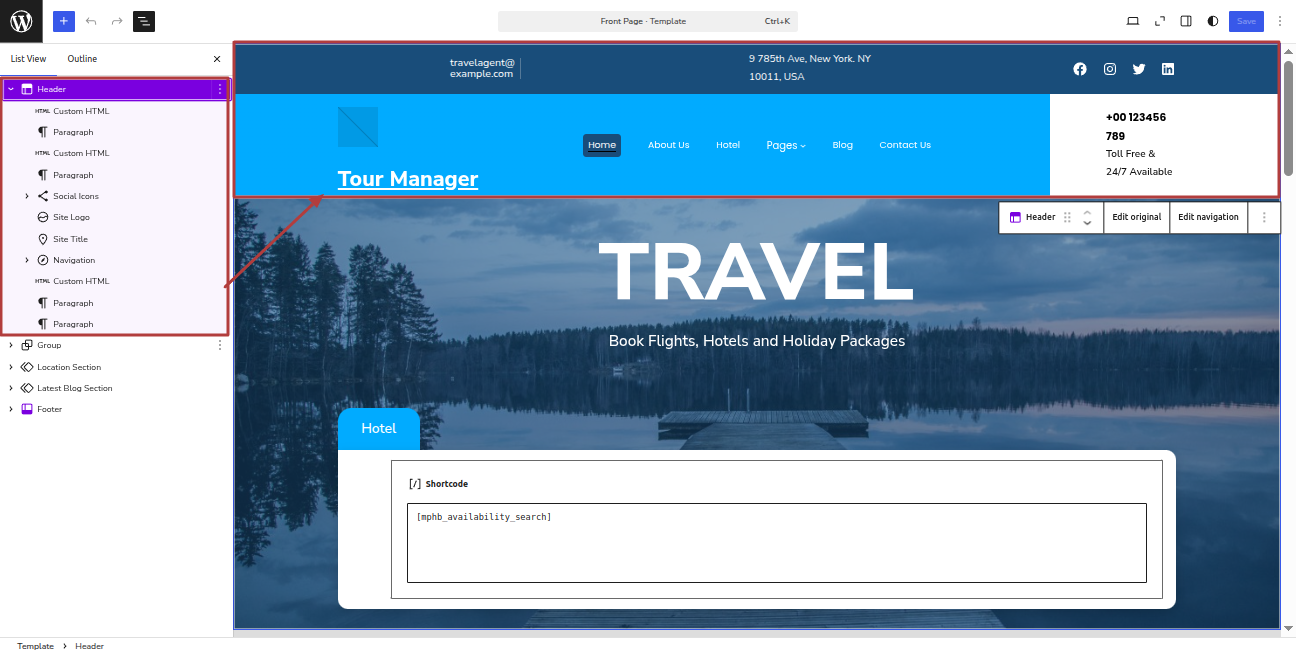
Part on Formulating the Best Header

In reference to the Header Configuration.

Step 1 Open "Dashbord" to change the theme ===> By selecting "Appearance" ===> Go now to the "Editor"


It will be shown in this format in the Header Section.


Part Regarding The Banner Development

In reference to the Banner Configuration.

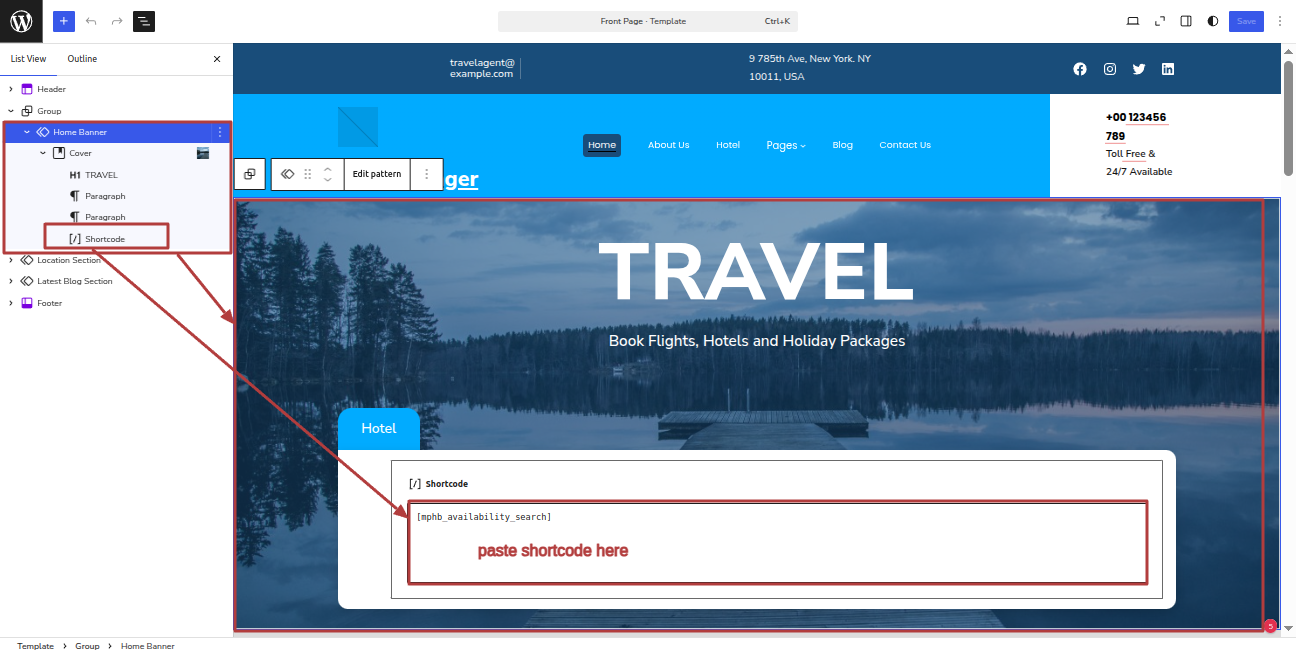
To Set-up the Banner proceed as described below

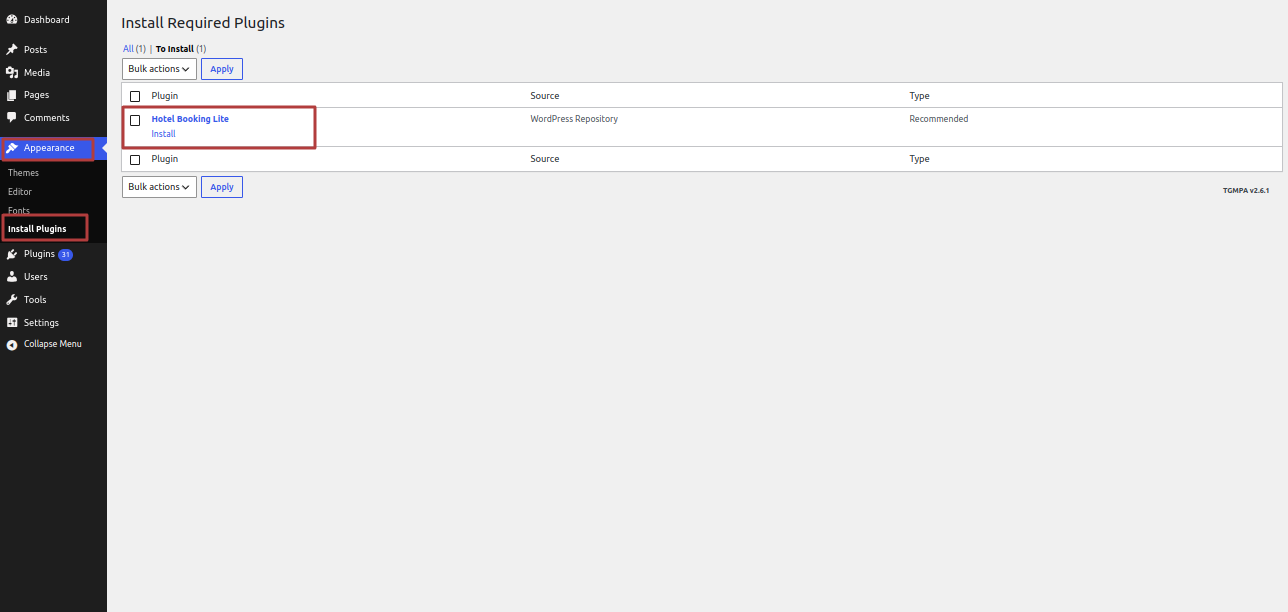
You'll need to install these plugins for the search function to work. Follow the instructions below.

Click Dashboard >> Appearance >> Install Plugins >> Add New Seasons
If you receive the notification, please click the Install Pages button. This action will generate all the necessary pages for your hotel booking. Once installed, these pages will be available in the search results, so you will need to complete the installation to ensure they appear in searches.
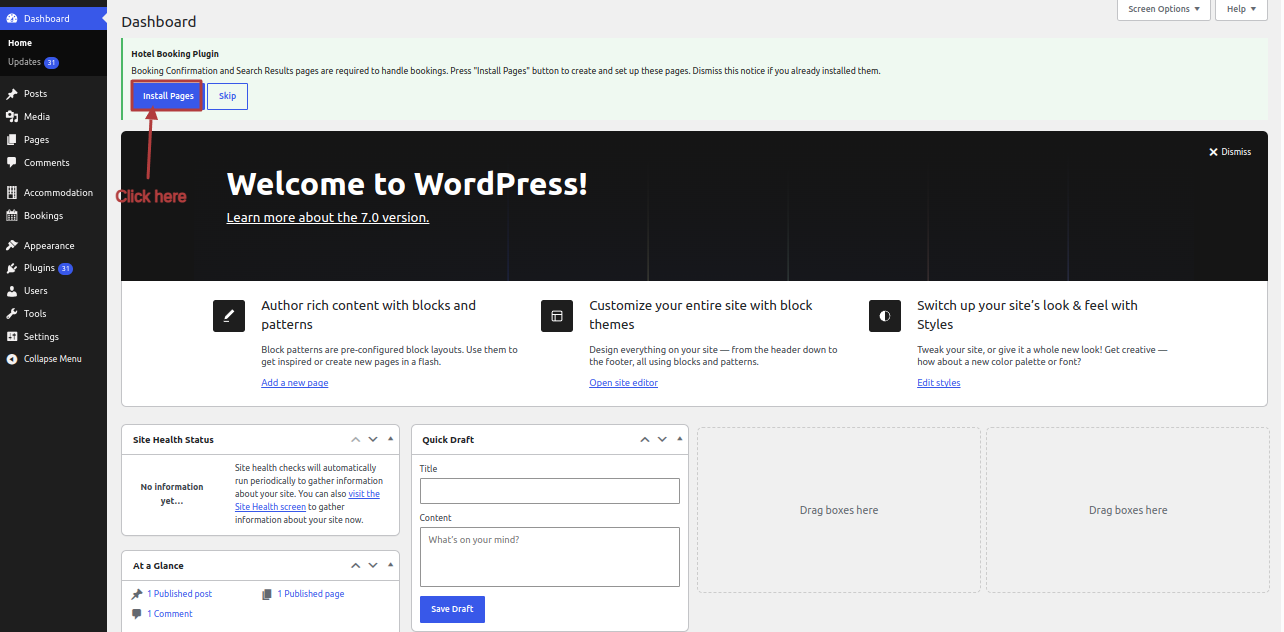
Start by accessing the appropriate section to configure the hotel booking.

You can generate the following components:

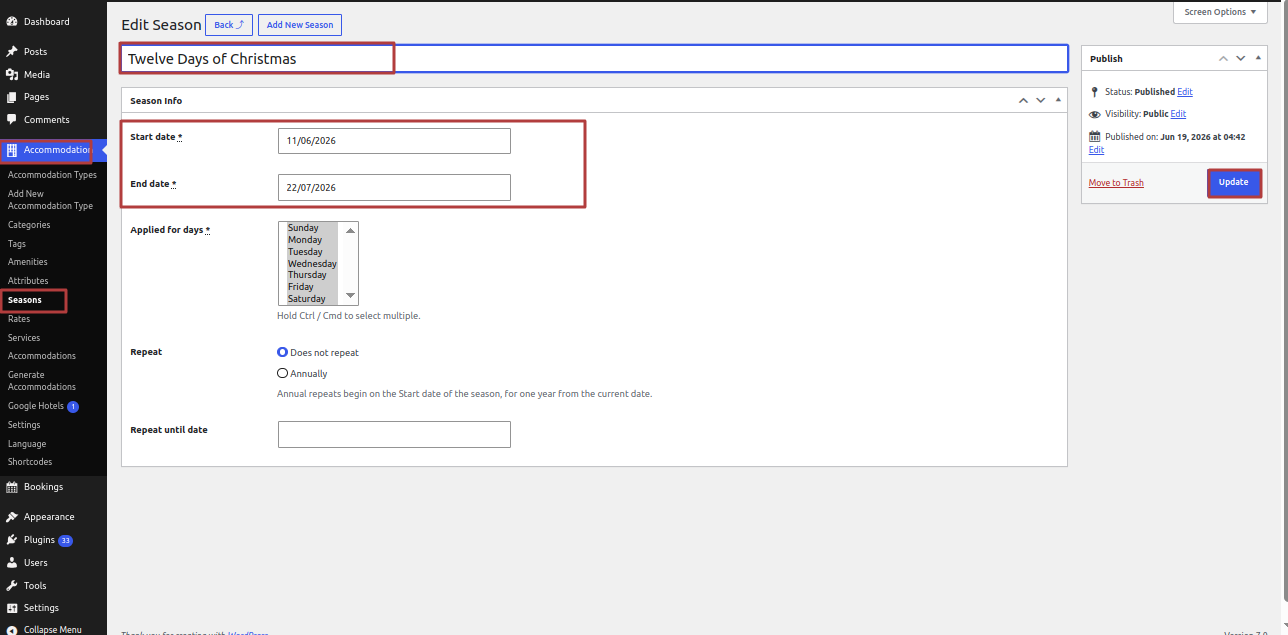
  1. Seasons
  2. Services
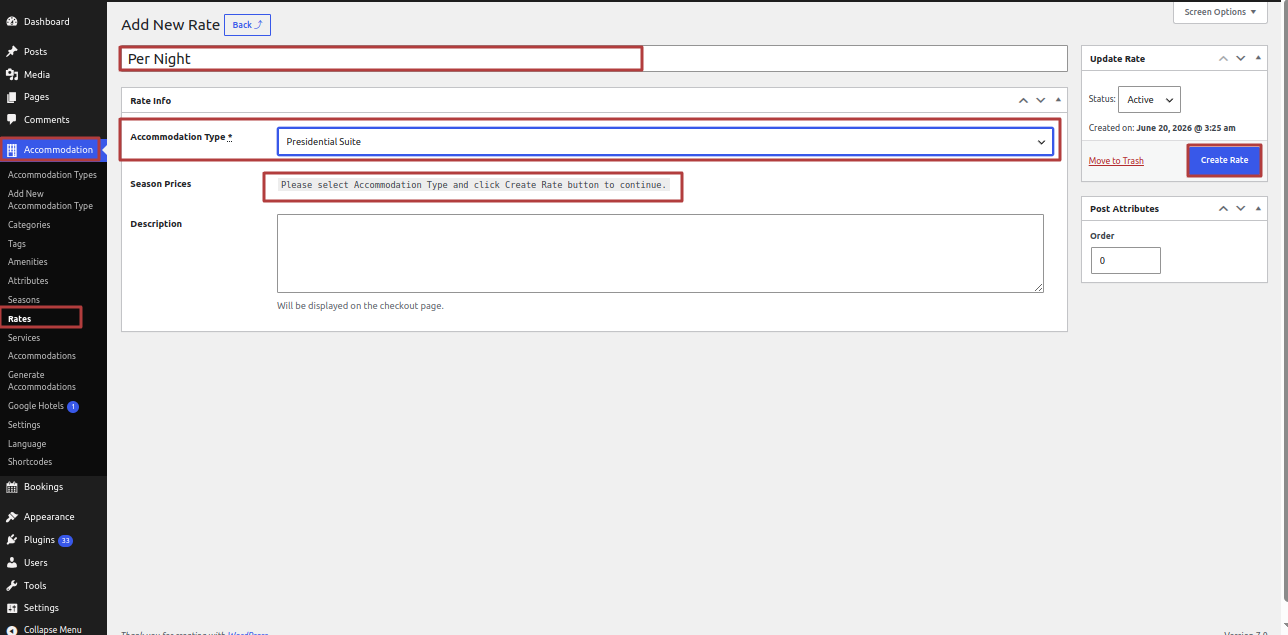
  3. Rates
  4. Generate Accommodation

Alternatively, if you create the pages yourself, when you perform a search you will be presented with date selection options, and the relevant functions will be available to you.

Click Dashboard >> Accommodation >> Seasons >> Add New Seasons
Click Dashboard >> Accommodation >> Rates >> Add New Rates
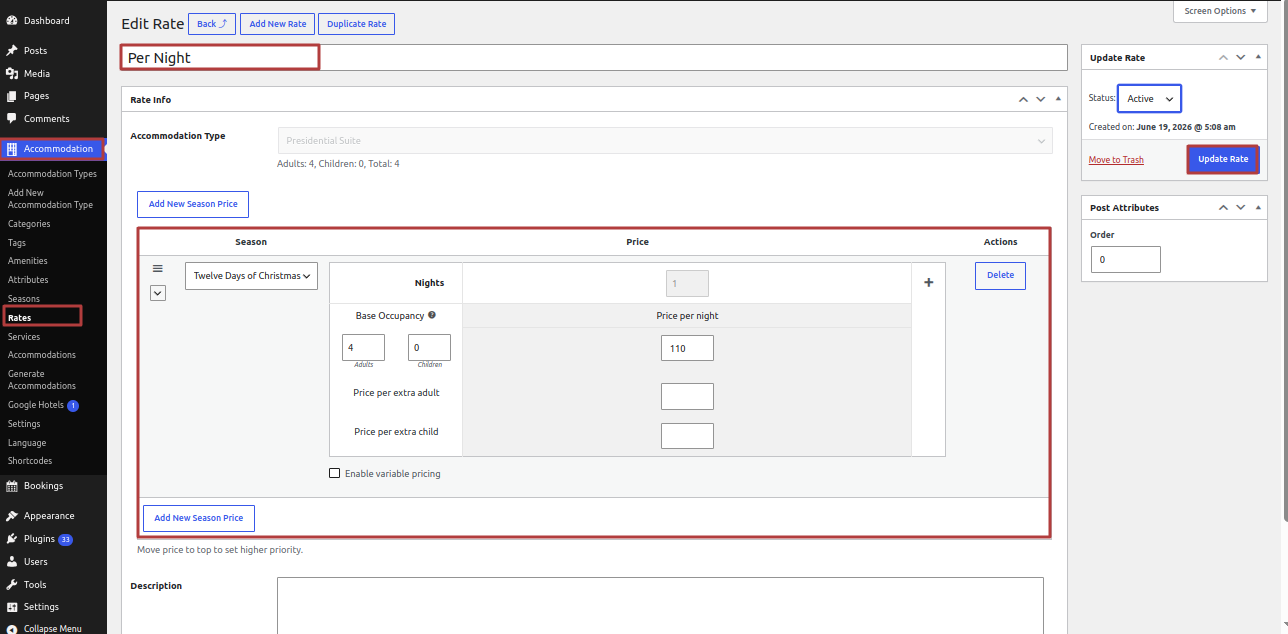
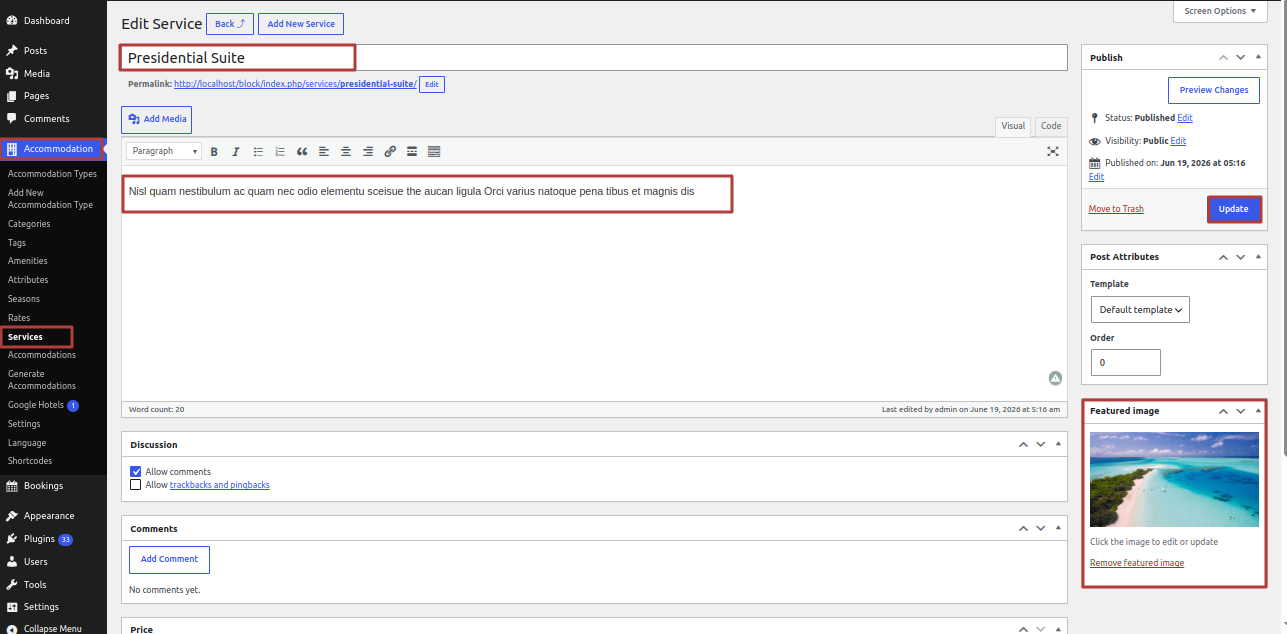
Click Dashboard >> Accommodation >> Services >> Add New Services
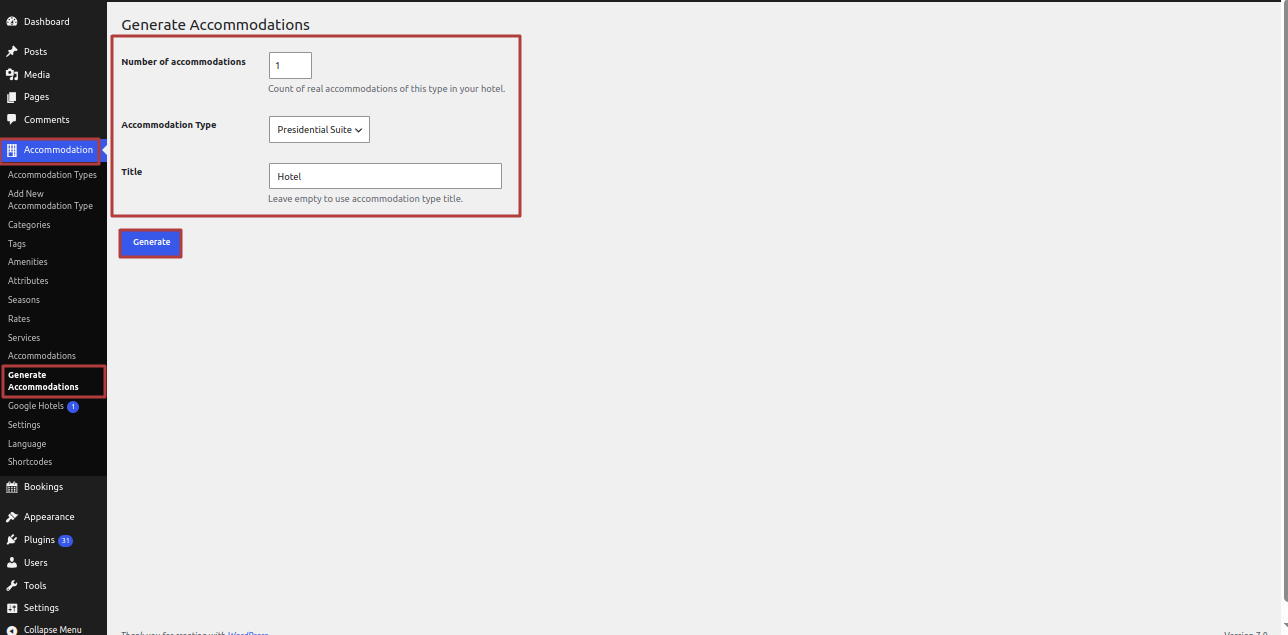
Click Dashboard >> Accommodation >> Generate Accommodation >> Generate
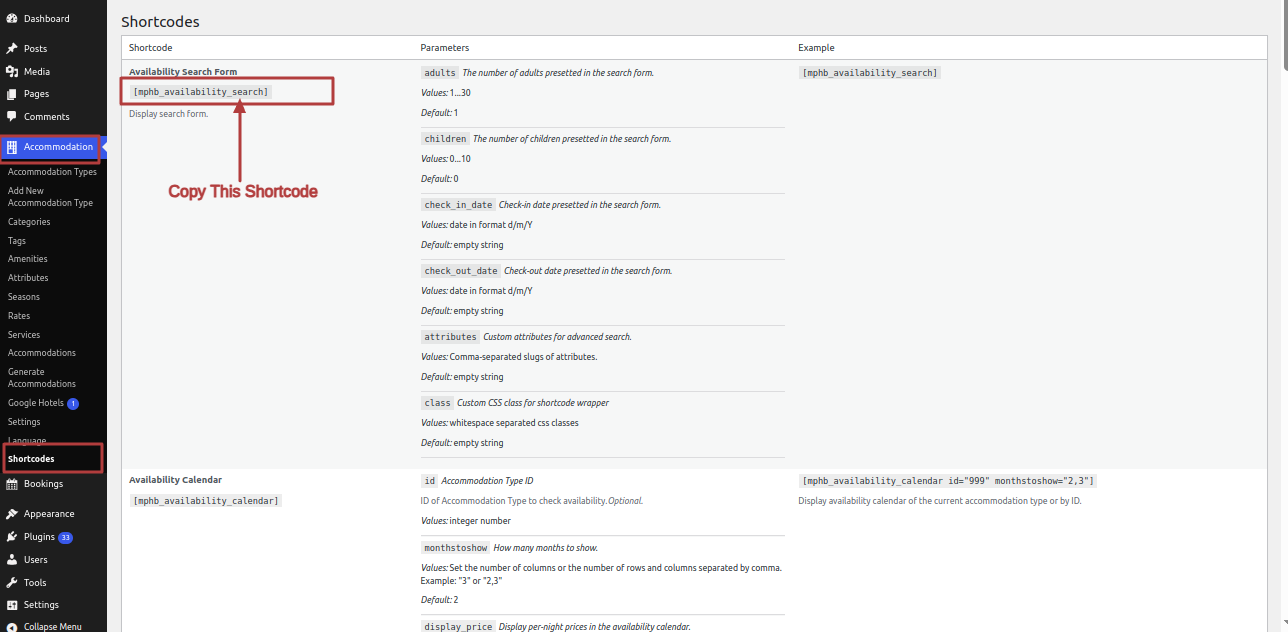
Click Dashboard >> Accommodation >> Shortcodes >> Availability Search Form
Step 1 Open "Dashbord" to change the theme ===> By selecting "Appearance" ===> Go now to the "Editor."
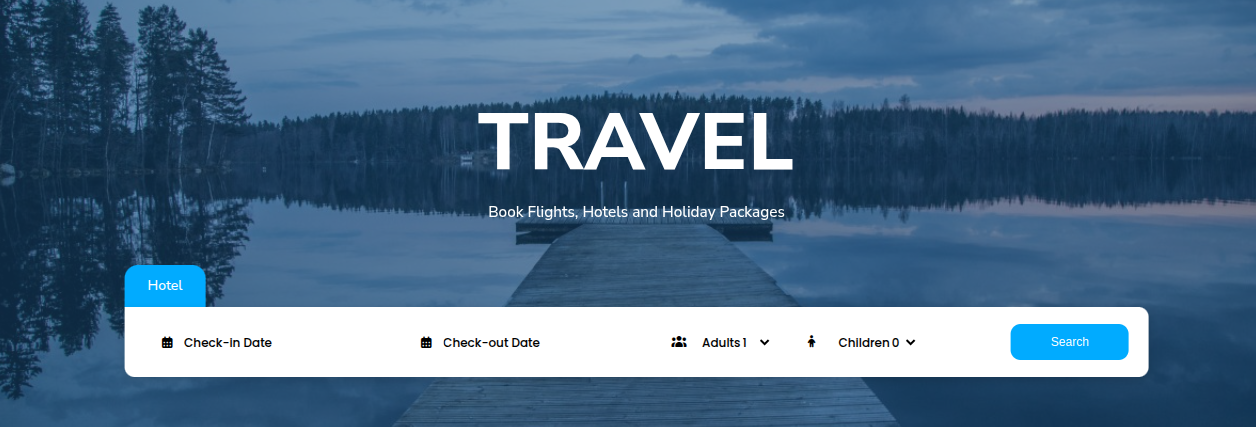
Output of Banner section
Part Regarding The Have an Adventure in mind Development

In reference to the Have an Adventure in mind Configuration.

Set-up Have an Adventure in mind Section

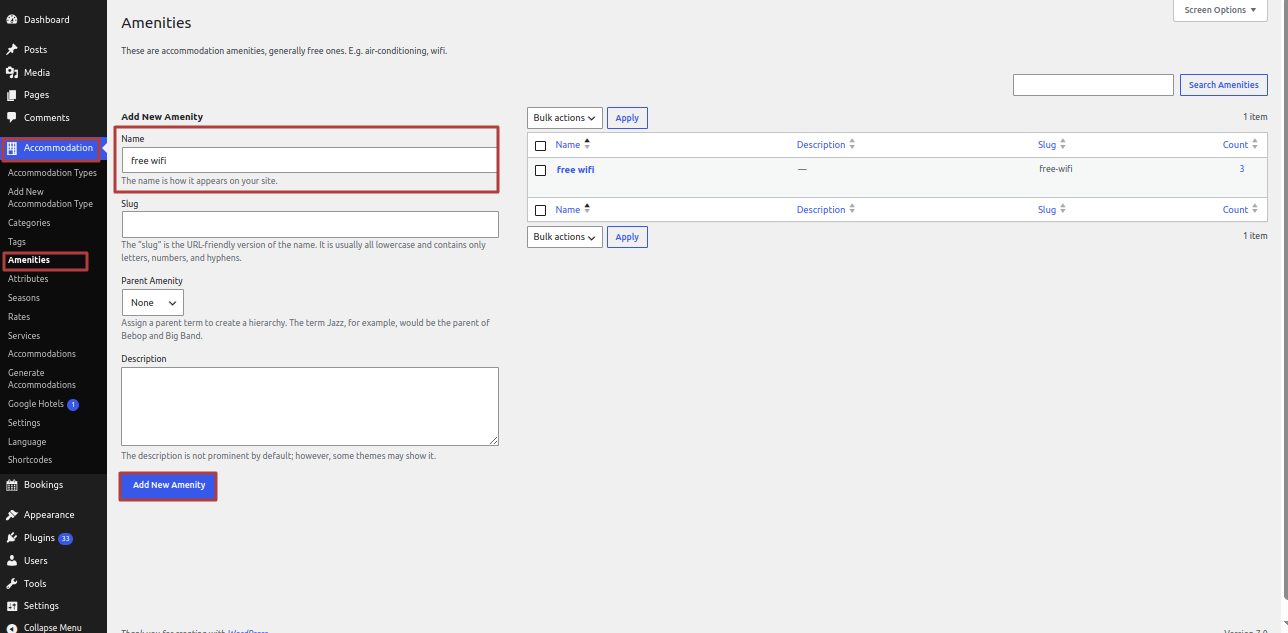
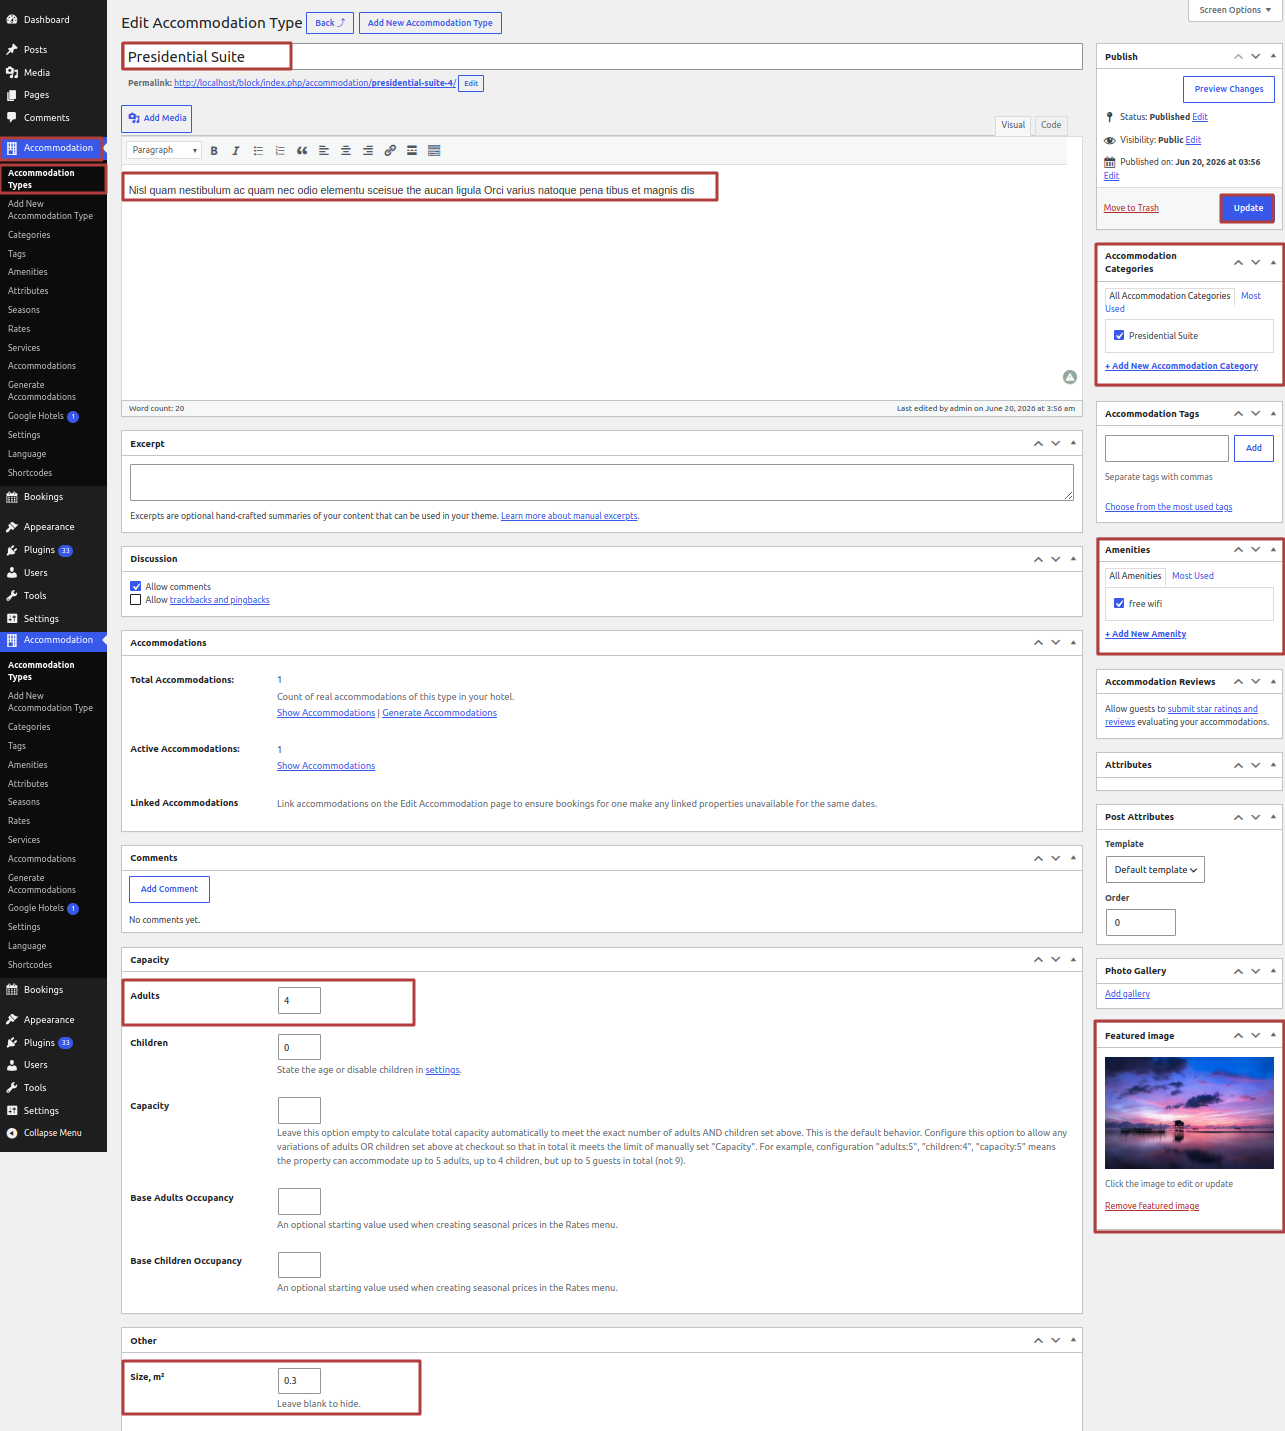
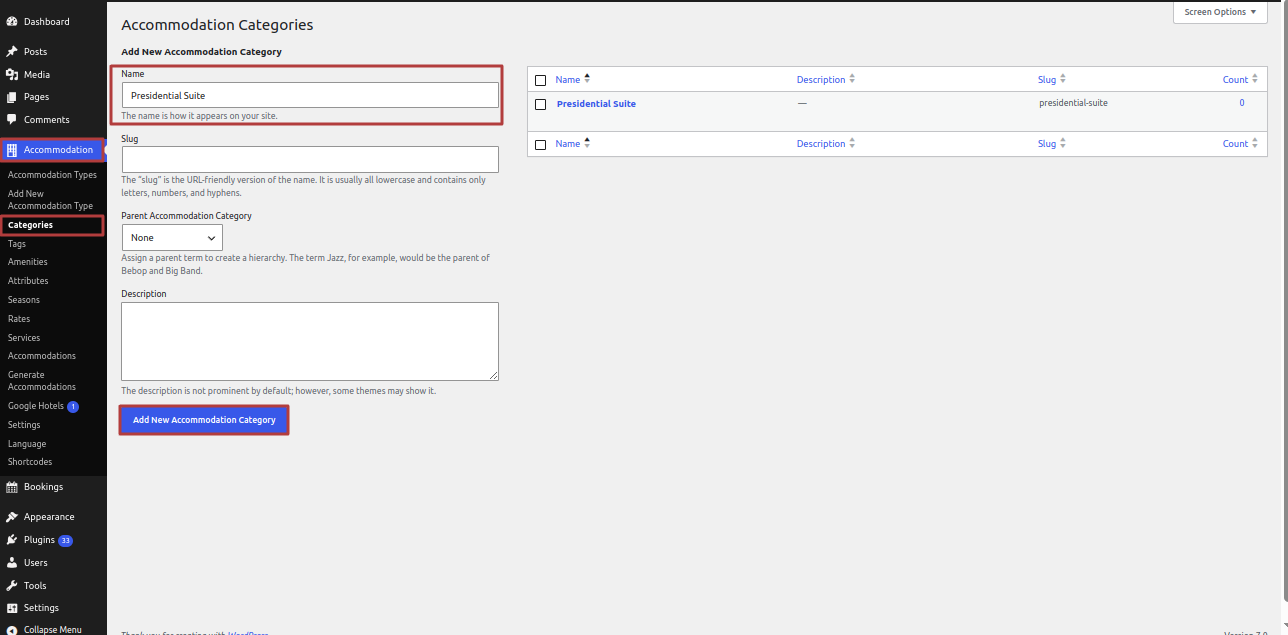
If the posts for the Have an Adventure in mind section are ready, follow each of the steps given below and your section will be created.

Click Dashboard >> Accommodation >> Categories

Click Dashboard >> Accommodation >> Amenities

Click Dashboard >> Accommodation >> Add New Accommodation Type

Click Dashboard >> Accommodation >> Seasons >> Add New Seasons

Click Dashboard >> Accommodation >> Rates >> Add New Rates


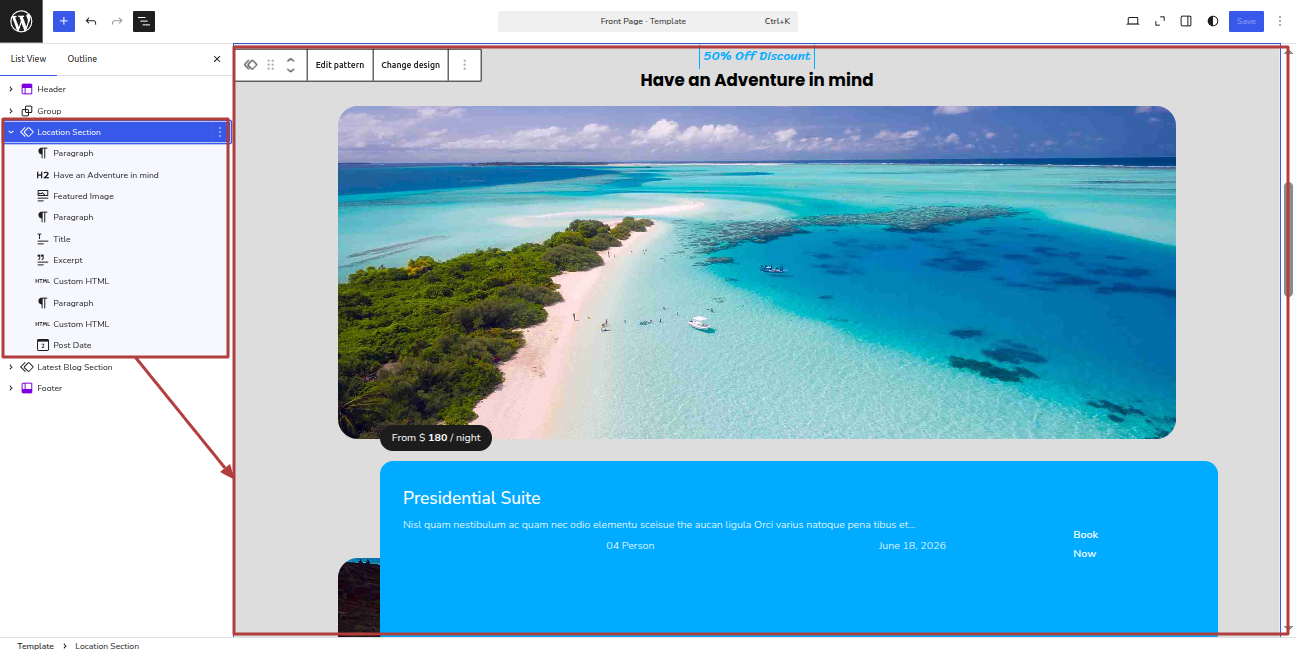
Step 1 Open "Dashbord" to change the theme ===> By selecting "Appearance" ===> Go now to the "Editor."

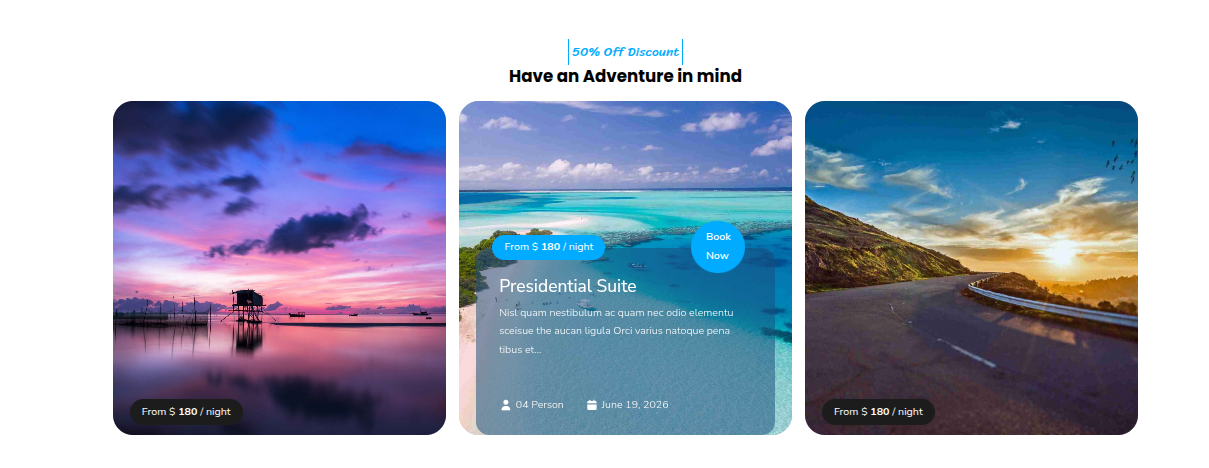
Output of Have an Adventure in mind section

Part Regarding The Our Blog Development

In reference to the Our Blog Configuration.

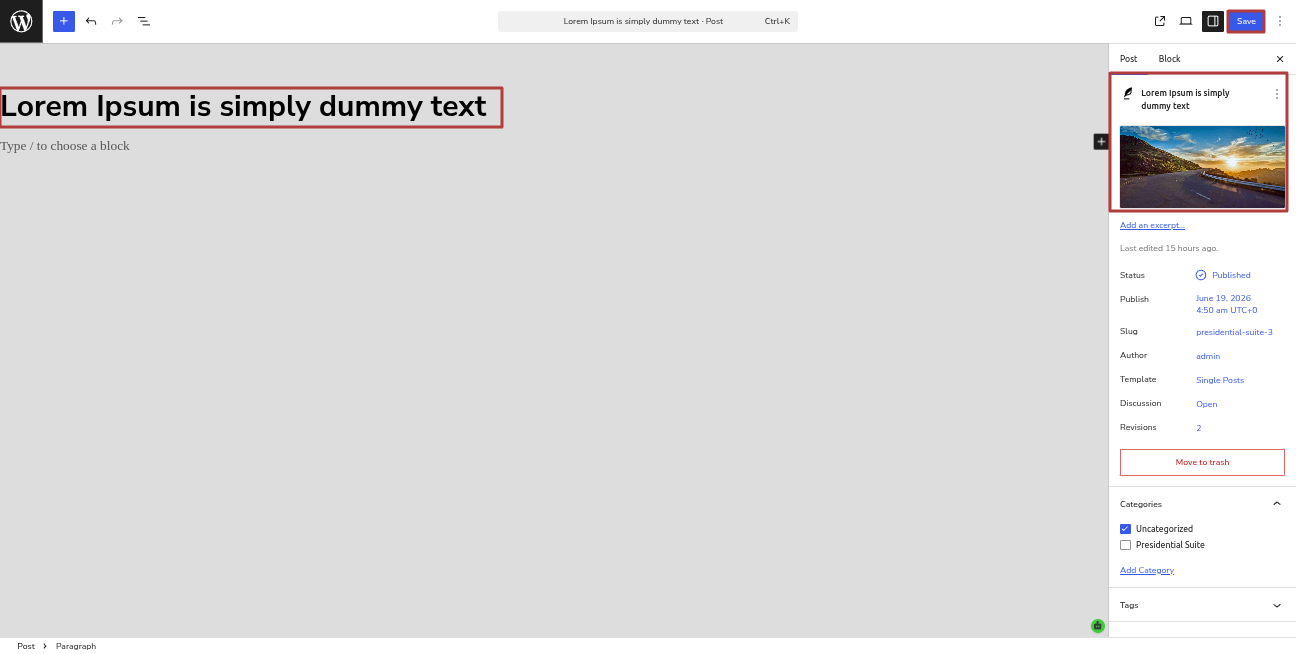
Step 1 Open "Dashbord" to change the theme ===> By selecting "Posts" ===> Go now to the "Add New Posts."


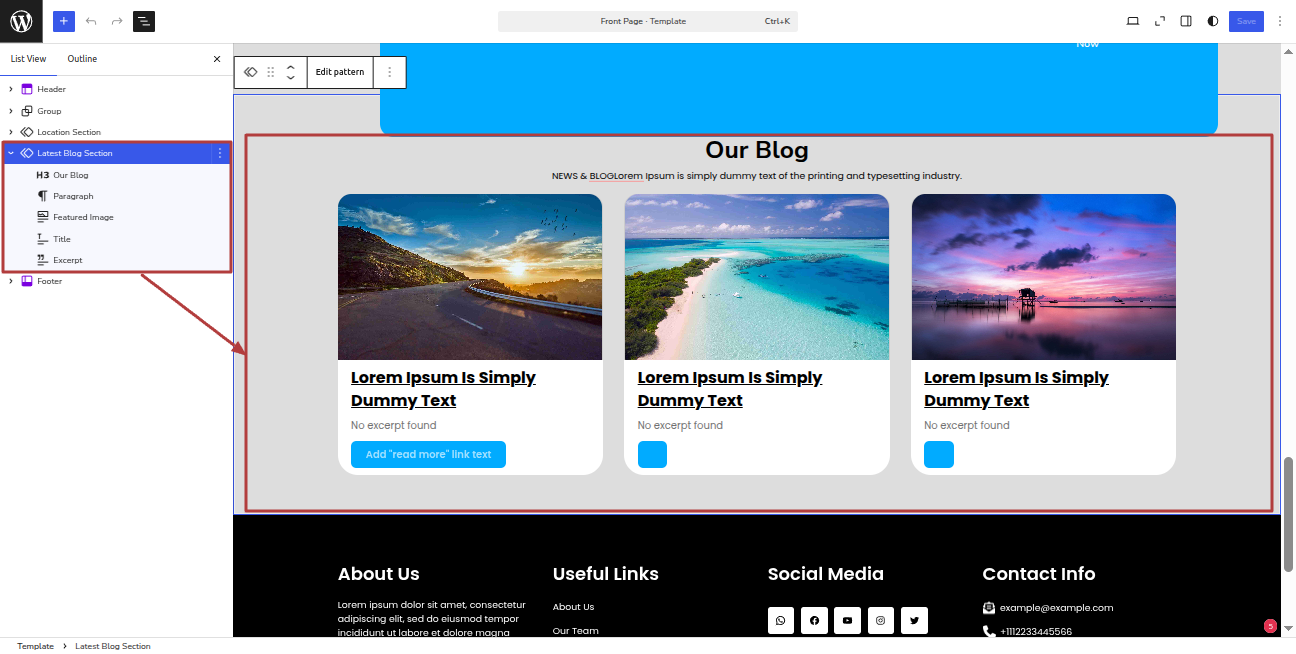
Step 2 Open "Dashbord" to change the theme ===> By selecting "Appearance" ===> Go now to the "Editor"


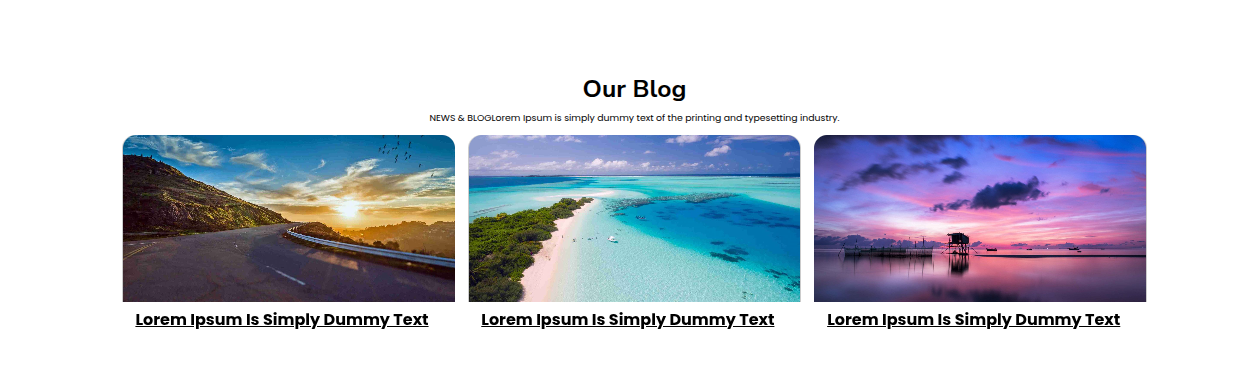
It will be shown in this format in the Our Blog Section.


Part Regarding The Footer Bottom Development

In reference to the Footer Bottom Configuration.

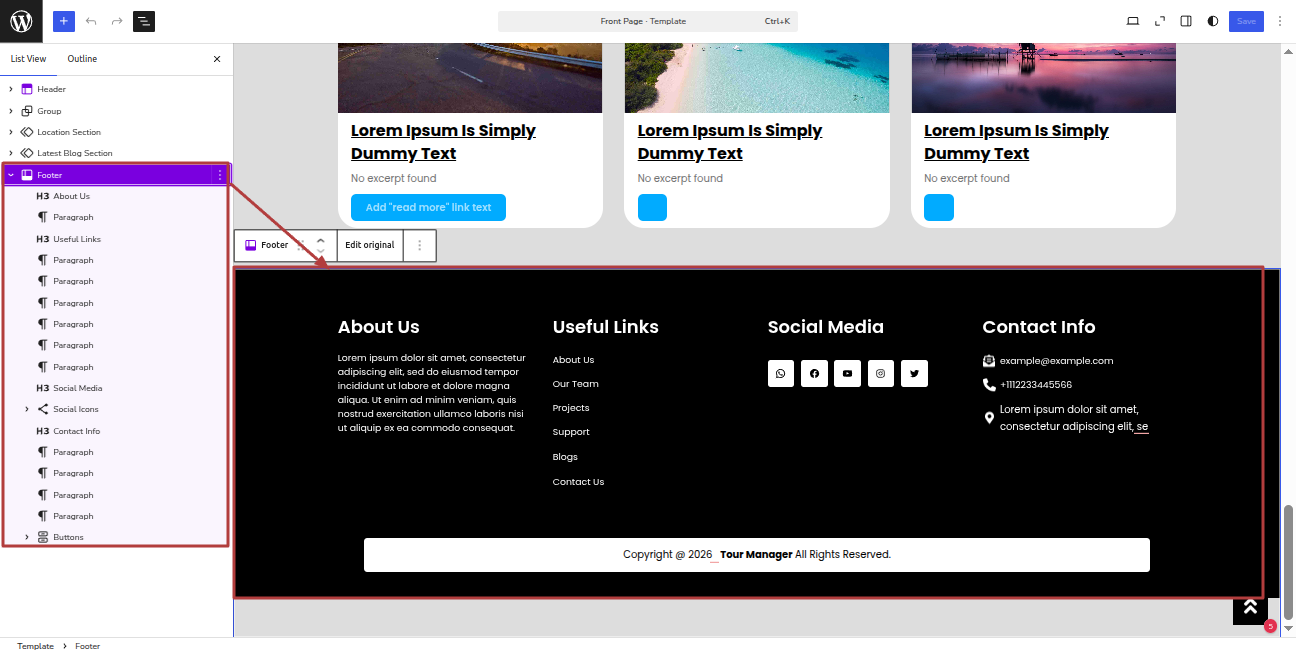
Step 1 Open "Dashbord" to change the theme ===> By selecting "Appearance" ===> Go now to the "Editor".


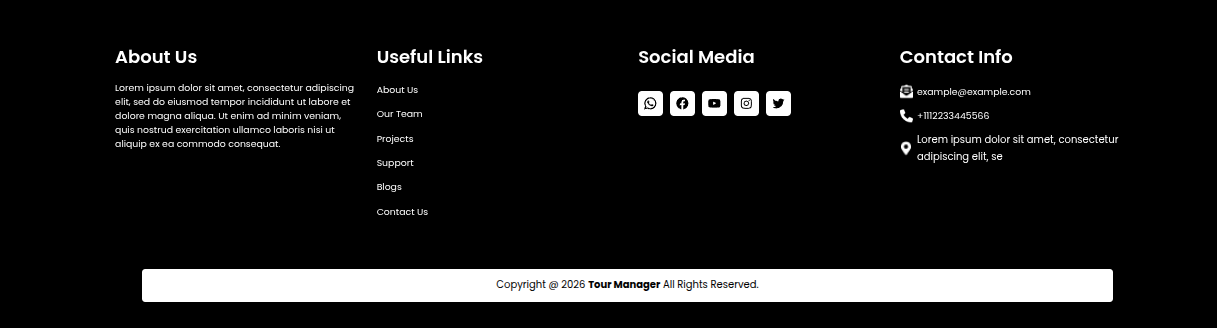
It will be shown in this format in the Footer Bottom.


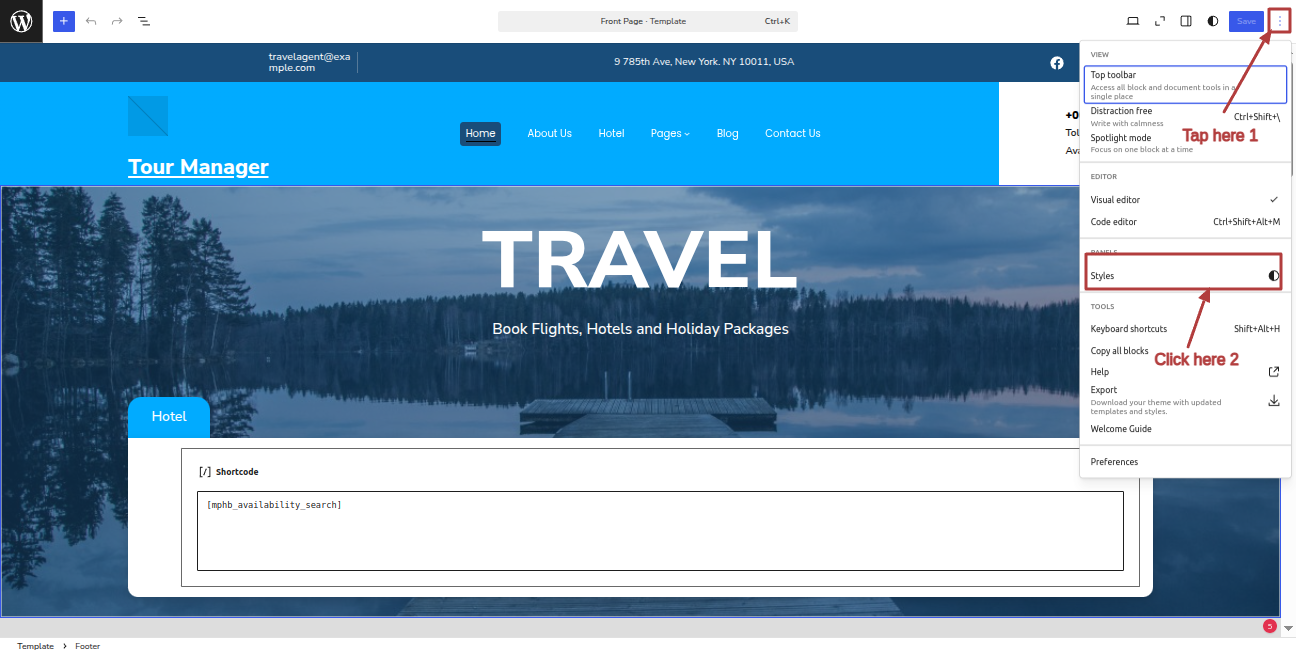
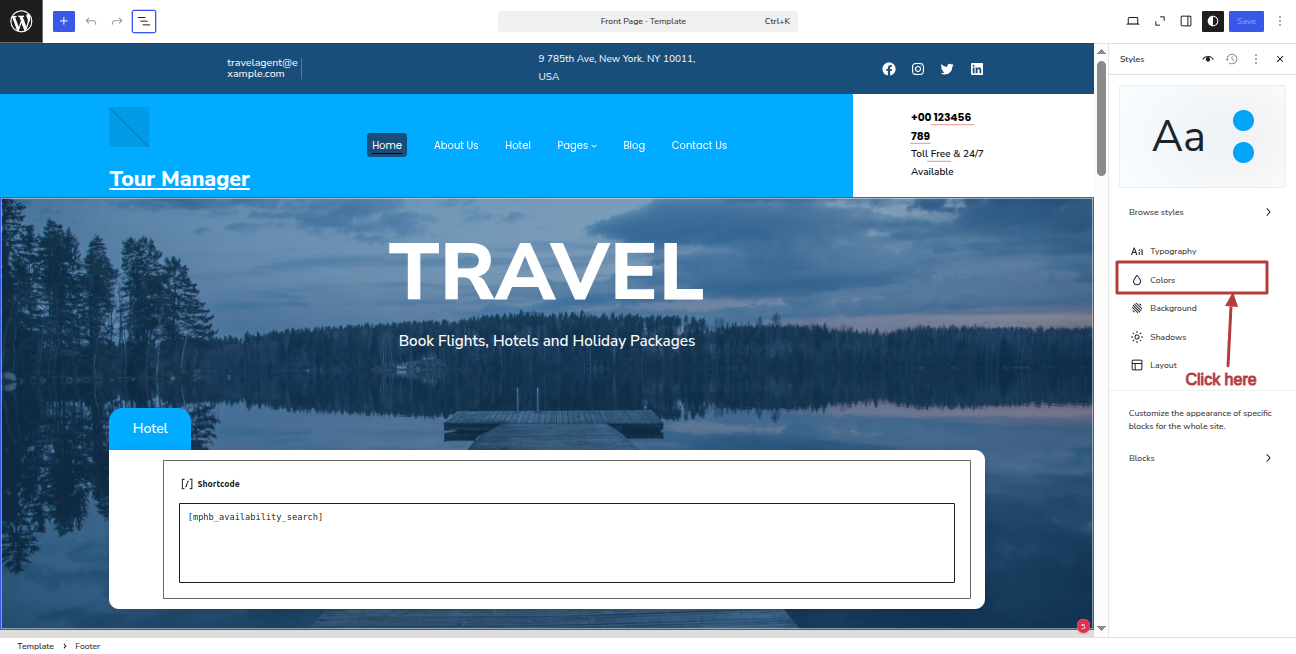
Part Regarding The Styles Varation Development

In reference to the Styles Varation Configuration.

Step 1 Open "Dashbord" to change the theme ===> By selecting "Appearance" ===> Go now to the "Editor".


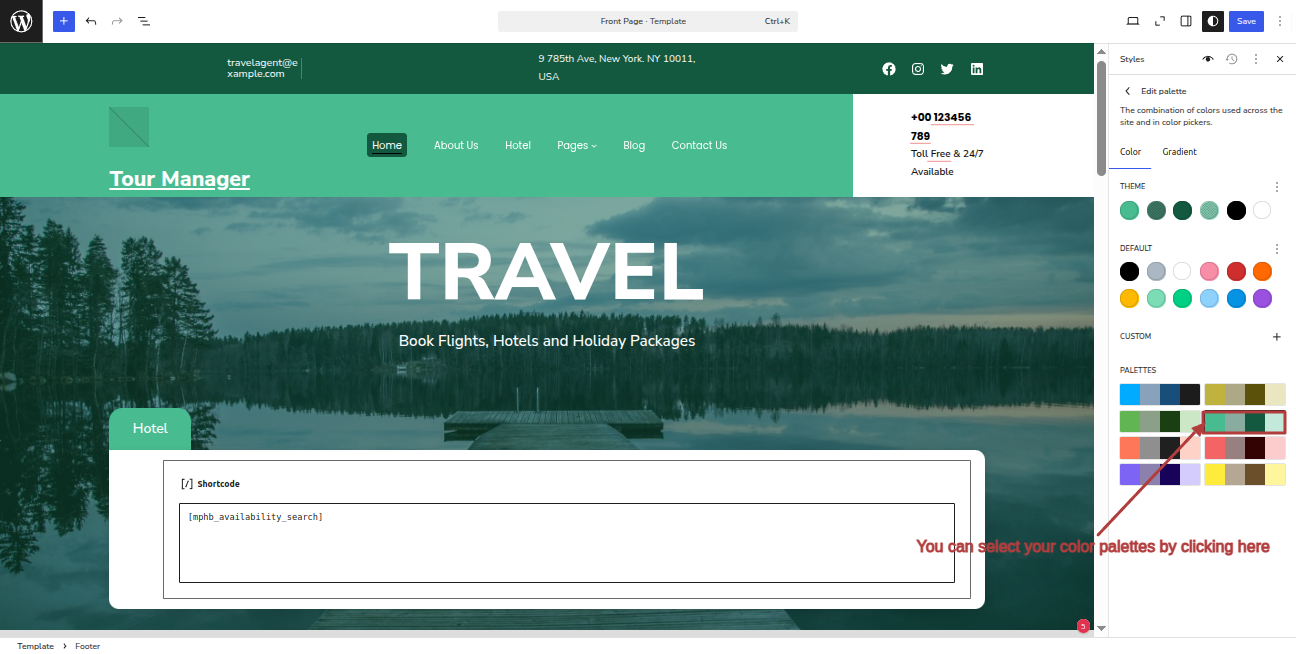
"You can choose the colour palette according to your preferences, and make changes as you like."


It will be shown in this format in the Styles Varation.