SEO Expert Pro
Theme Documentation
- By drakearthur
- support: SEO Expert Pro
How do you go about installing the templates?
The installation of a template is a simple process.
Step 1 These steps will walk you through installing a theme using WordPress Administrator.
Start by going to your WordPress admin panel.
Open "Appearance" to change your theme's settings. ===> then choose "Themes"
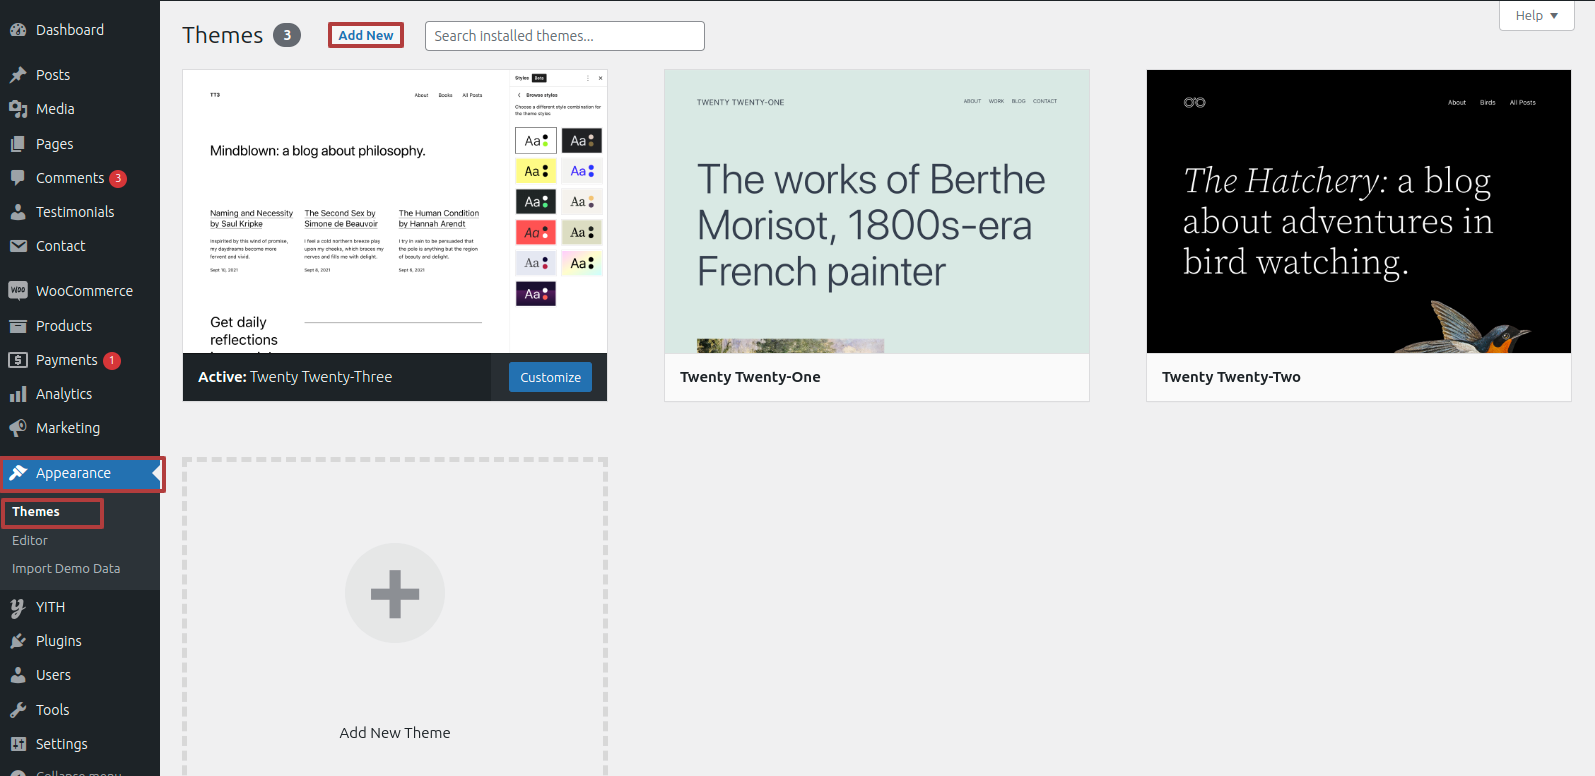
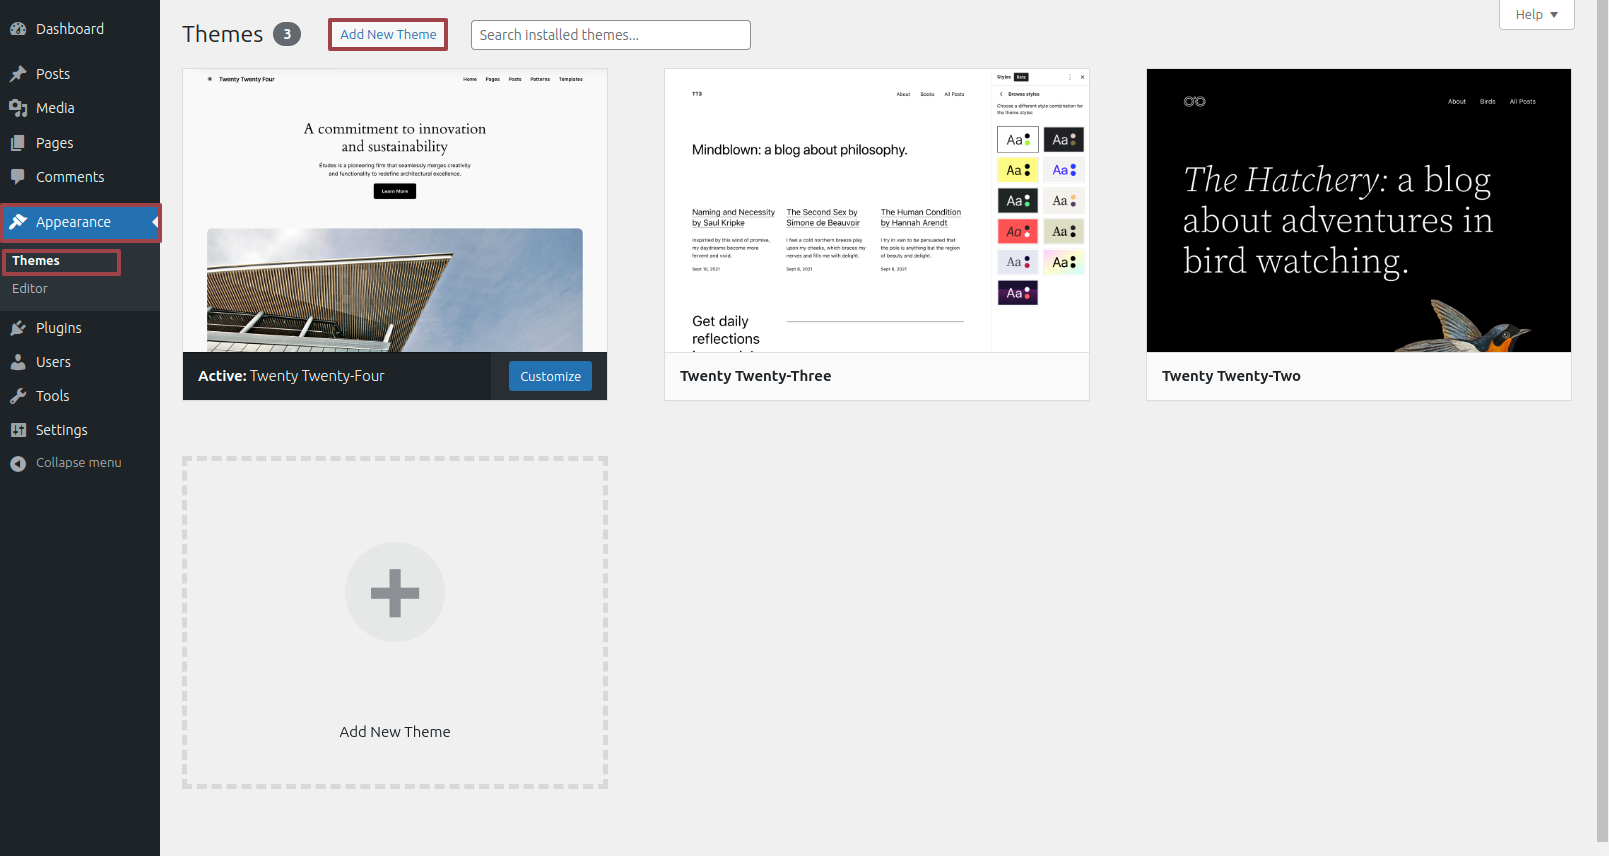
Step 2 After arriving at the themes page,choose"Add New" from the drop-down menu
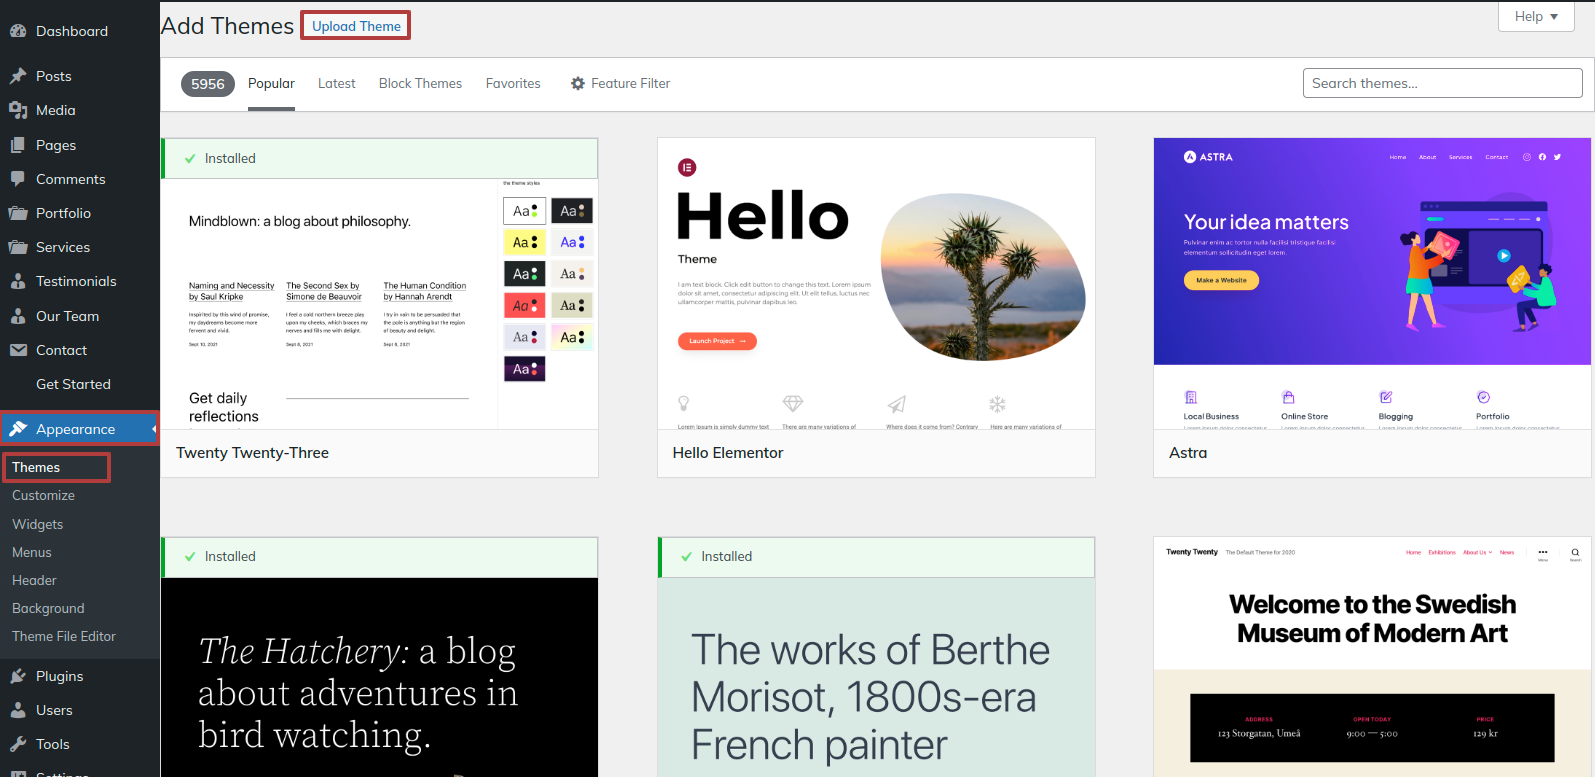
Step 3 It is important to click the "Upload Theme" button.
Step 4 Once you've selected your favourite seo-expert-pro.zip theme, click the Browse and Now Installing buttons.
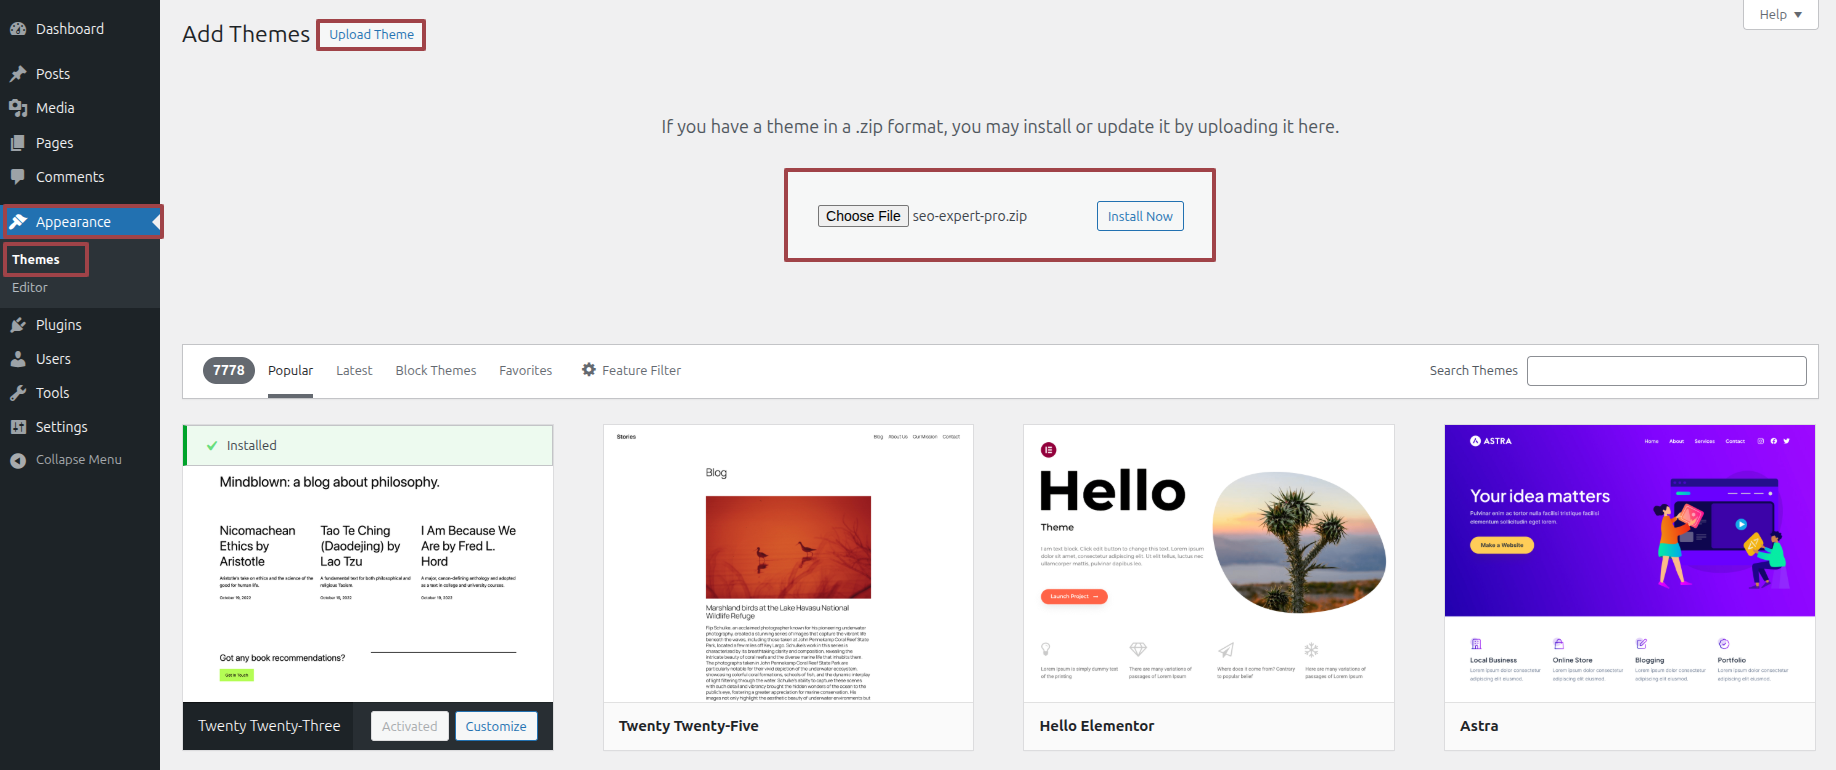
WordPress will now install the preferred theme and provide you a success message along with a preview of the theme that you may activate.
Recommendations for installing themes using FTP.
Using FTP to upload the theme is an additional method of installing it. You must first use FTP to access your website and navigate to the wp-content/themes folder in order to use this method. To get started, just download the theme file, store it to your server, and then unpack the Total folder.
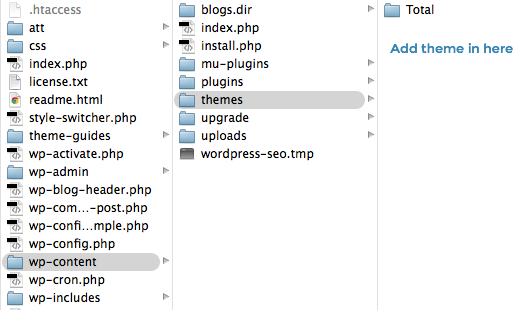
After that, go into WordPress and navigate to the "Appearance" tab. You may activate the entire folder by choosing "Themes" under Appearance.
Guidelines for install every plugin required
You may expand WordPress's capabilities by using plugins.
How Plugins Are Activated If you want these functionalities in your theme, you must activate the plugin. Follow the instructions below to activate the plugin inside your theme.
You may manually install a WordPress plugin from a.zip file using the techniques shown below.
Step 1 Open "Dashbord" to change the theme ===> By selecting "Appearance" ===> click the "Install Plugins"
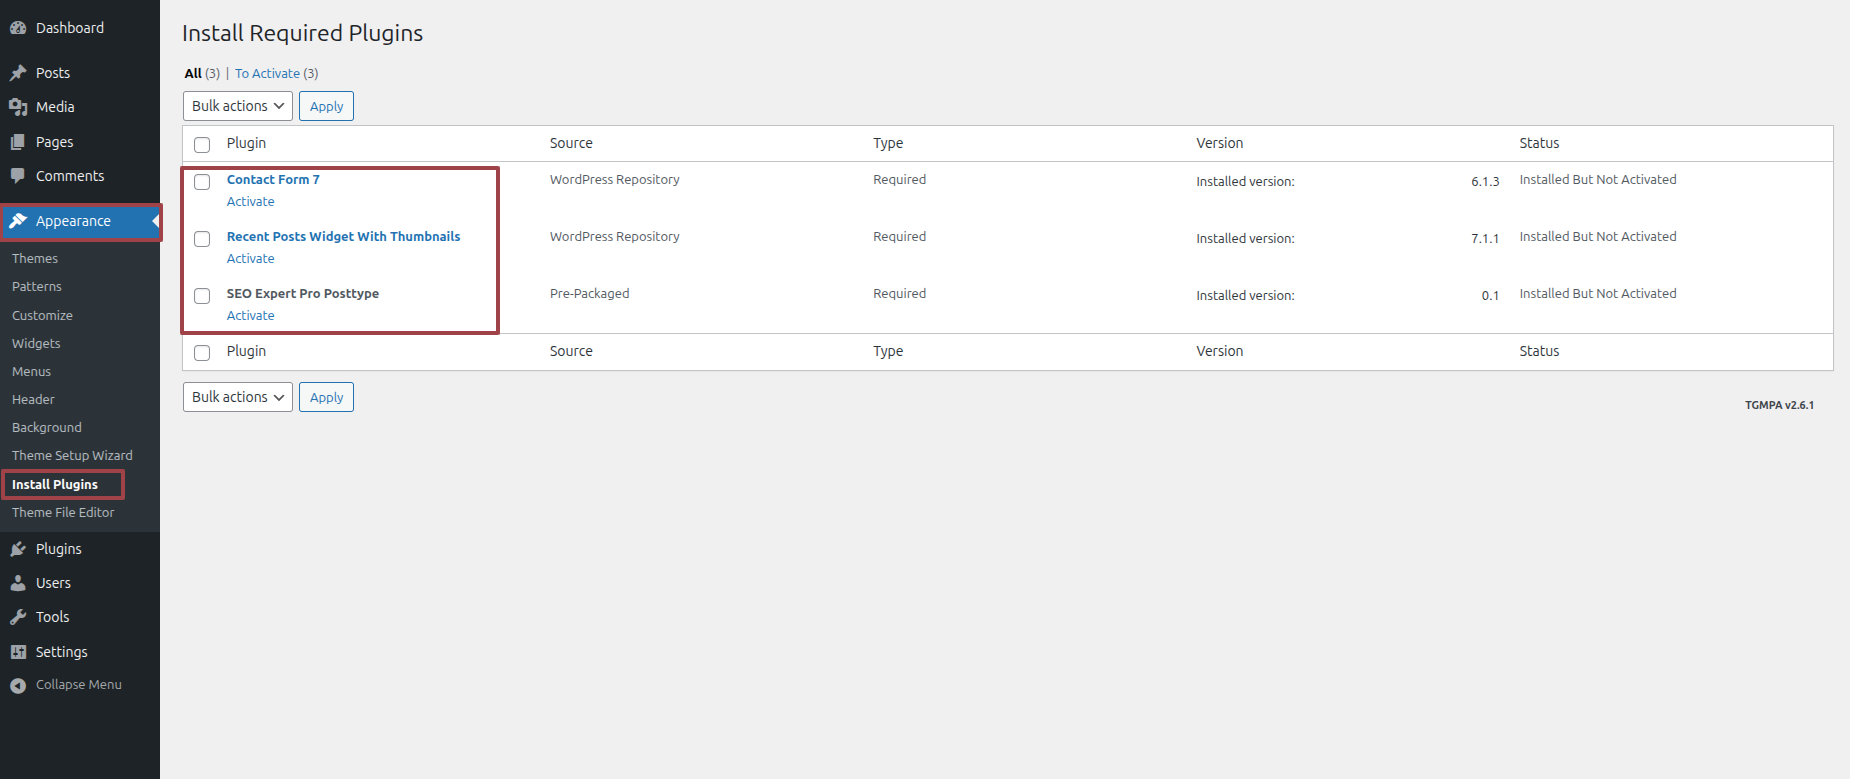
After choosing "install now," continue with the activation.
Guidelines for install Demo Importer
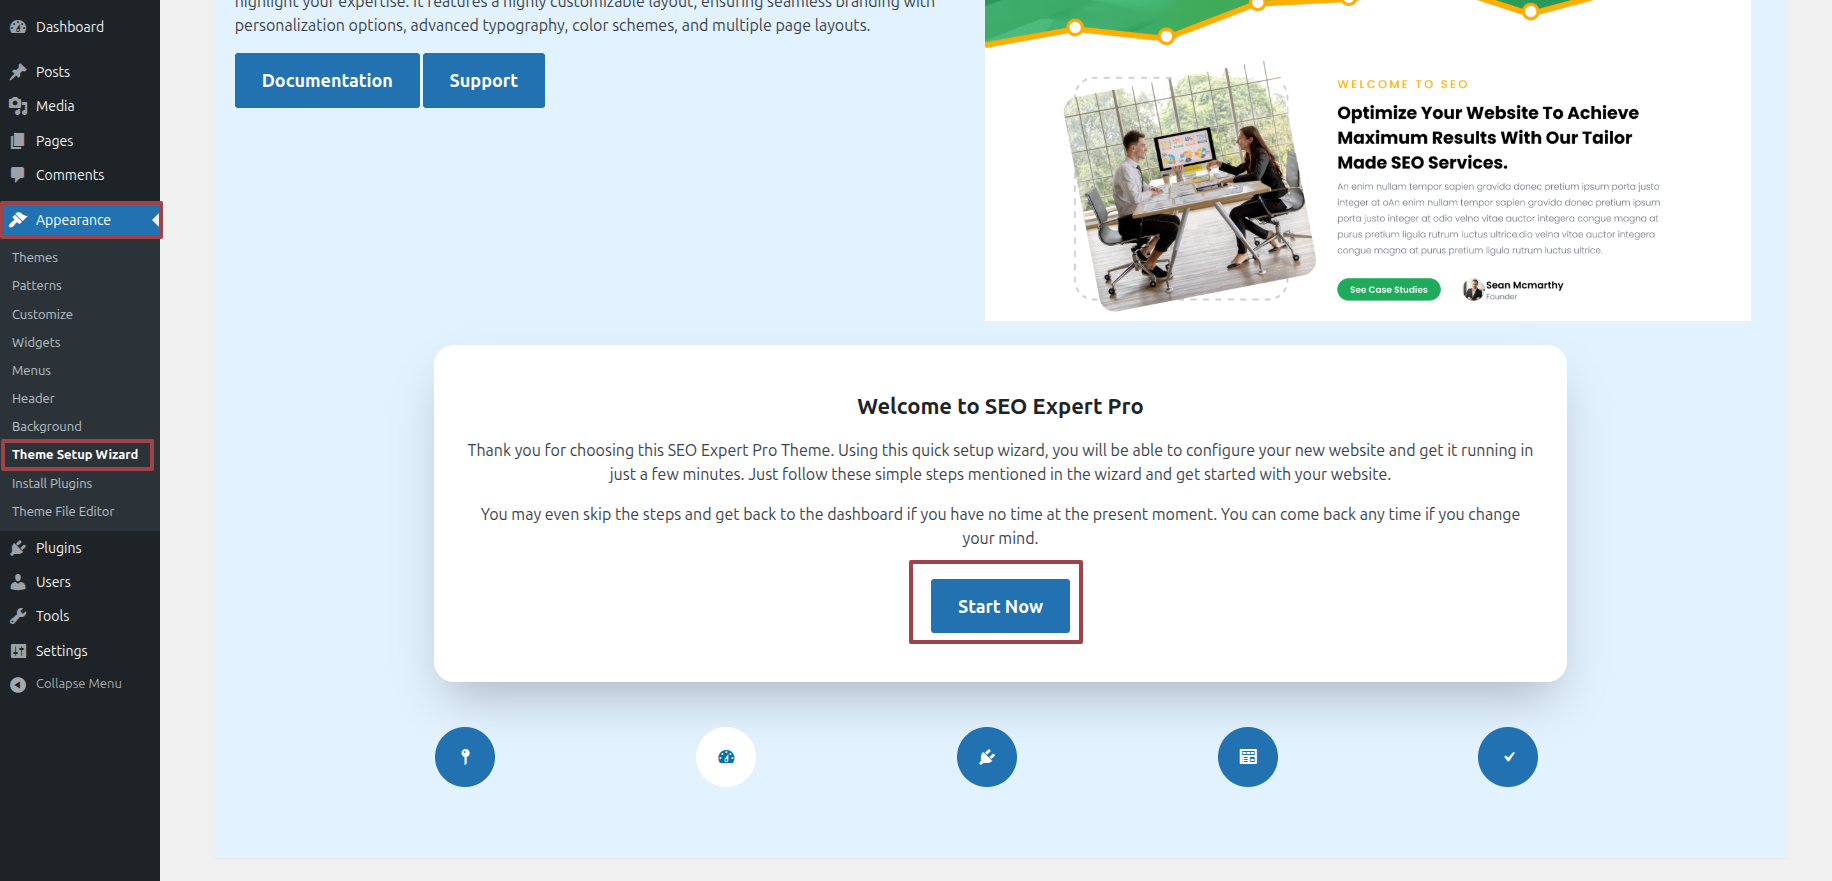
WordPress's sample Importer demo makes it simple to Demo Importer in a few quick clicks..
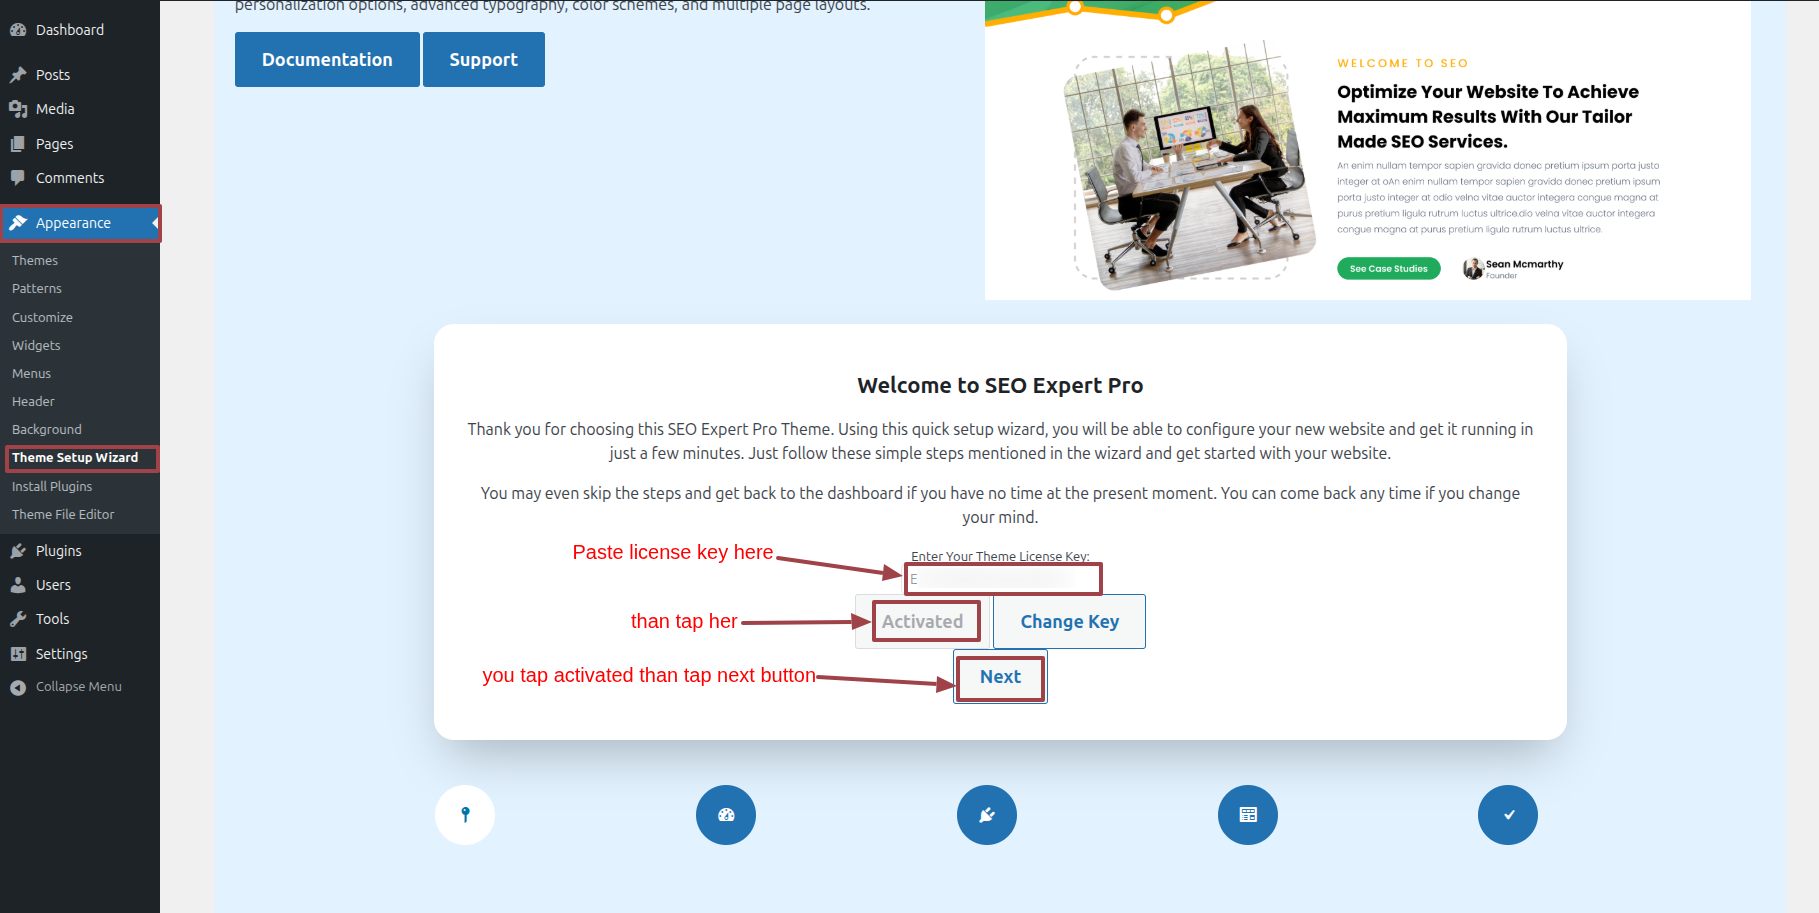
Step 1 Open "Dashbord" to change the theme ===> By selecting"Appearance" ===> then you must select the "Theme Setup Wizard".===>clicking "Start Now" is required.
Enter the license key, then hit the activate button, then click the next button.
Guidelines for Setting Up Static Pages
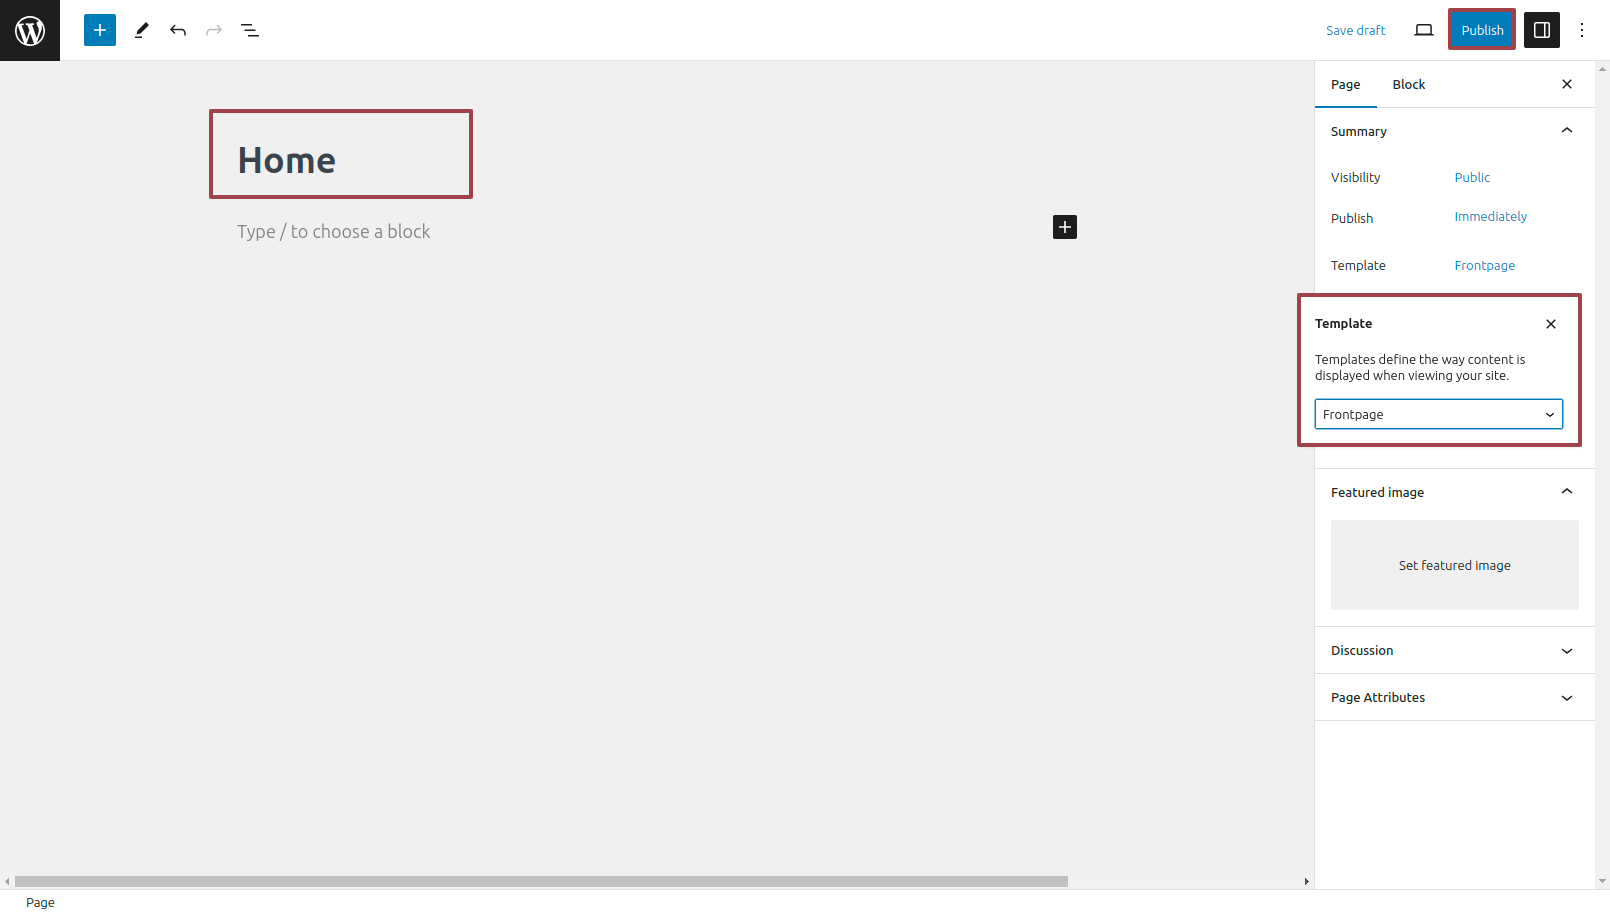
After that, name it "Home" and pick "Frontpage" from the list of template options.
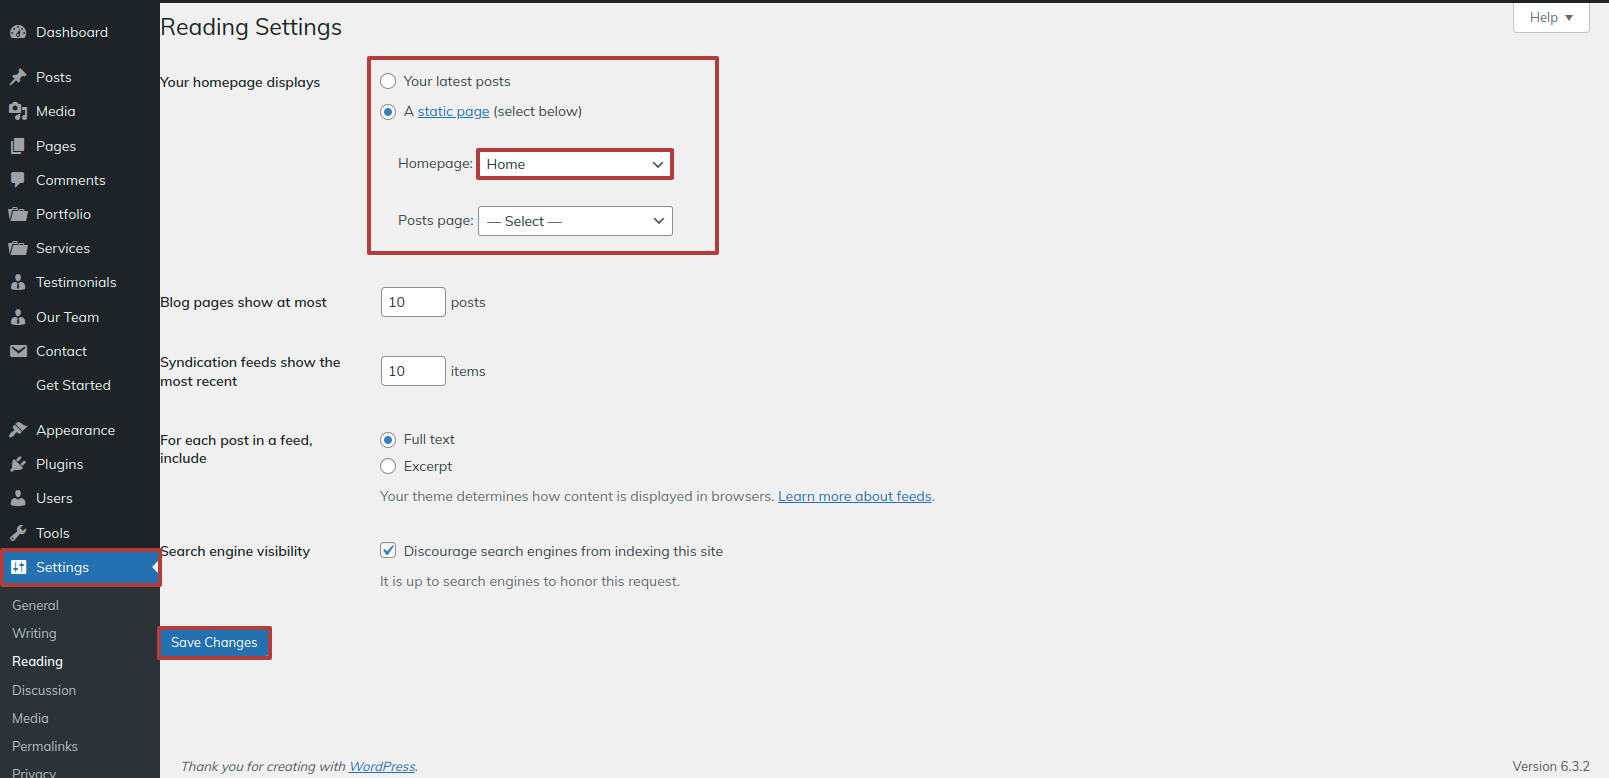
Give the name of your parent website or clearly identify your home page as such. Next, under the settings menu, pick Reading to make changes to the static template for the home page.
Step 1 design a page to serve as a template.Open the "Dashbord"'s ==> go along to "Pages"==> Please make me a "home page".
Step 2 From the Your "Homepage" Display settings, choose the "Static Page" option and designate the page you recently built as your "homepage".
Part Regarding Creating Section Reorder
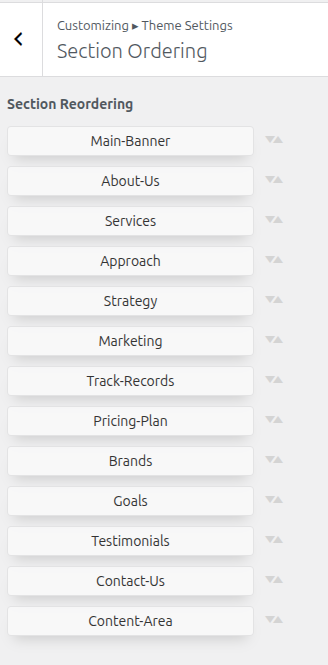
To reorganise the parts to better serve our requirements is known as "Section Ordering". Make sure you pick the component before shifting it to the upper or lower. Depending on what you choose to drape, Your front view will appear differently.
Step 1 Open "Appearance" to change the theme ===> By selecting "Customize" ===> Go now to the "Theme Settings" ===> Move on to "Section Ordering."
In what way may I set up Navigation?
Section Concerning the Creation of the Navigation
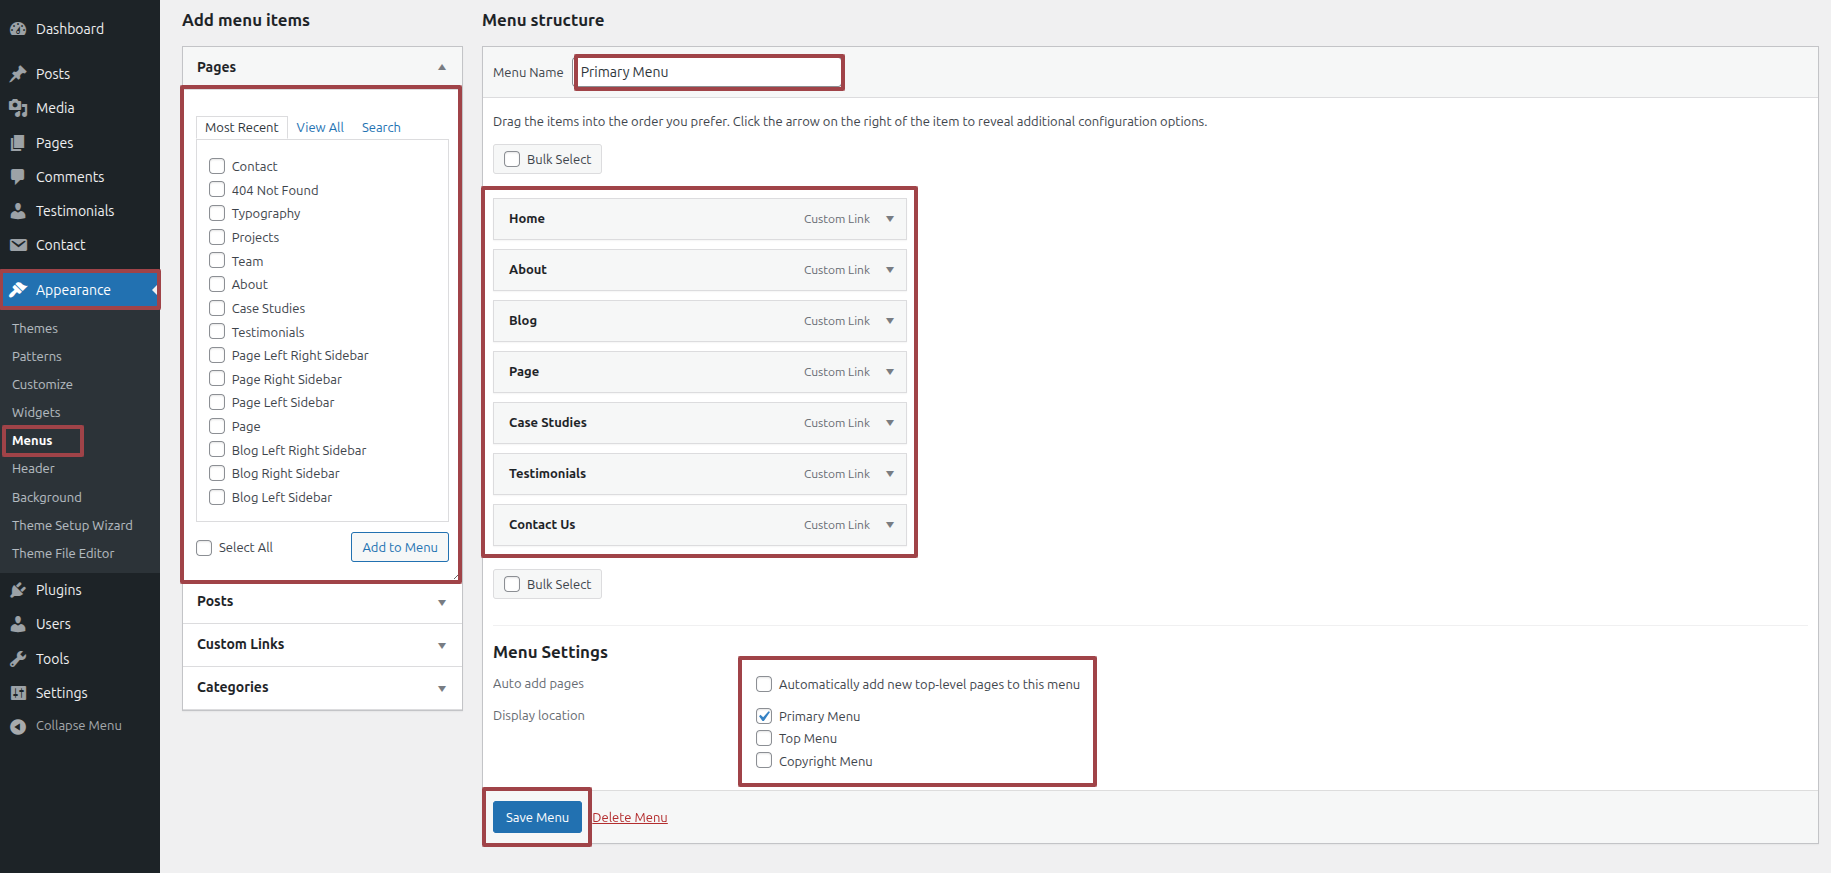
Step 1 To begin creating a new page, navigate to the "Dashbord",after selecting "Pages", click the "Add new" option.
Step 2 Navigate to "Appearance" and choose Menu.
Step 3 It is possible to construct a menu by choosing New Menu.
Step 4 After naming the menu, click the Save button located in the Menu Name field.
Step 5 After creating the menu, select the desired pages by checking the boxes next to them. To rearrange the parts, you have to drag the relevant section.
Step 6 prefer where the footer menu will appear using the checkboxes.
Step 7 If the Primary Menu option is checked, Menu Stars will show up on the header.
To get a better idea, look at this screenshot.
Part Regarding Creating the Site Identity
Including the Header with the logo.
Step 1 Open "Appearance" to change the theme ===> By selecting "Customize" ===> Move on to "Site Identity."
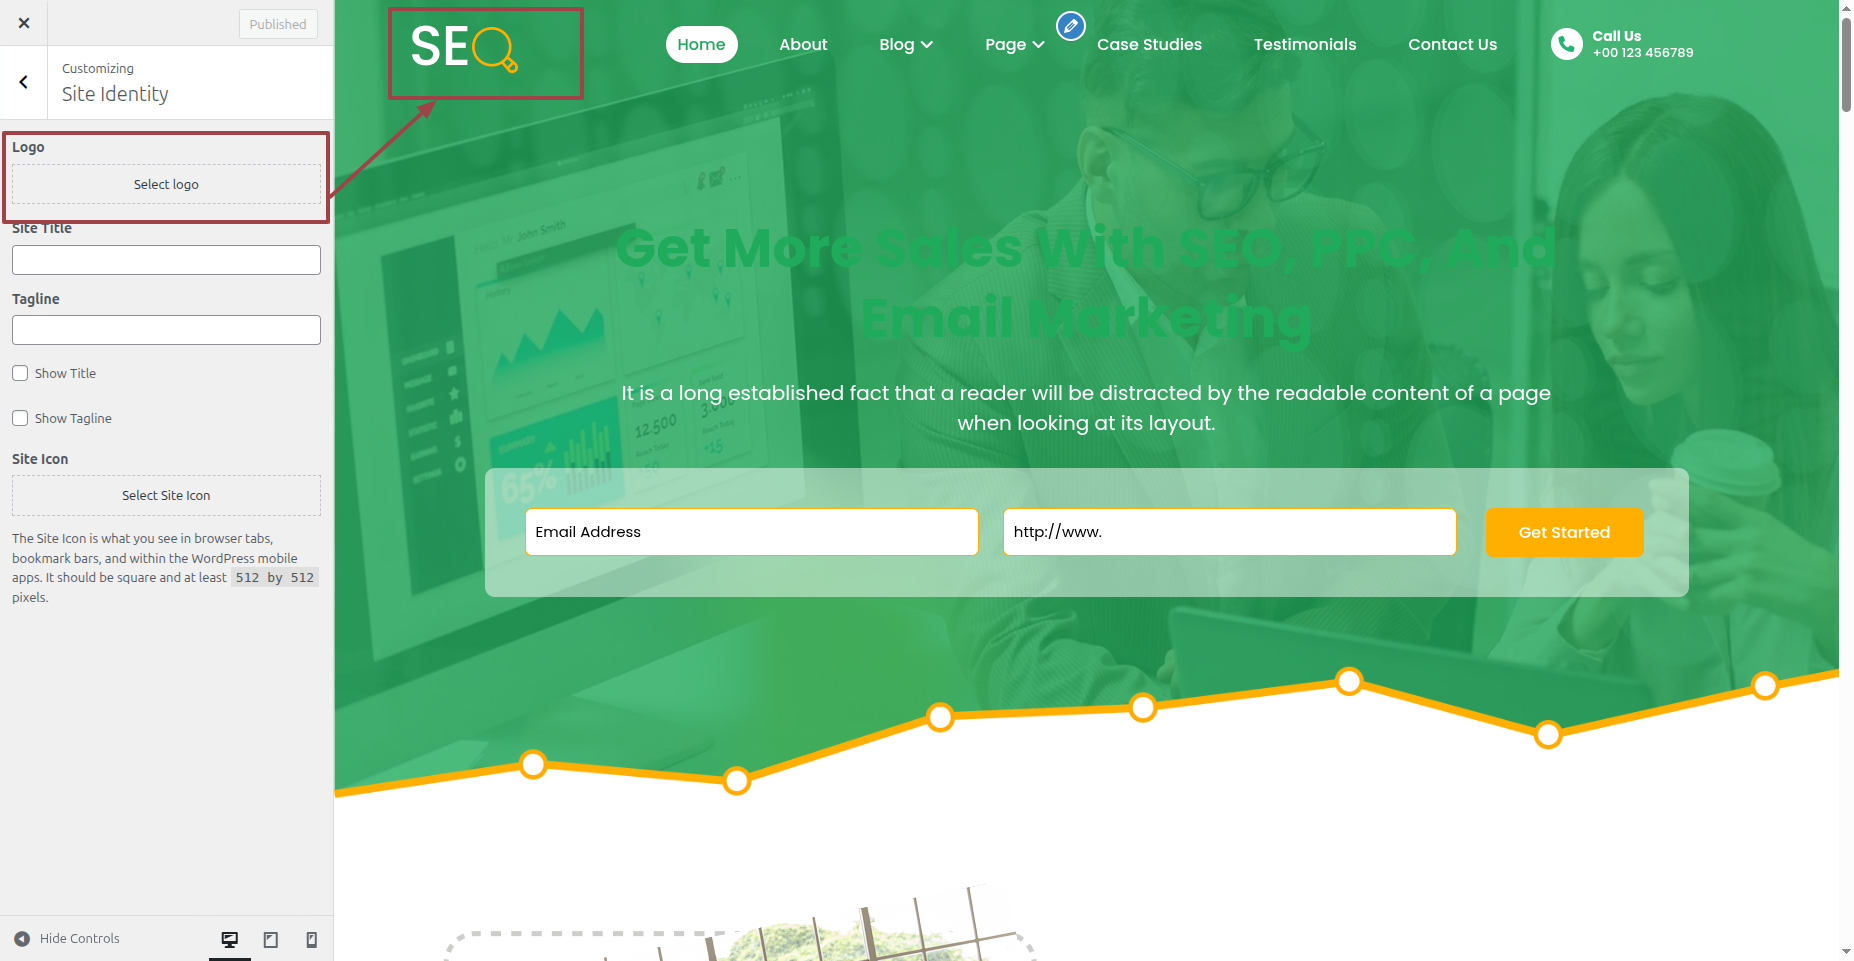
It will be shown in this format in the Header Section.

Part on Formulating the Best Header
In reference to the Header Configuration.
Step 1 Open "Appearance" to change the theme ===> By selecting "Customize" ===> Go now to the "Theme Settings" ===> Move on to "Header"
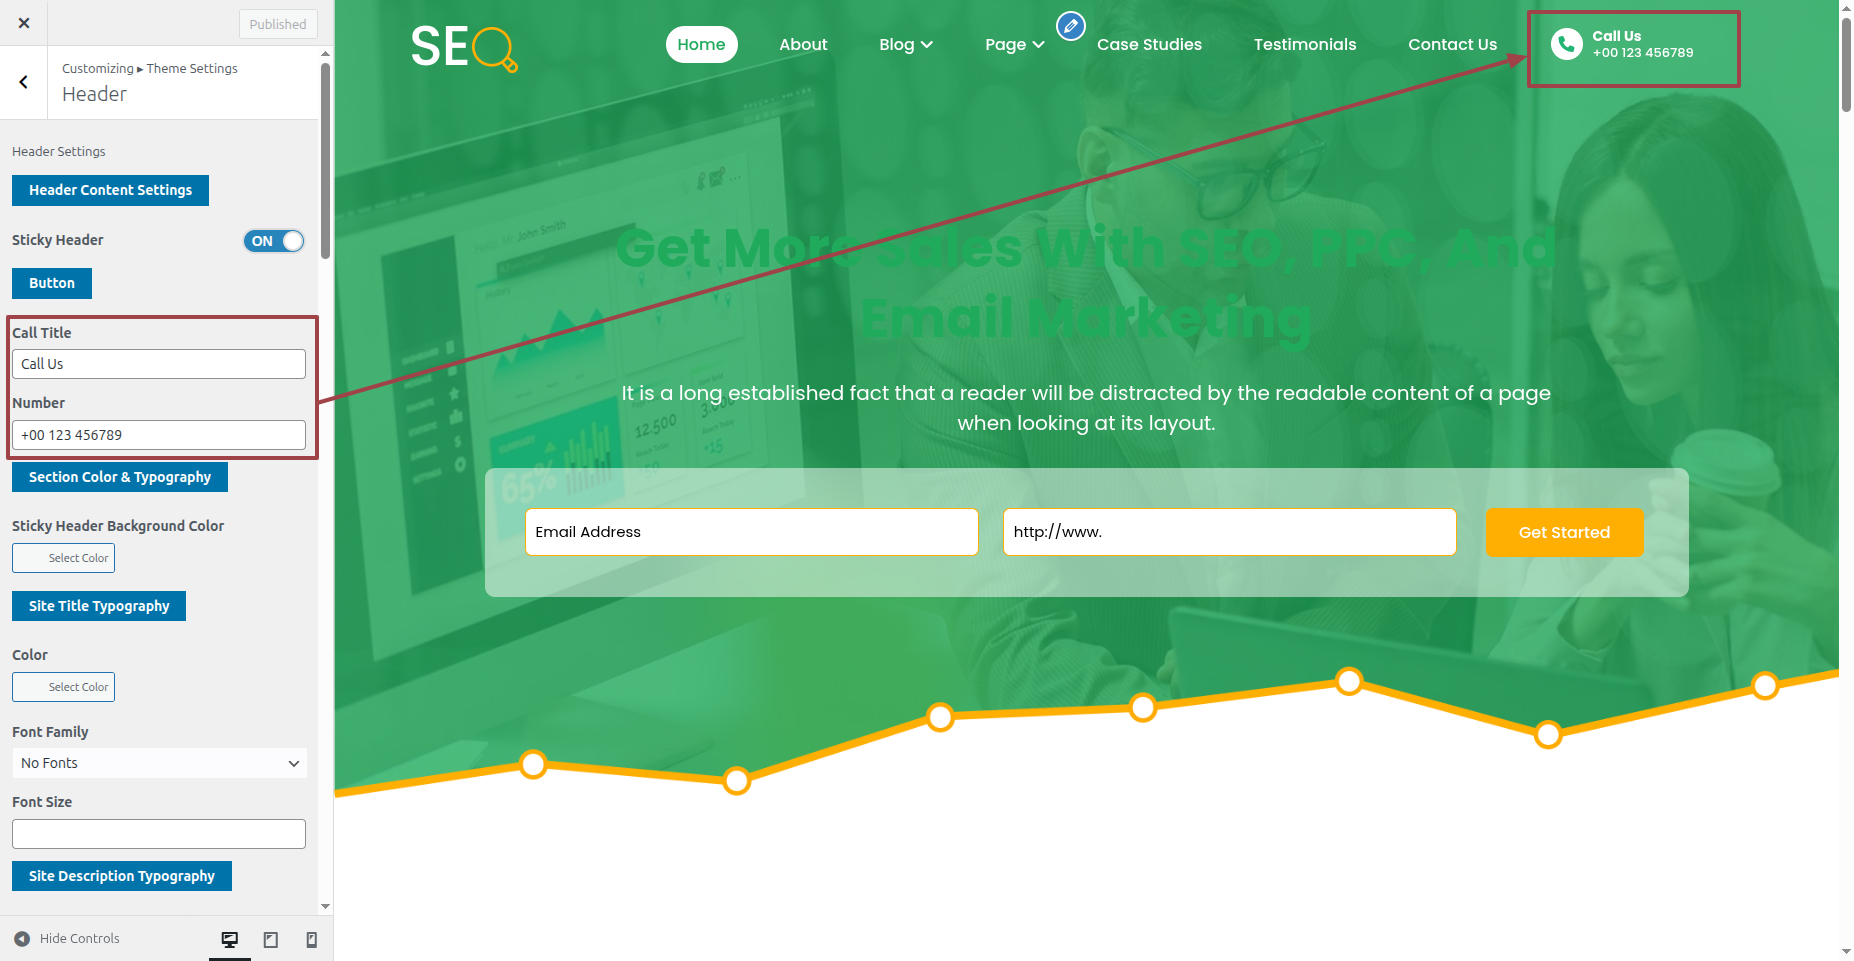
It will be shown in this format in the Header Section.

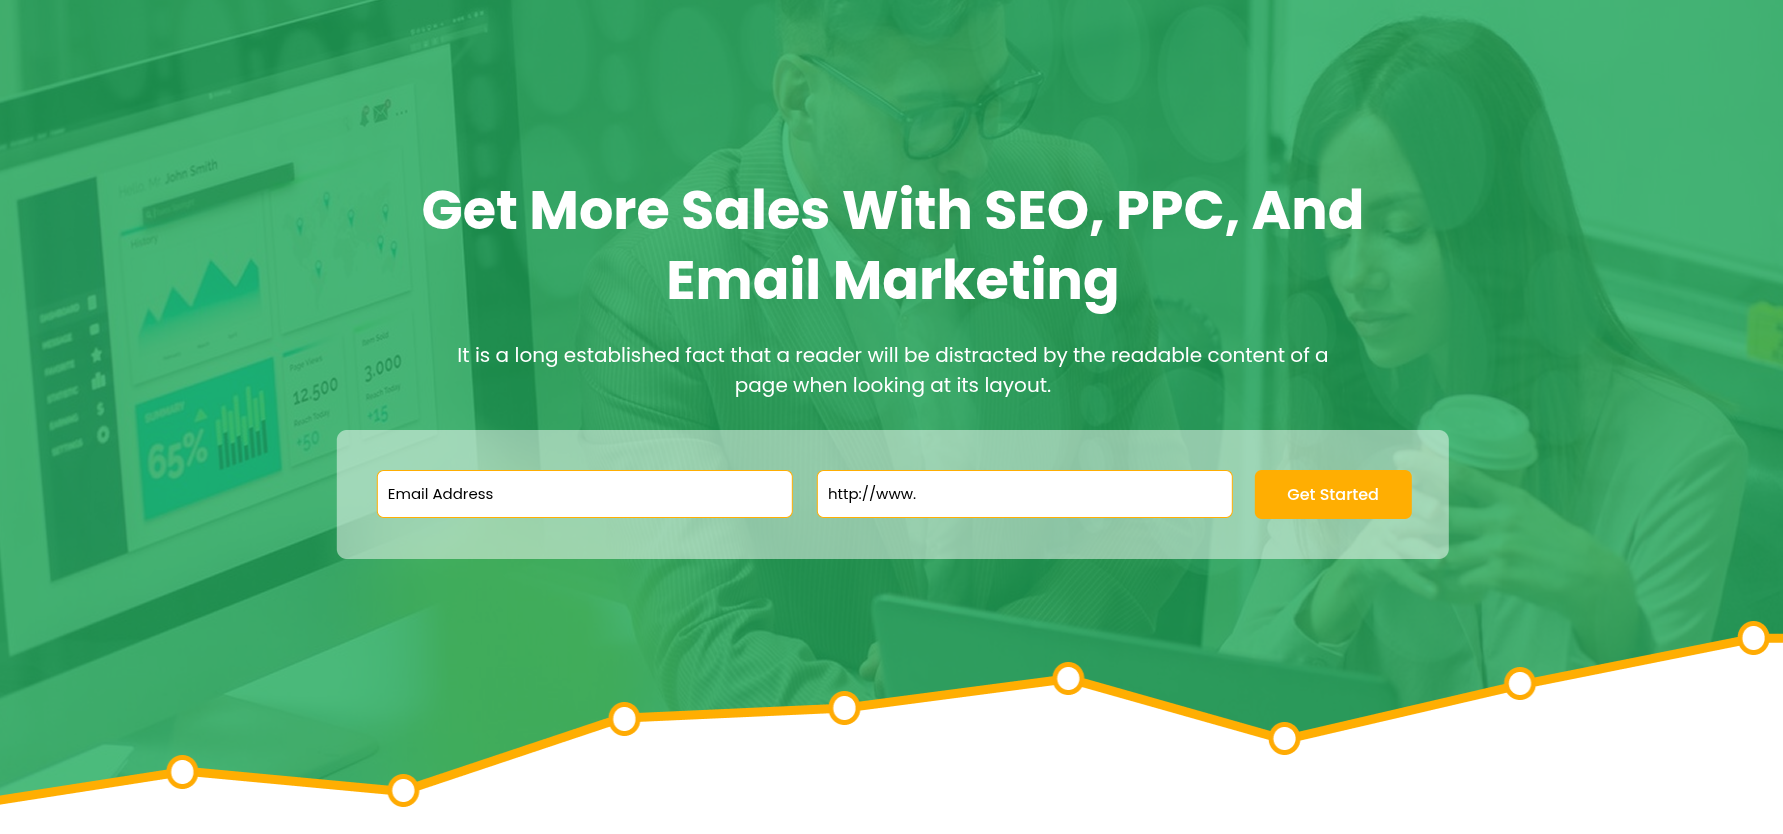
Part Regarding The Main Banner Development
In reference to the Main Banner Configuration.
Step 1 Open "Appearance" to change the theme ===> By selecting "Customize" ===> Go now to the "Theme Settings " ===> Move on to "Main Banner"
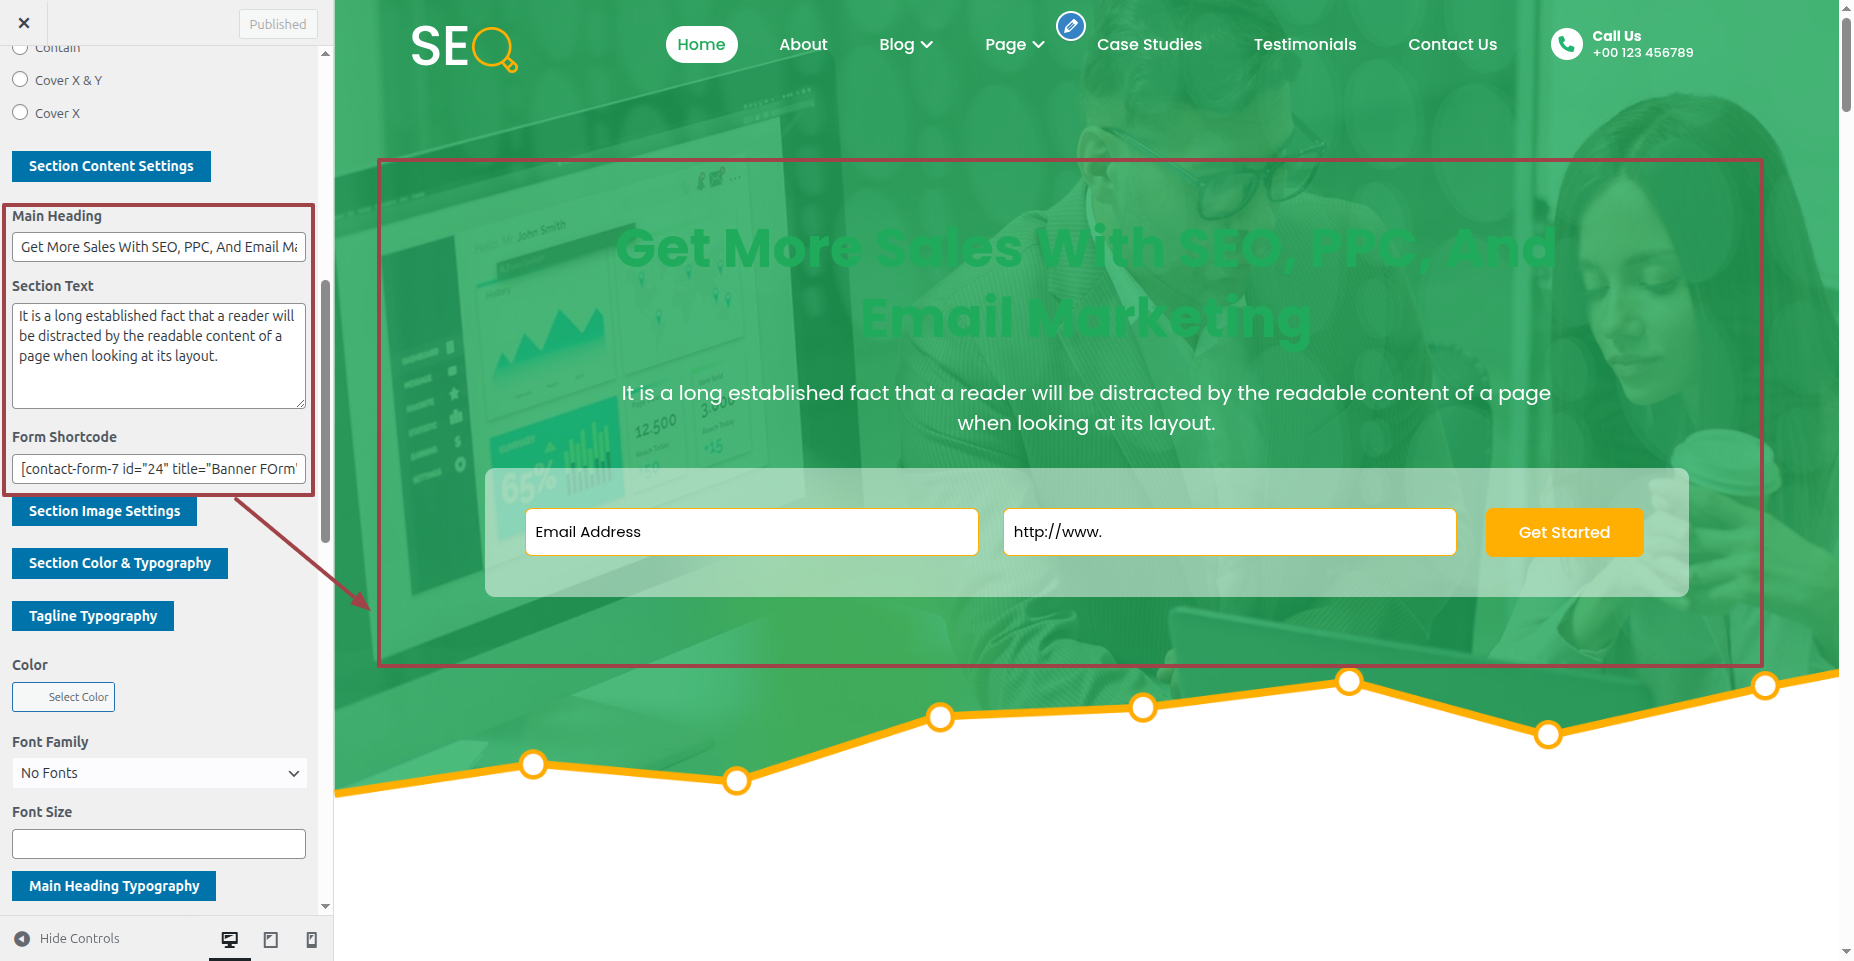
It will be shown in this format in the Main Banner Section.
Part Regarding The About Us Development
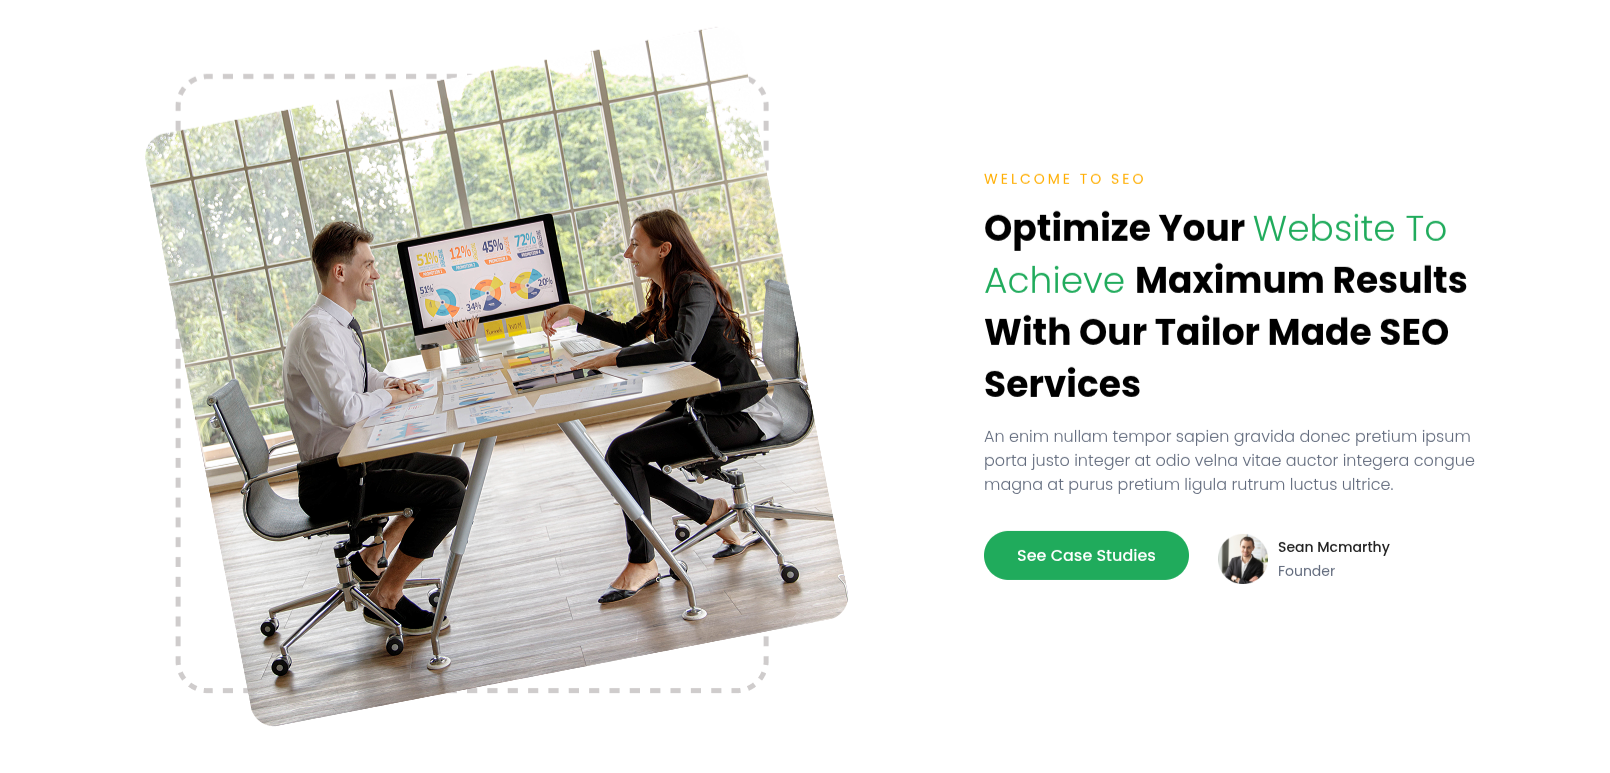
In reference to the About Us Configuration.
Step 1 Open "Appearance" to change the theme ===> By selecting "Customize" ===> Go now to the "Theme Settings " ===> Move on to "About Us"
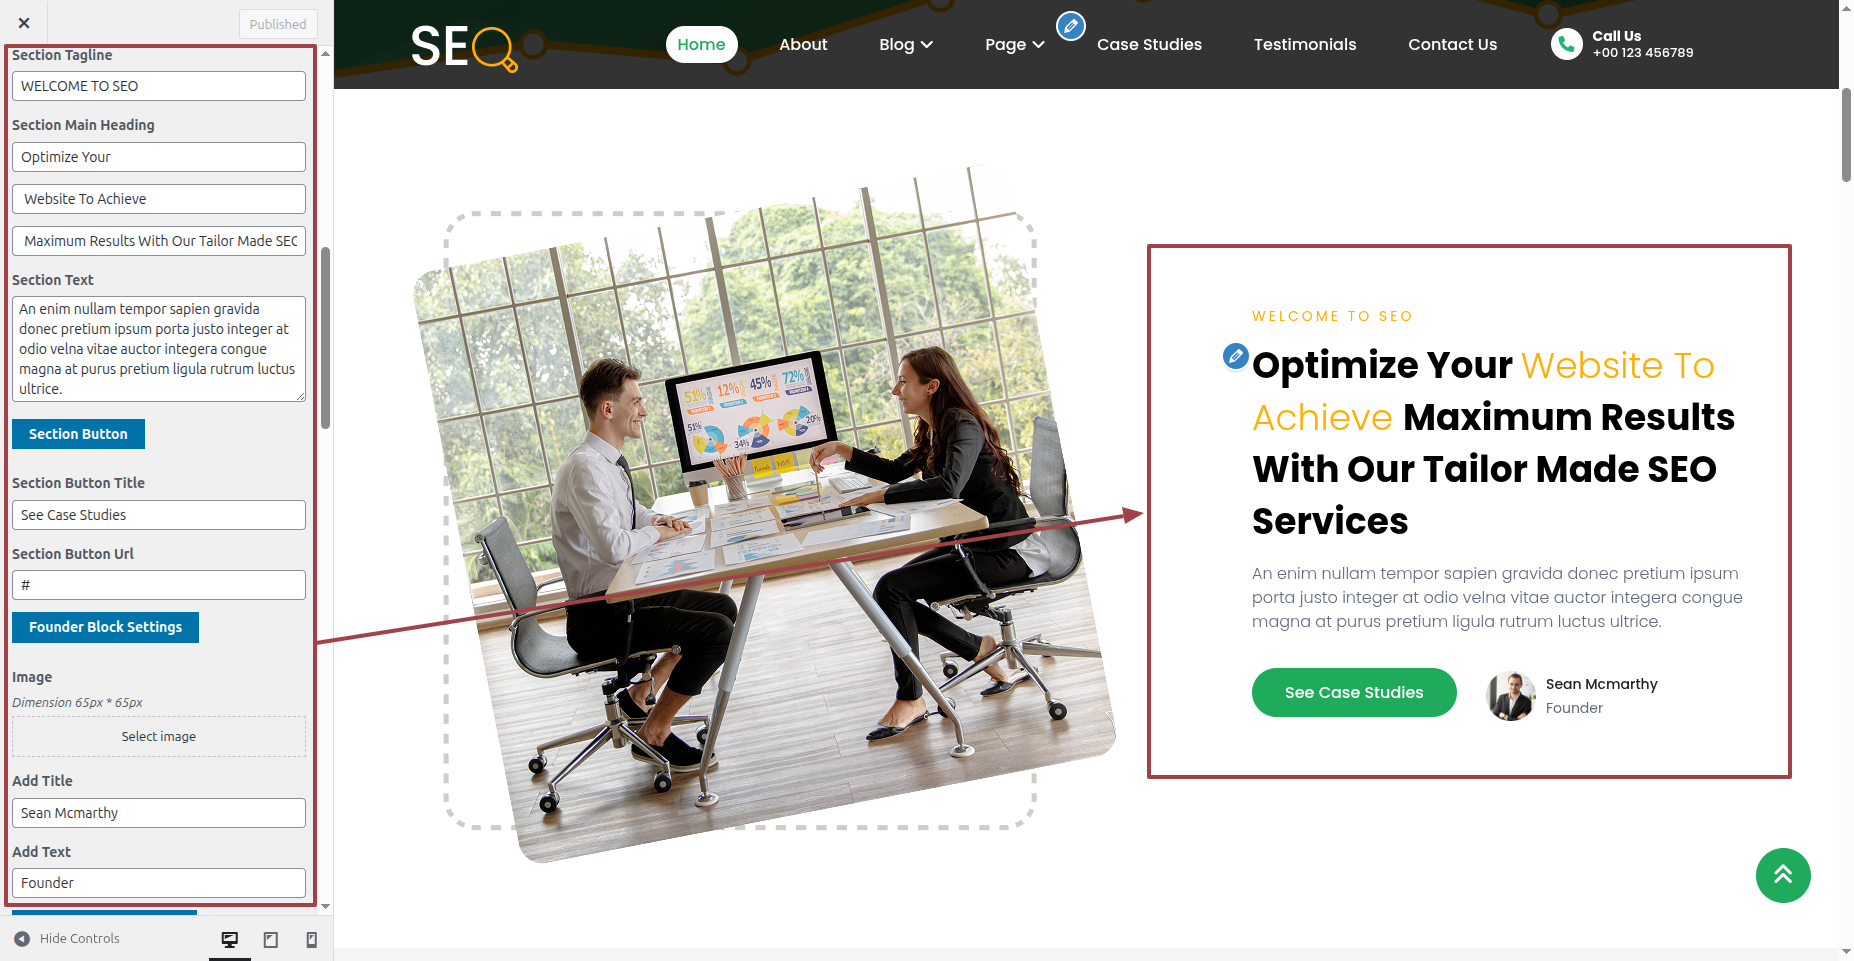
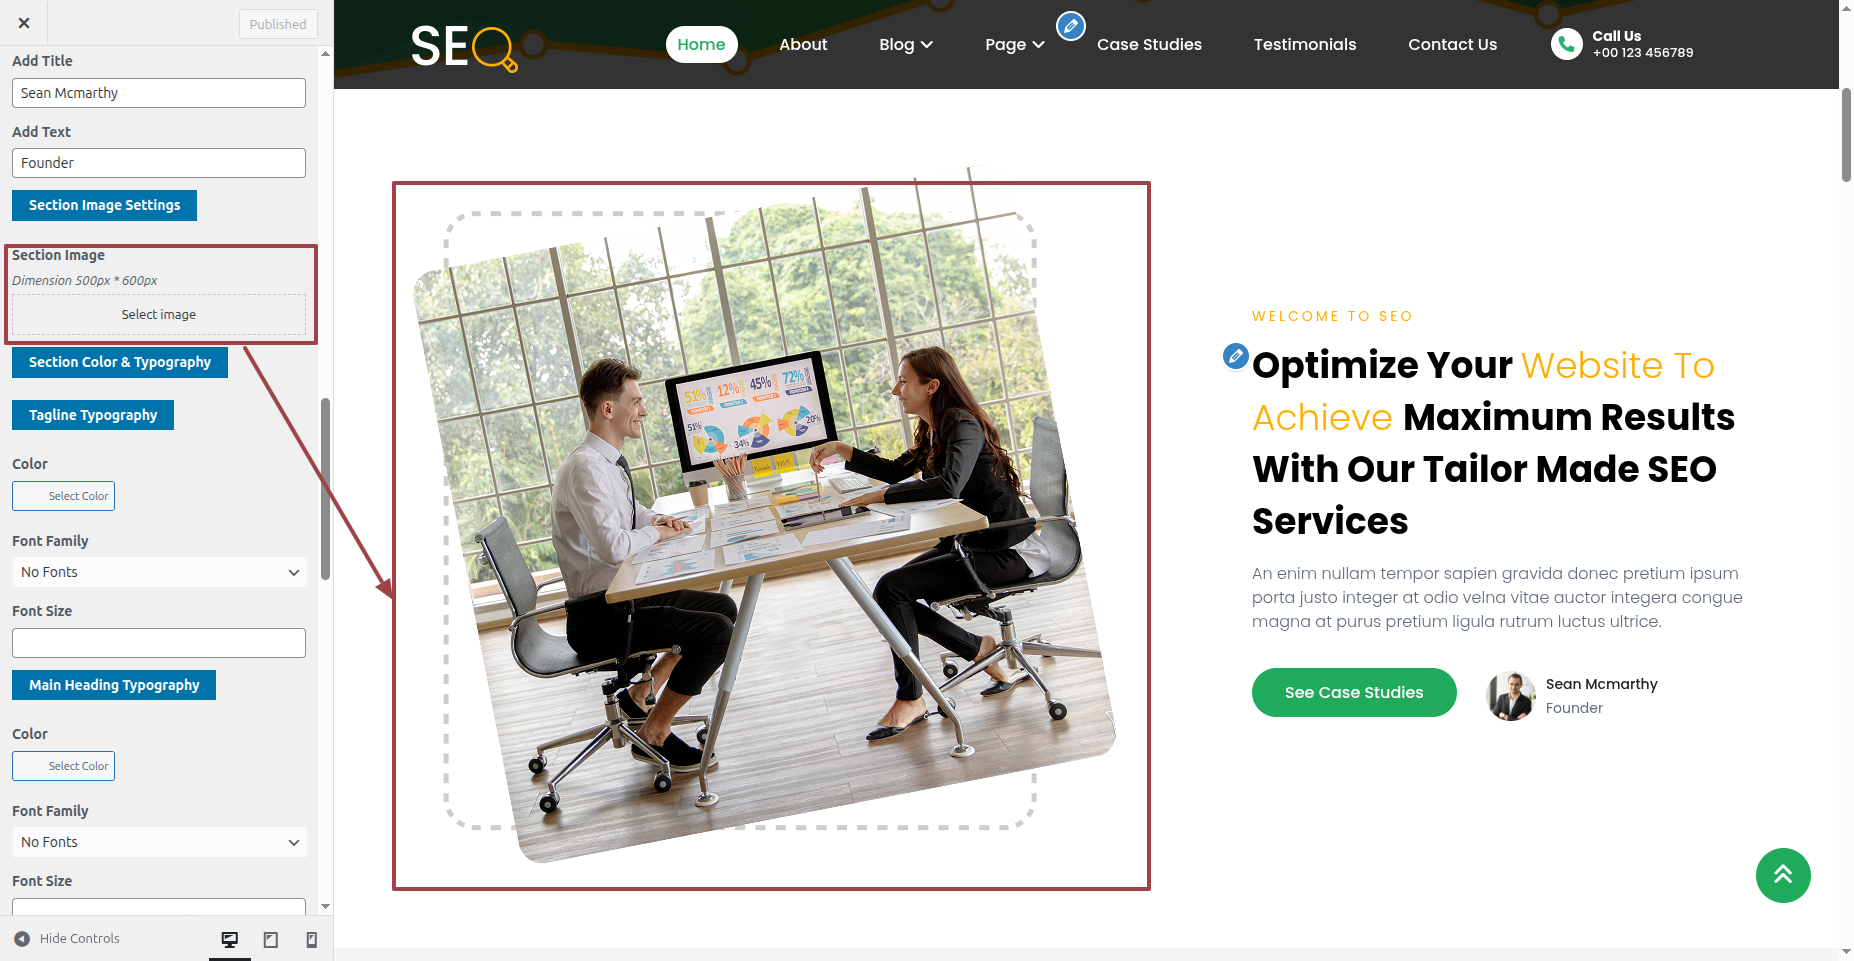
It will be shown in this format in the About Us Section.
Part Regarding Services Development
In reference to Services Configuration.
Step 1 Open "Appearance" to change the theme ===> By selecting "Customize" ===> Go now to the "Theme Settings " ===> Move on to "Services"
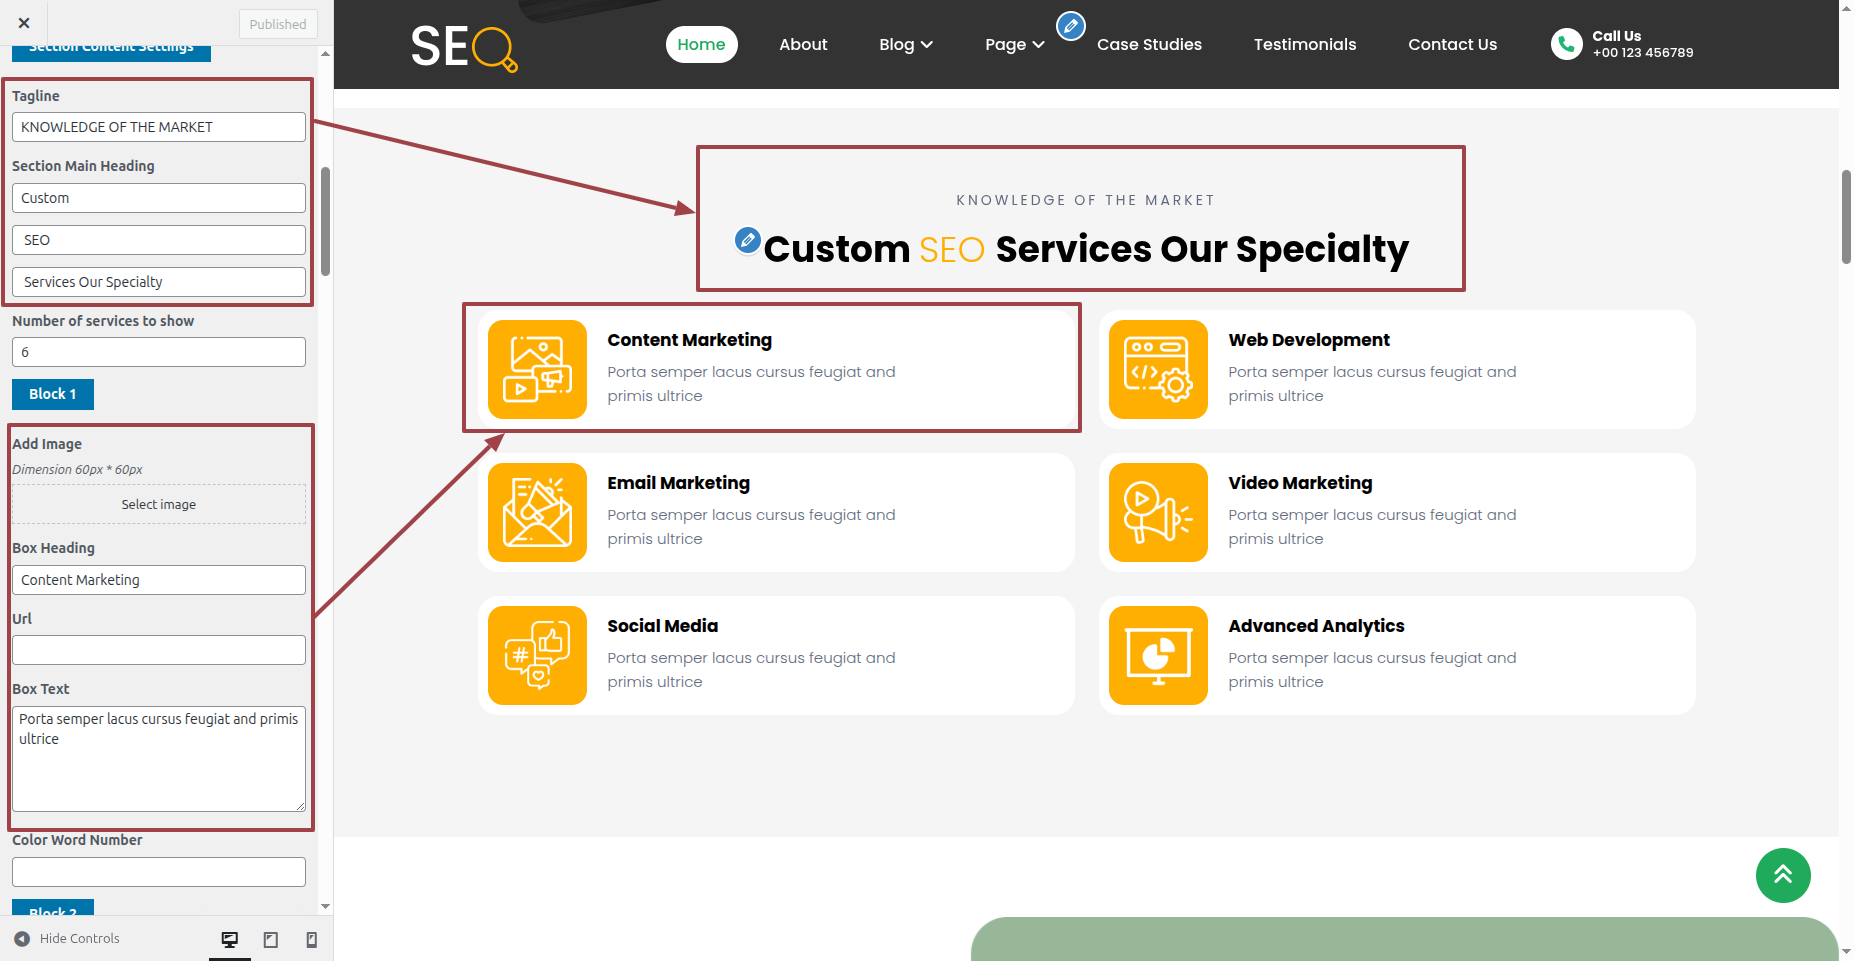
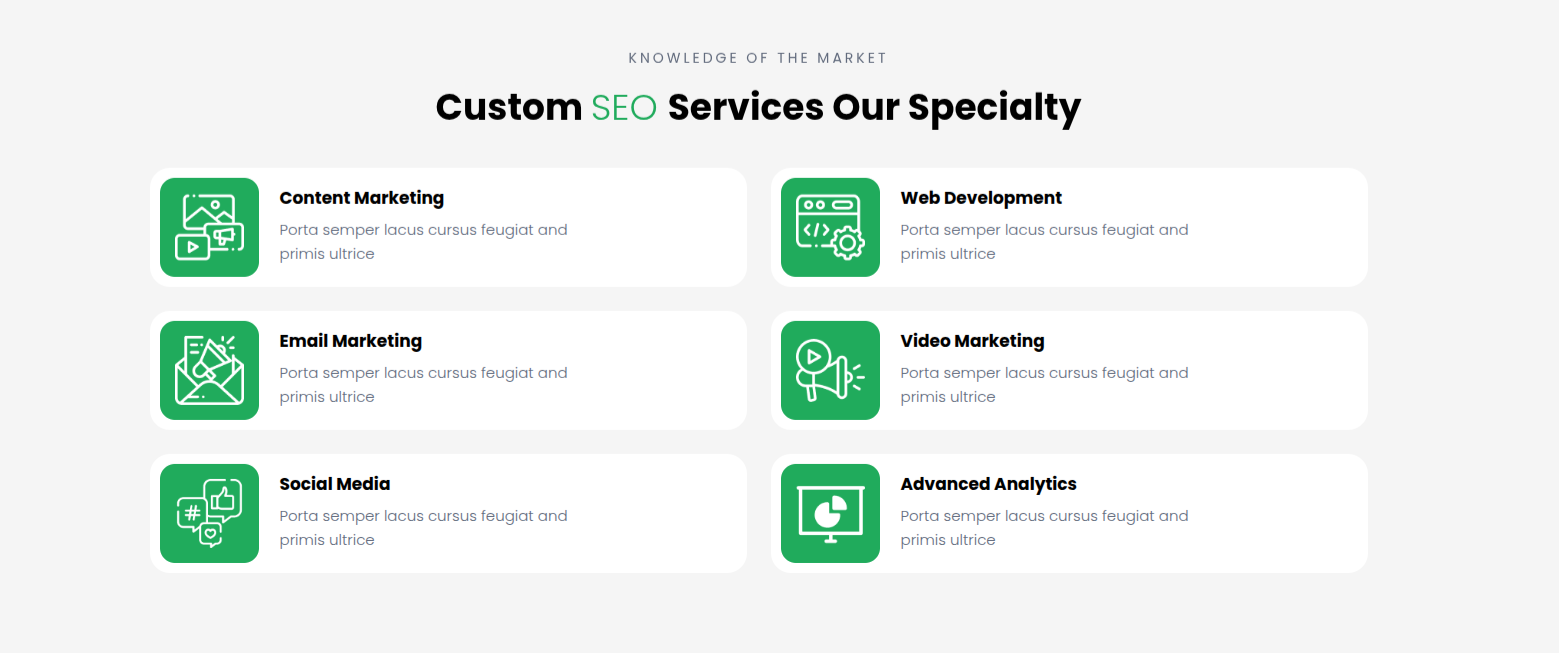
It will be shown in this format in Services Section.
Part Regarding The Approach Development
In reference to the Approach Configuration.
Step 1 Open "Appearance" to change the theme ===> By selecting "Customize" ===> Go now to the "Theme Settings " ===> Move on to "Approach"
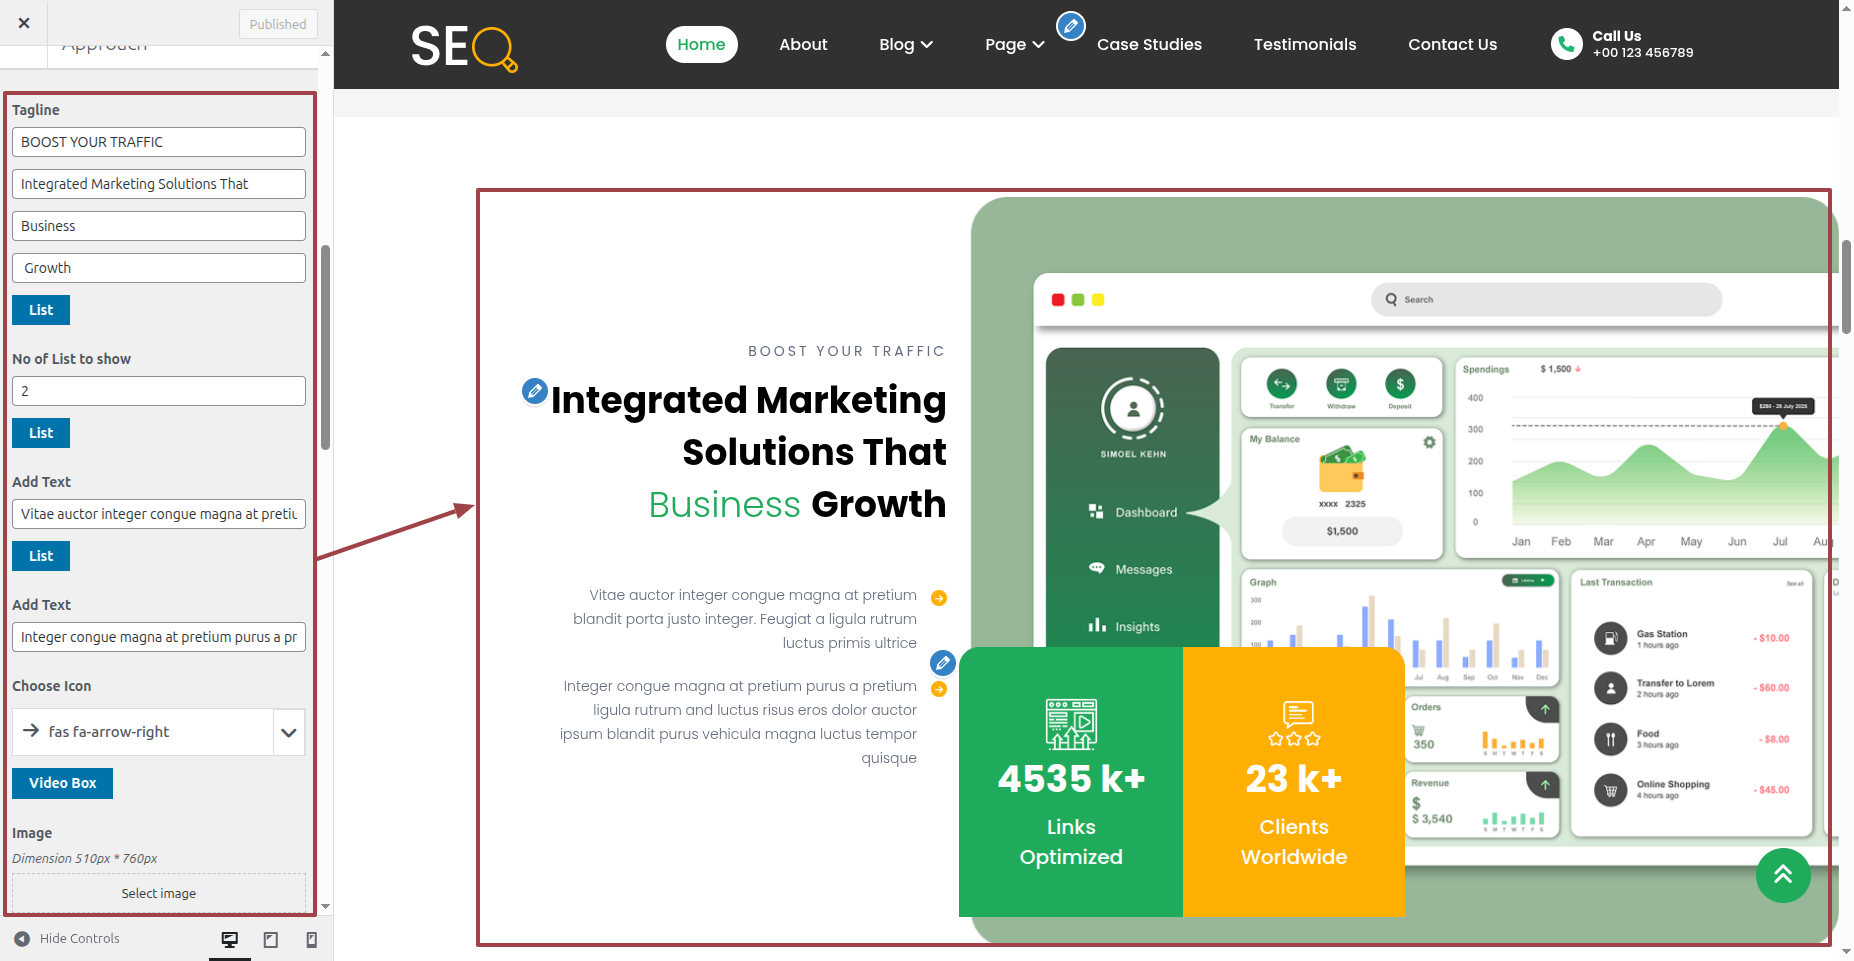
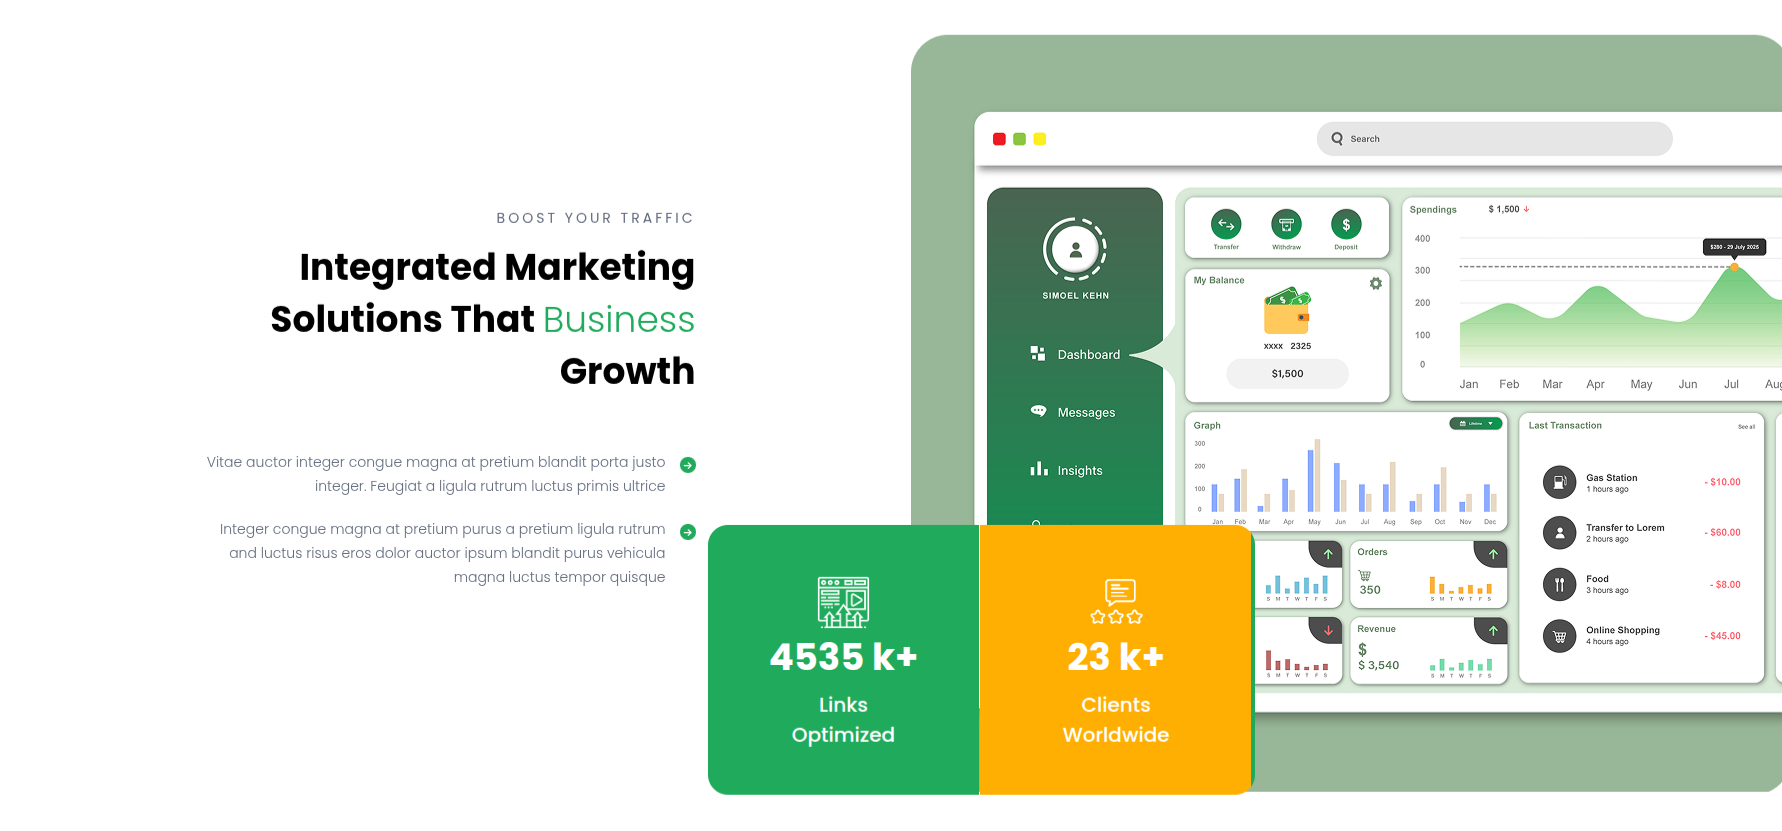
It will be shown in this format in the Approach Section.
Part Regarding The Strategy Development
In reference to the Strategy Configuration.
Step 1 Open "Appearance" to change the theme ===> By selecting "Customize" ===> Go now to the "Theme Settings " ===> Move on to "Strategy "
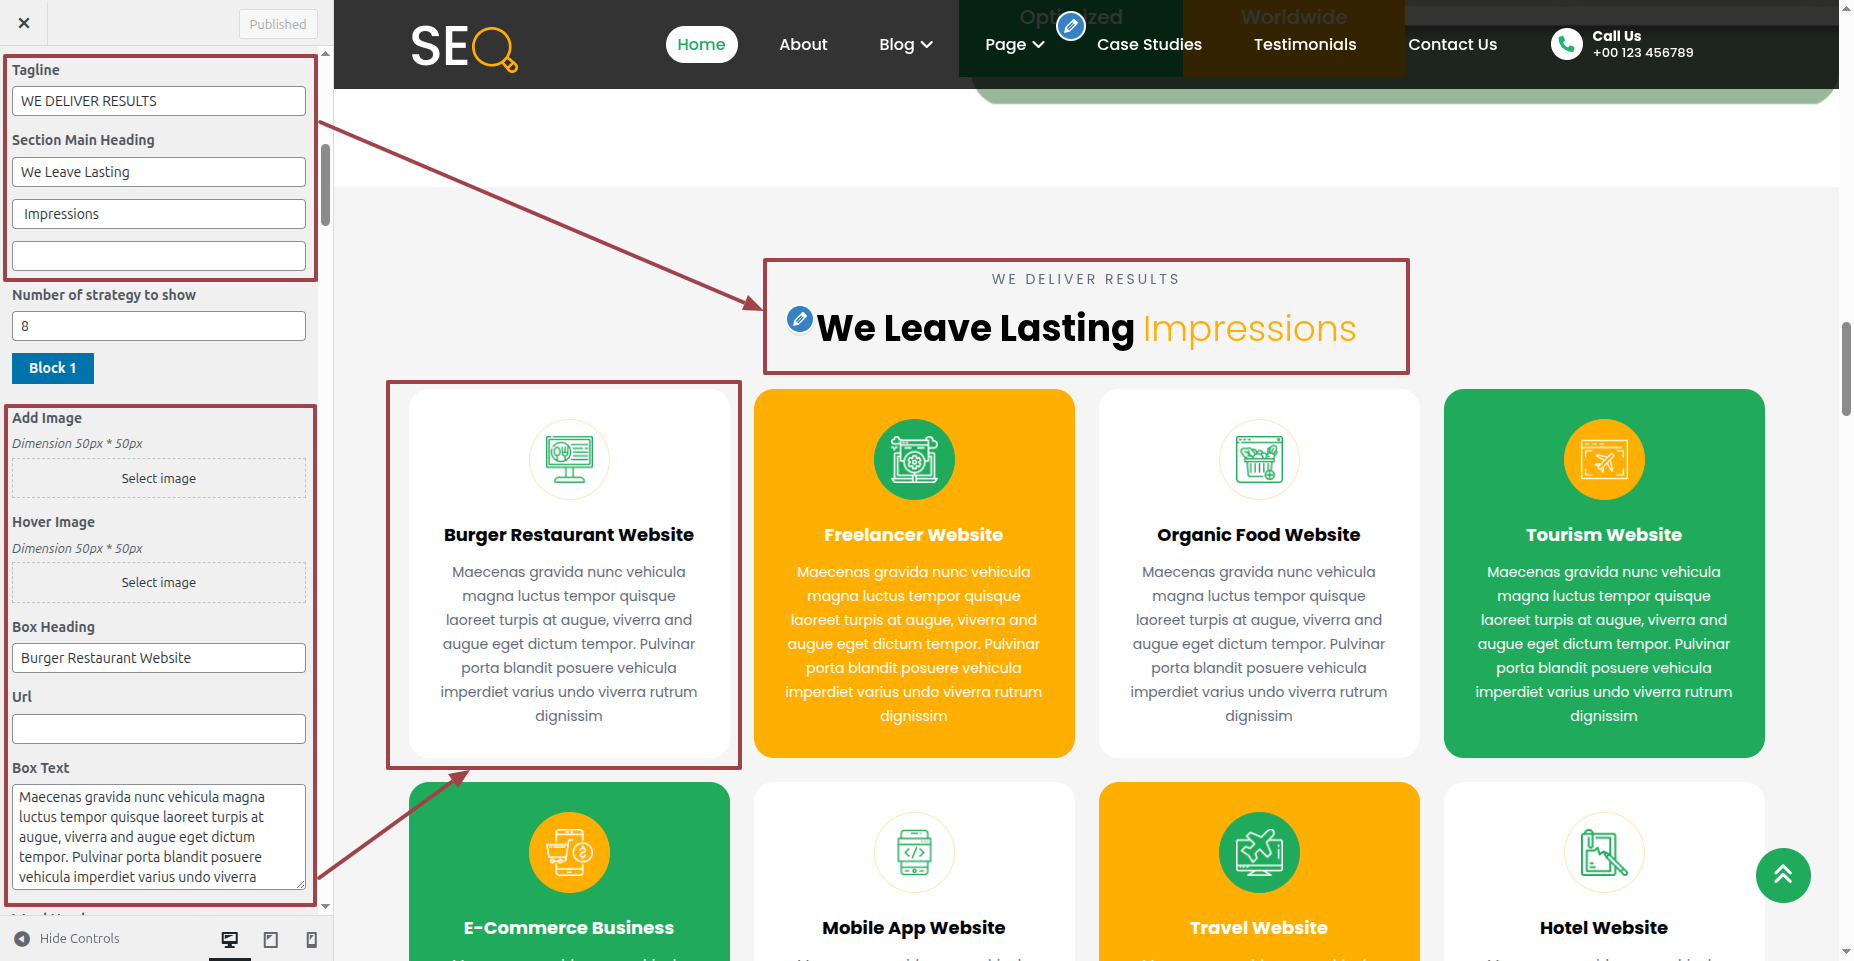
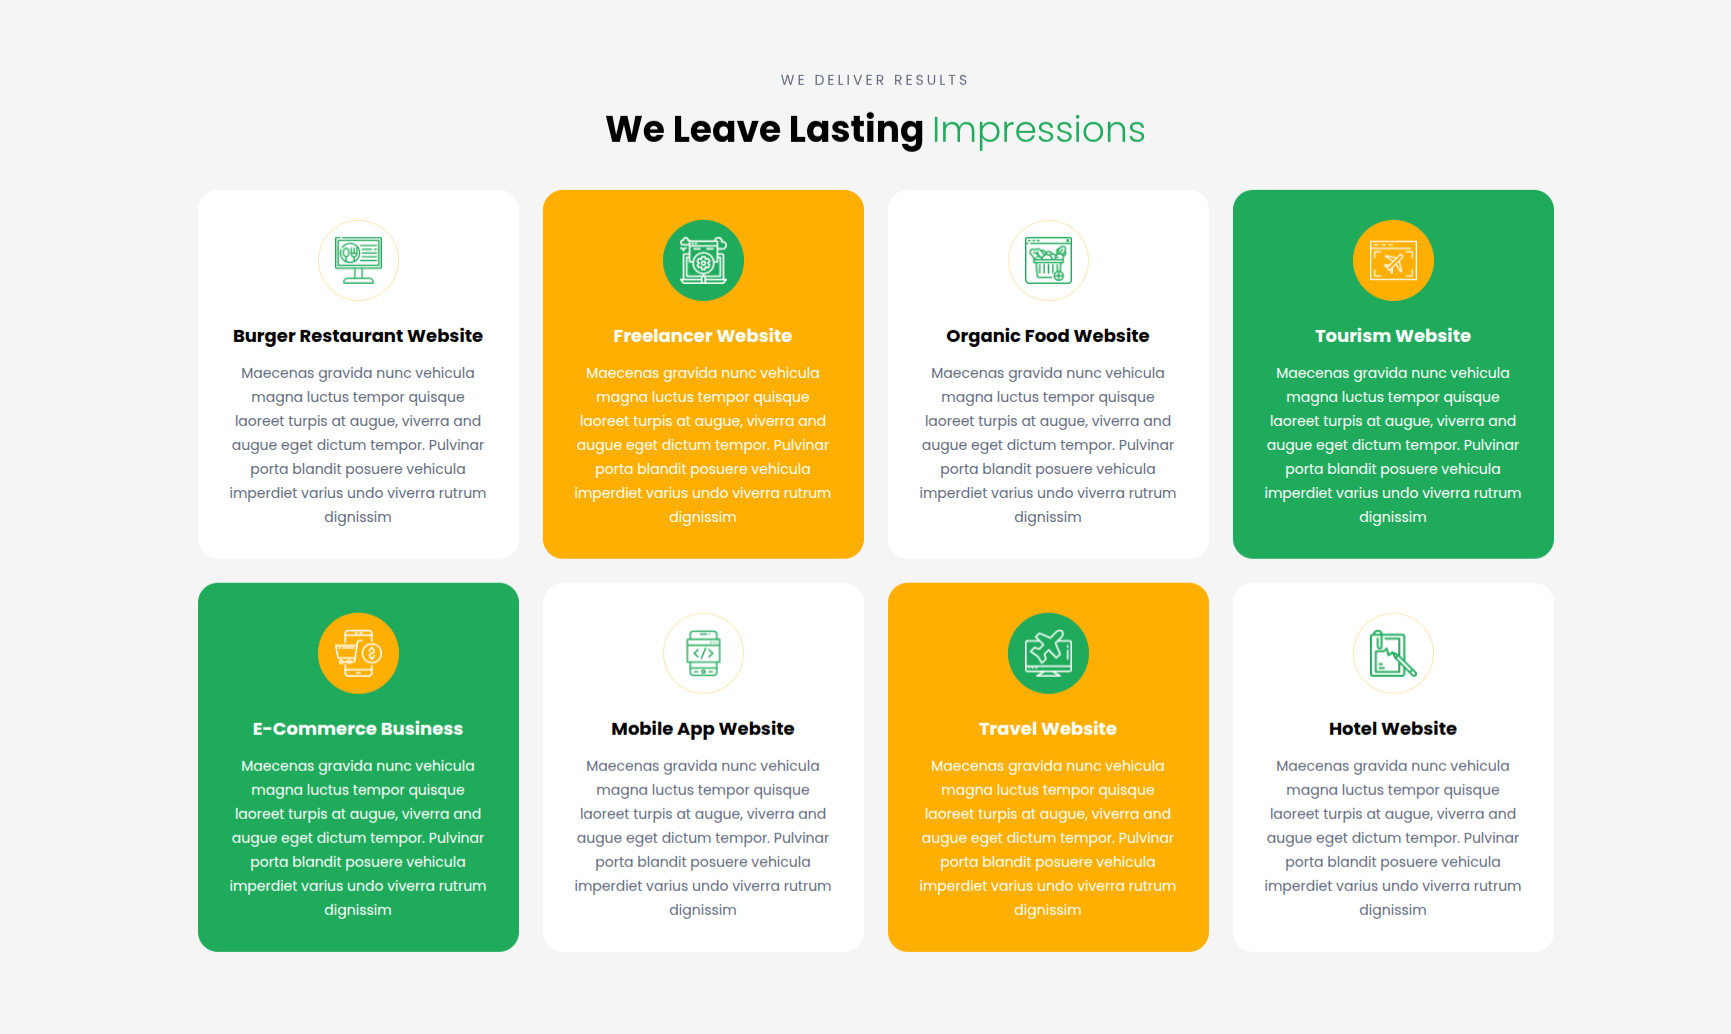
It will be shown in this format in the Strategy Section.
Part Regarding The Marketing Development
In reference to the Marketing Configuration.
Step 1 Open "Appearance" to change the theme ===> By selecting "Customize" ===> Go now to the "Theme Settings " ===> Move on to "Marketing "
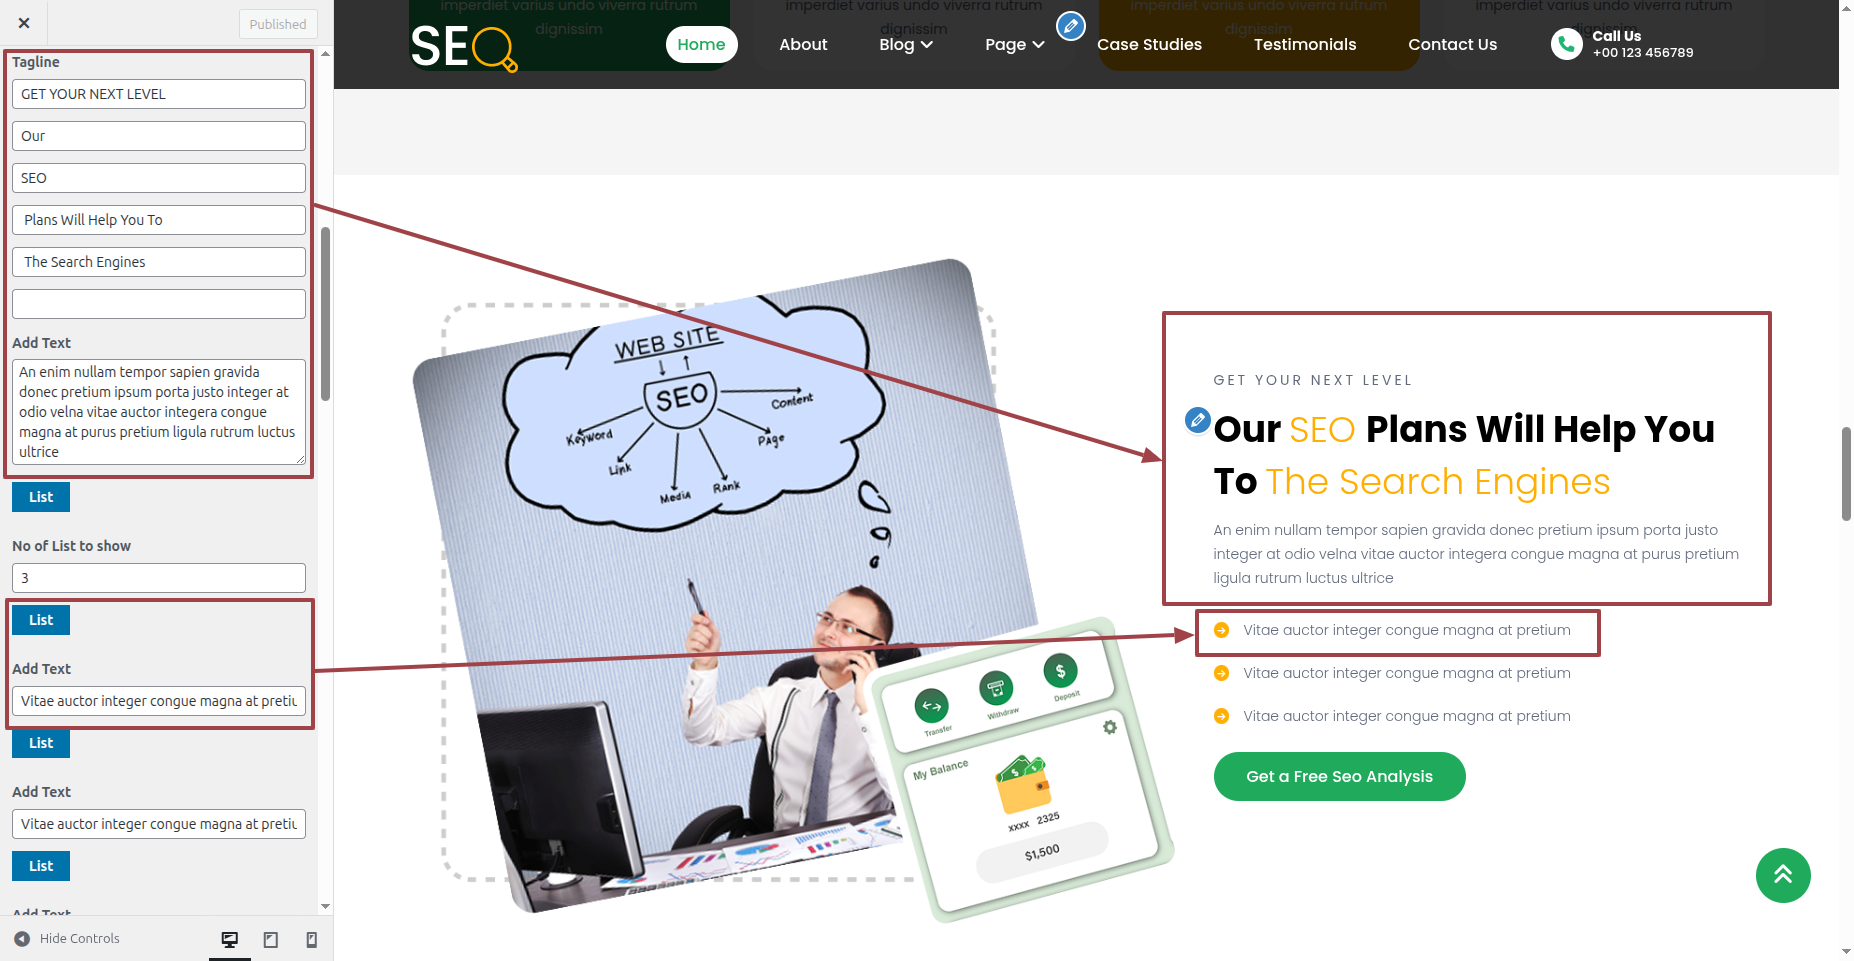
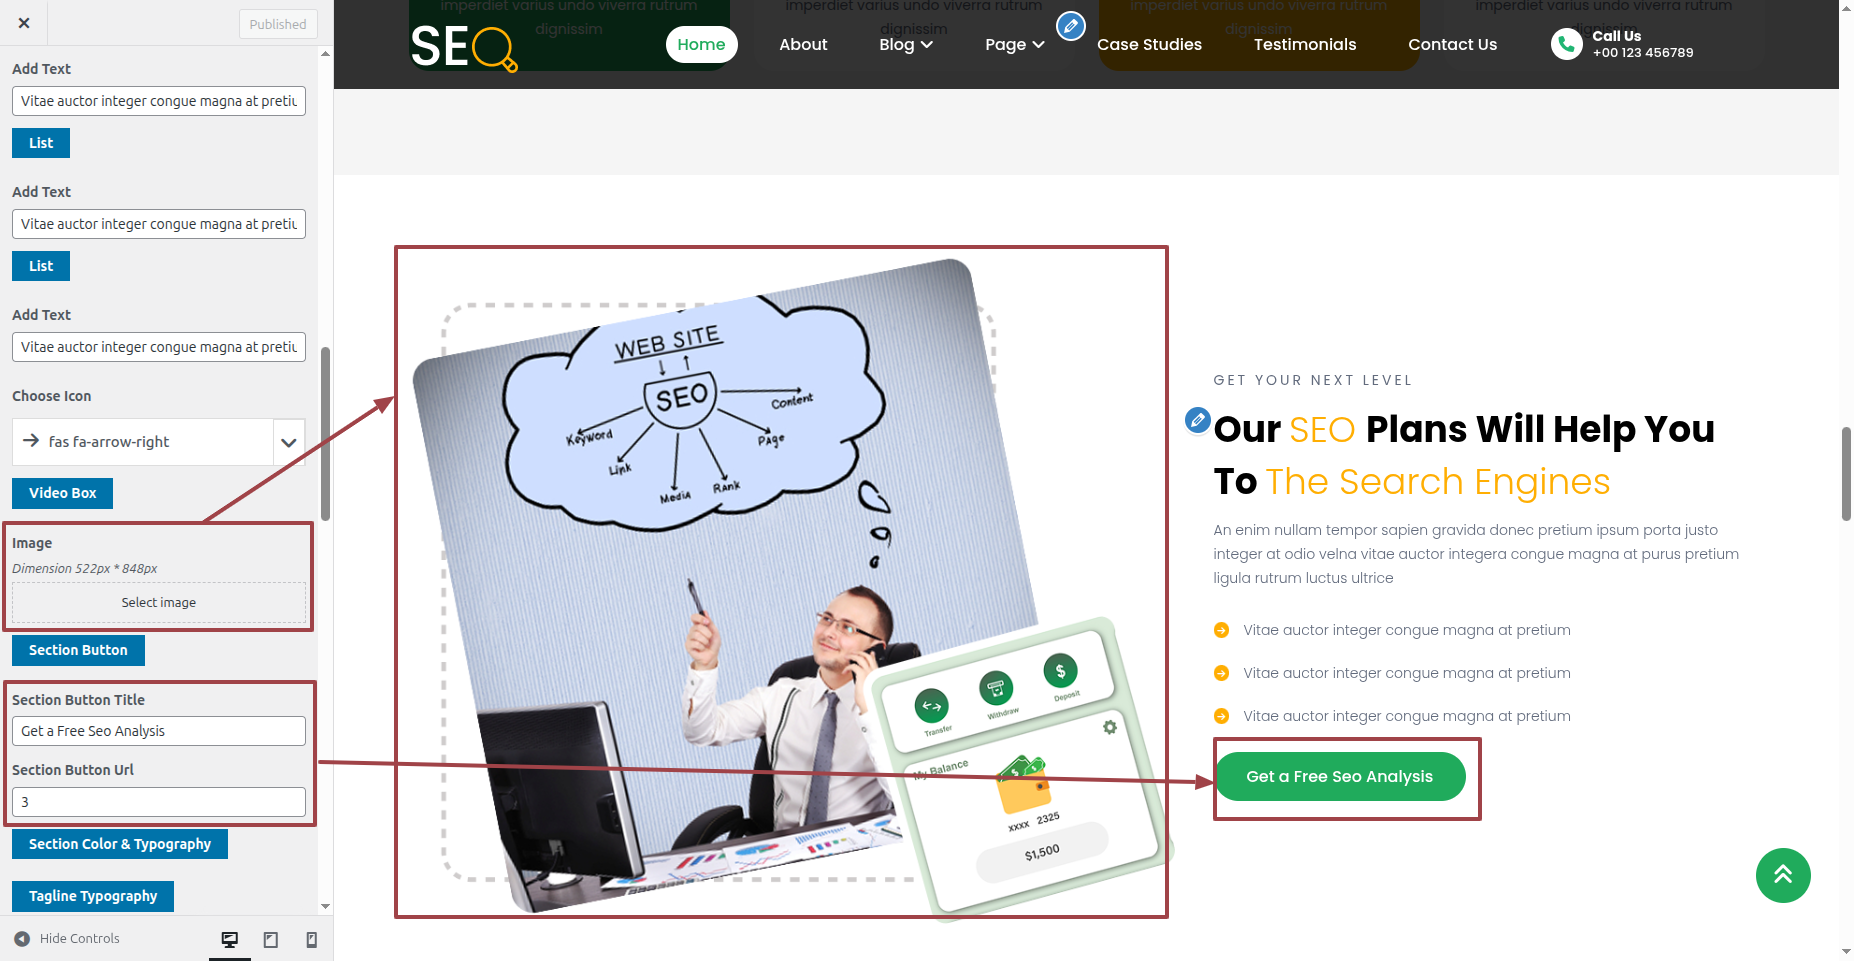
It will be shown in this format in the Marketing Section.
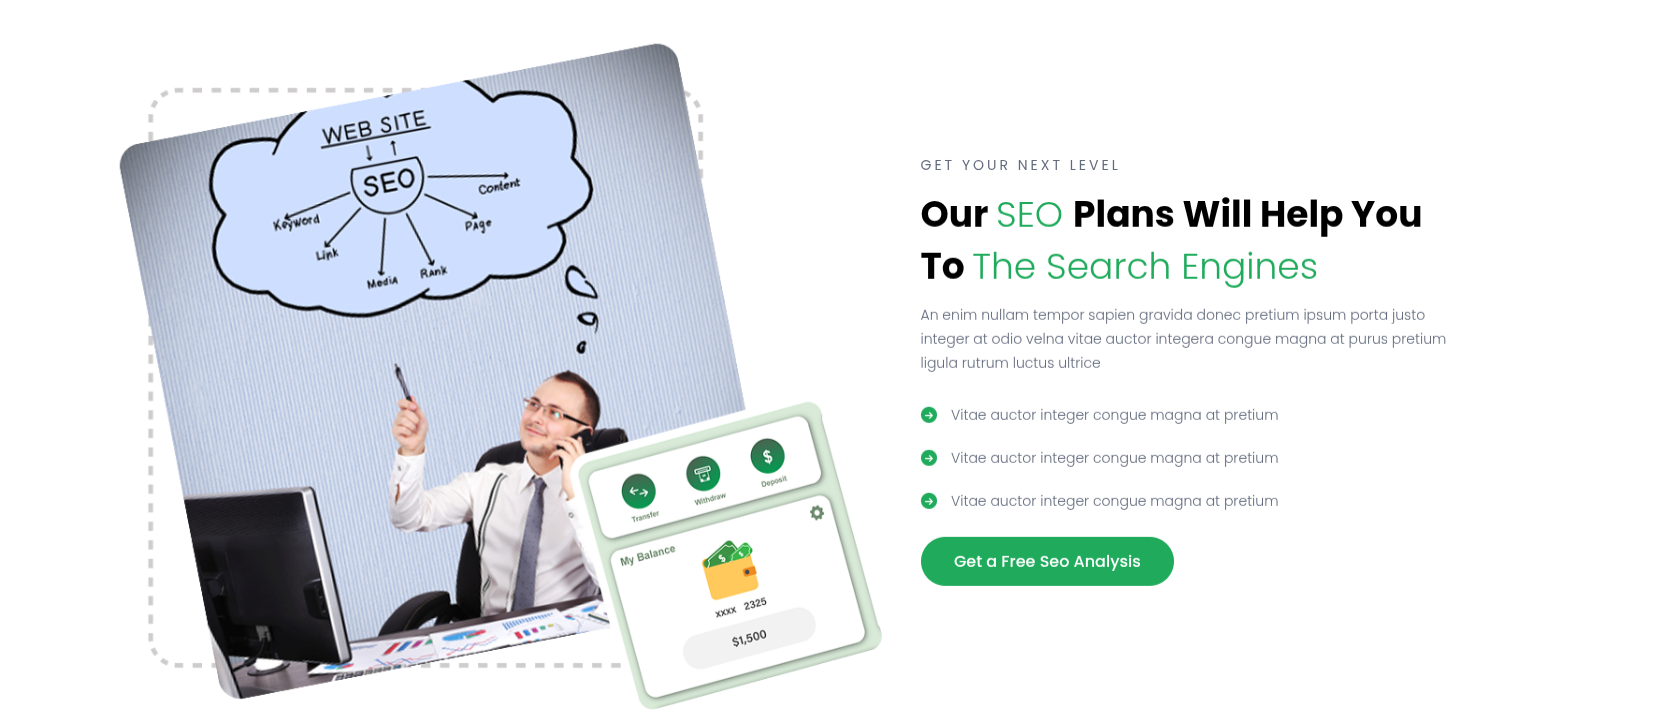
Part Regarding The Track Records Development
In reference to the Track Records Configuration.
Step 1 Open "Appearance" to change the theme ===> By selecting "Customize" ===> Go now to the "Theme Settings " ===> Move on to "Track Records "
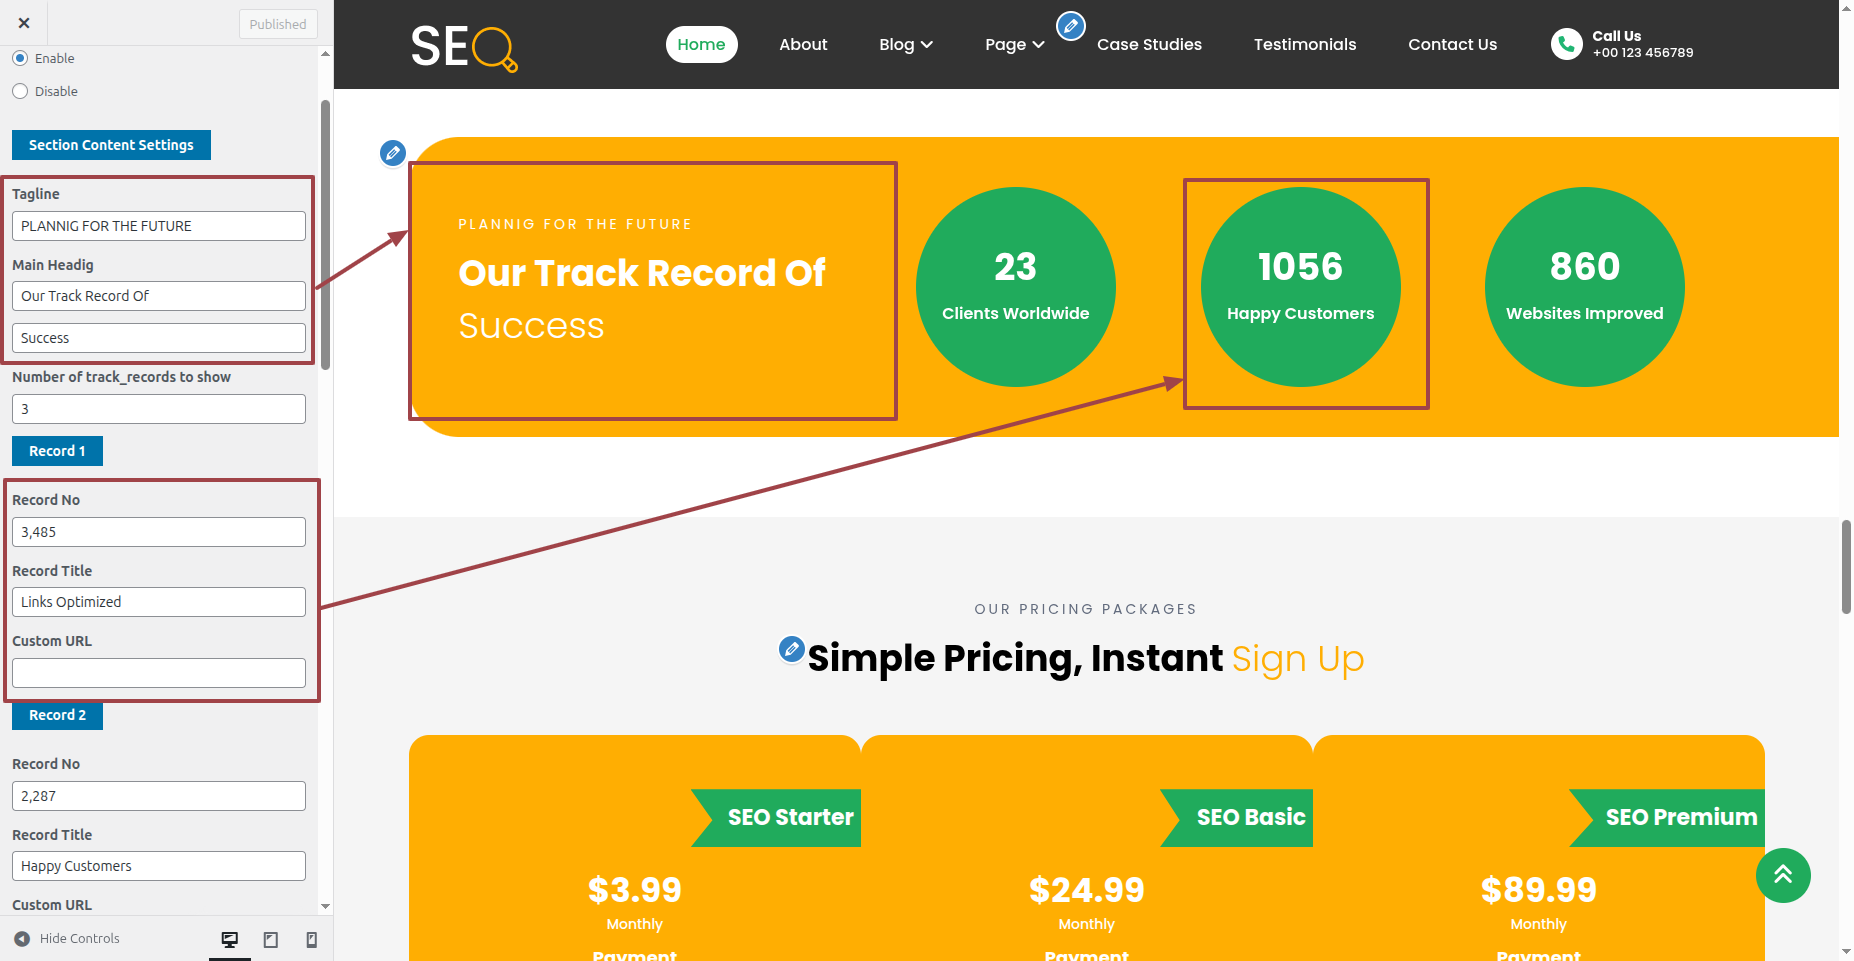
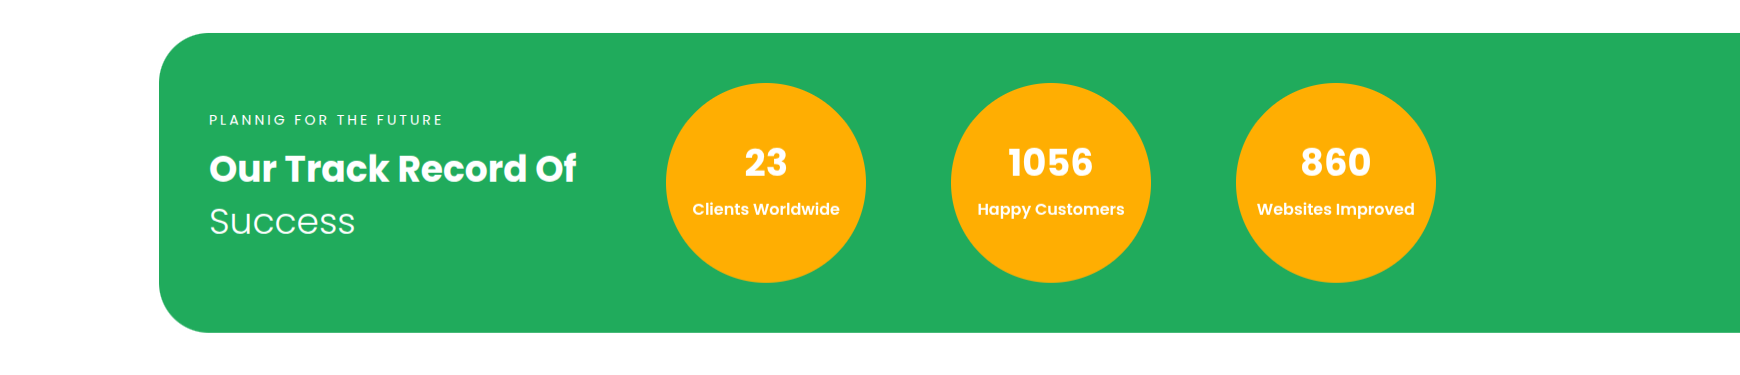
It will be shown in this format in the Track Records Section.
Part Regarding The Pricing Plan Development
In reference to the Pricing Plan Configuration.
Step 1 Open "Appearance" to change the theme ===> By selecting "Customize" ===> Go now to the "Theme Settings " ===> Move on to "Pricing Plan "
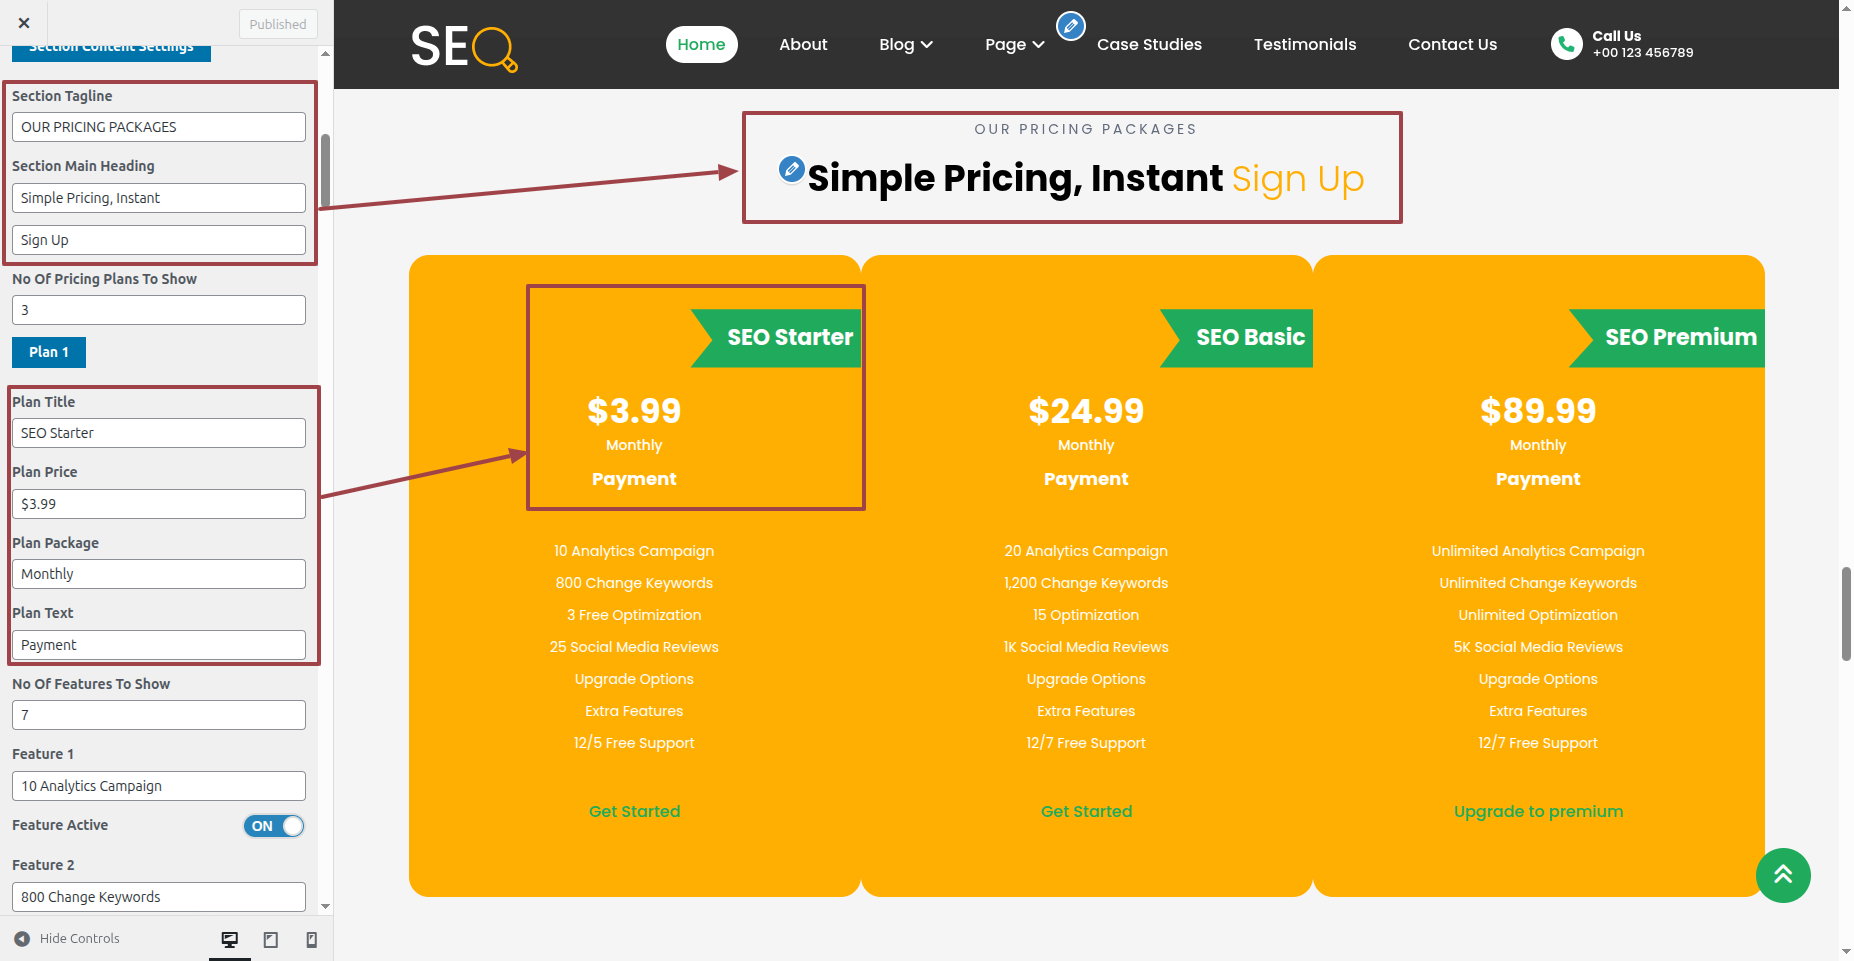
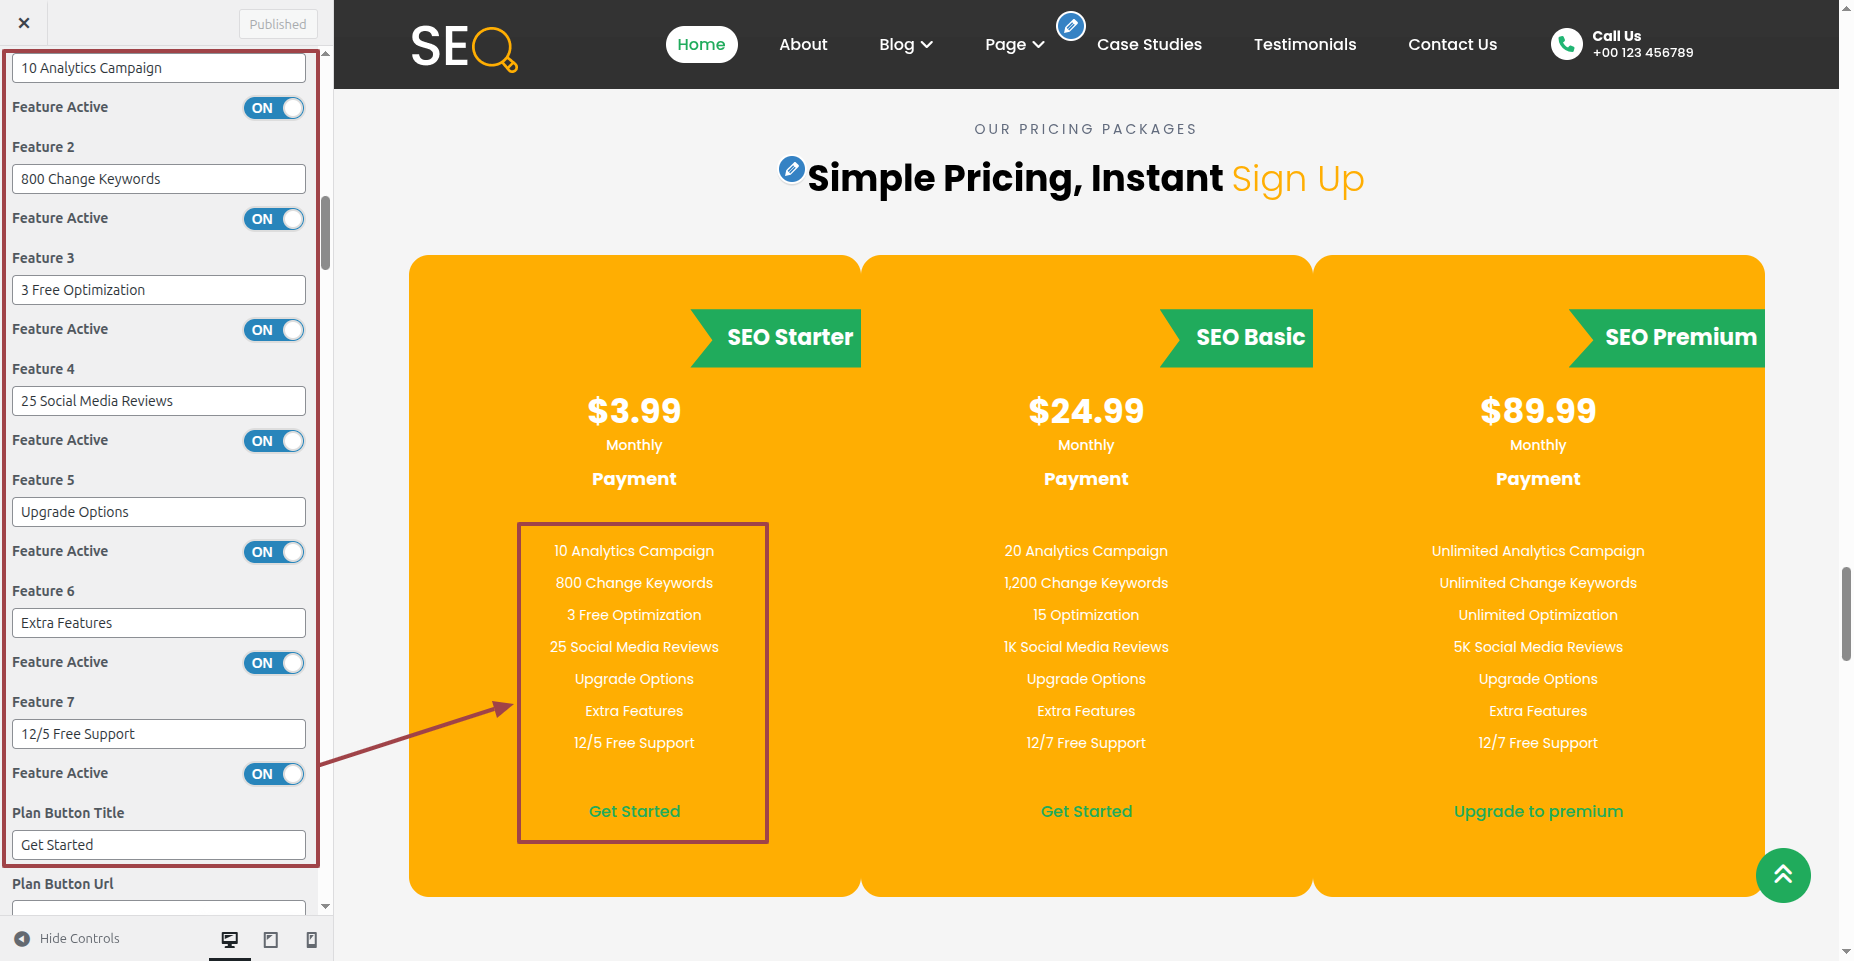
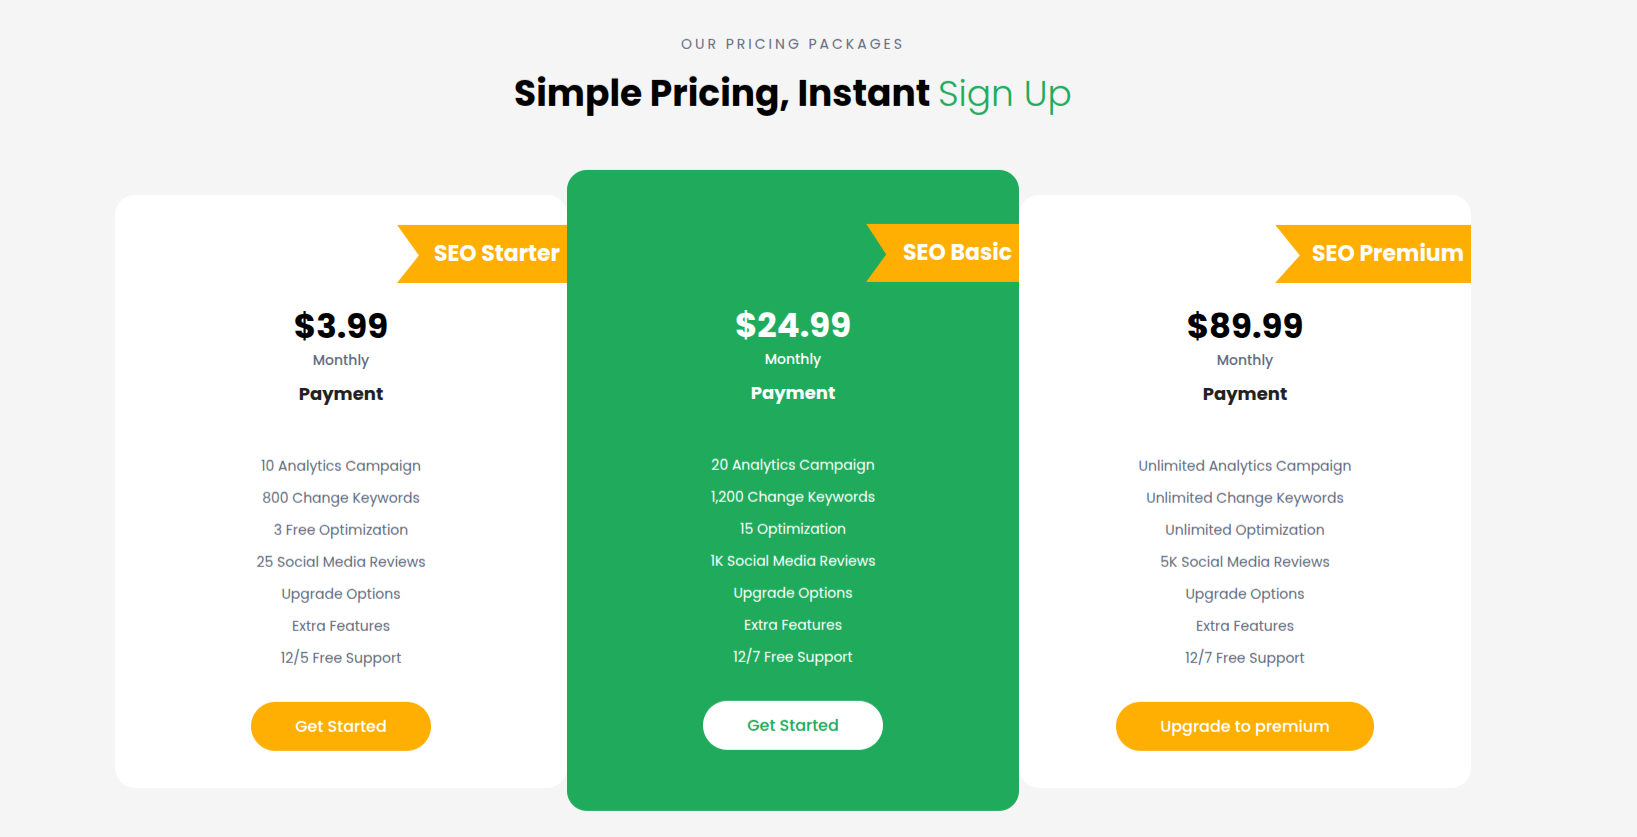
It will be shown in this format in the Pricing Plan Section.
Part Regarding The Brands Development
In reference to the Brands Configuration.
Step 1 Open "Appearance" to change the theme ===> By selecting "Customize" ===> Go now to the "Theme Settings " ===> Move on to "Brands"
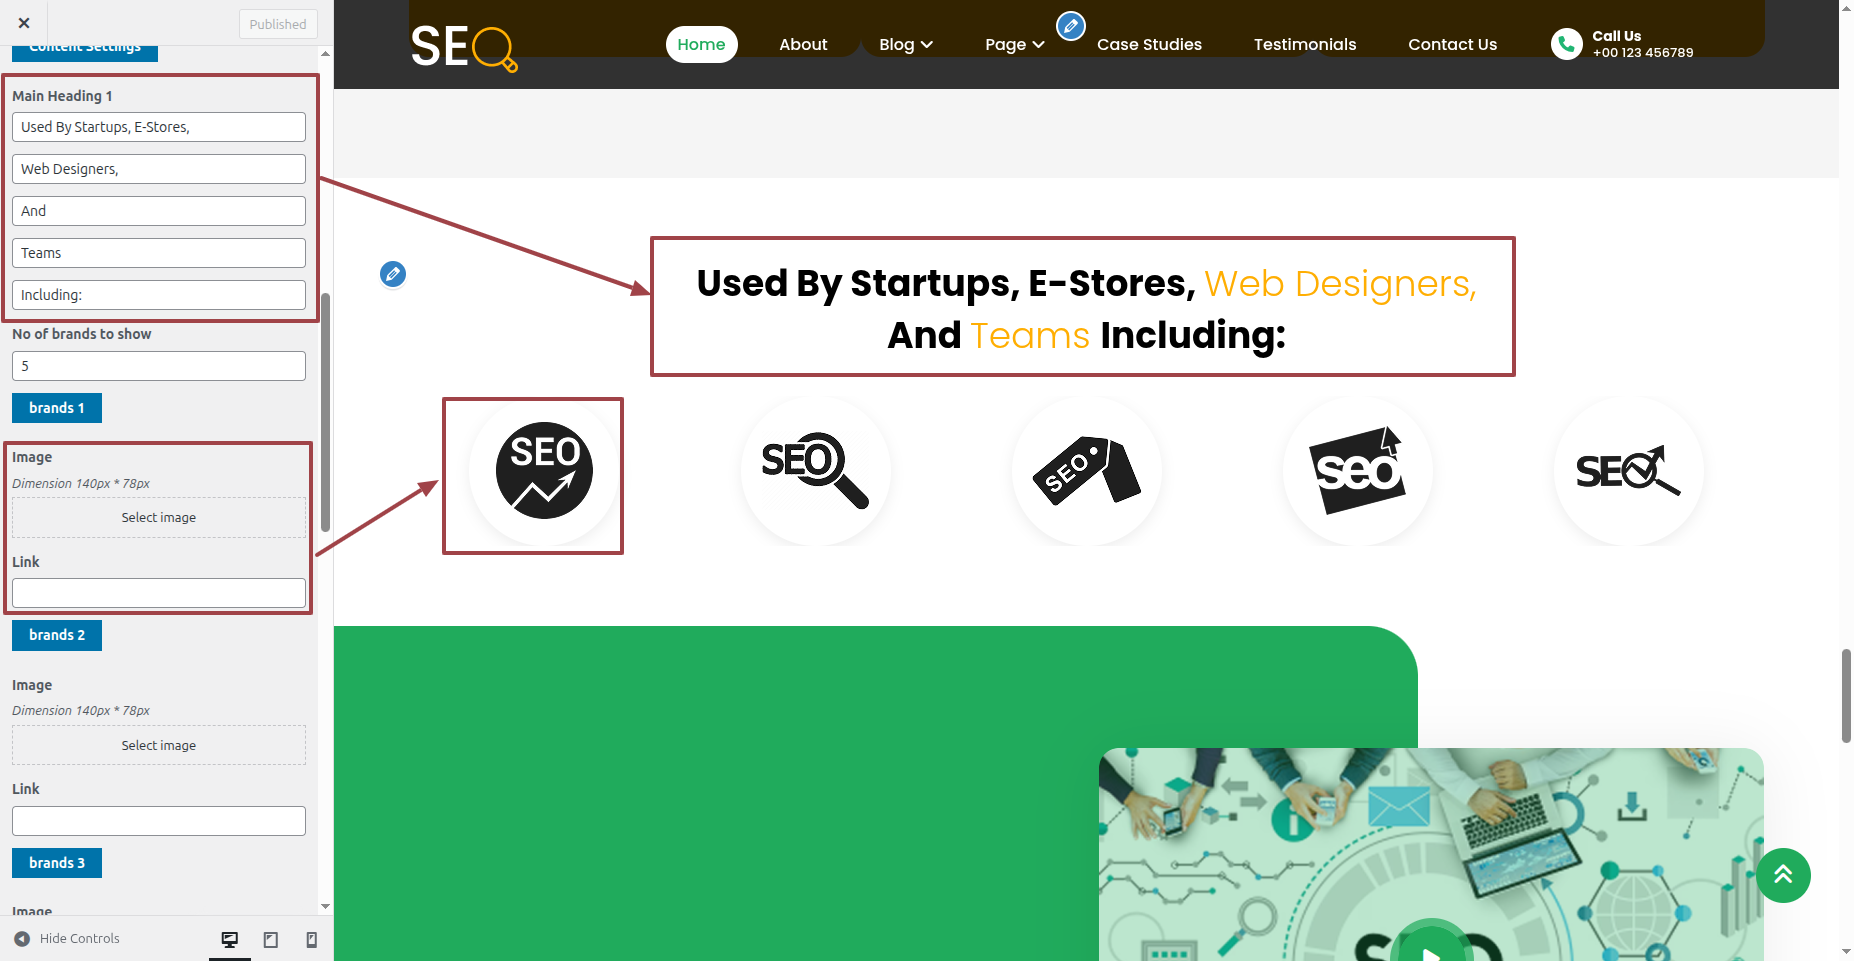
It will be shown in this format in the Brands Section.

Part Regarding The Goals Development
In reference to the Goals Configuration.
Step 1 Open "Appearance" to change the theme ===> By selecting "Customize" ===> Go now to the "Theme Settings " ===> Move on to "Goals"
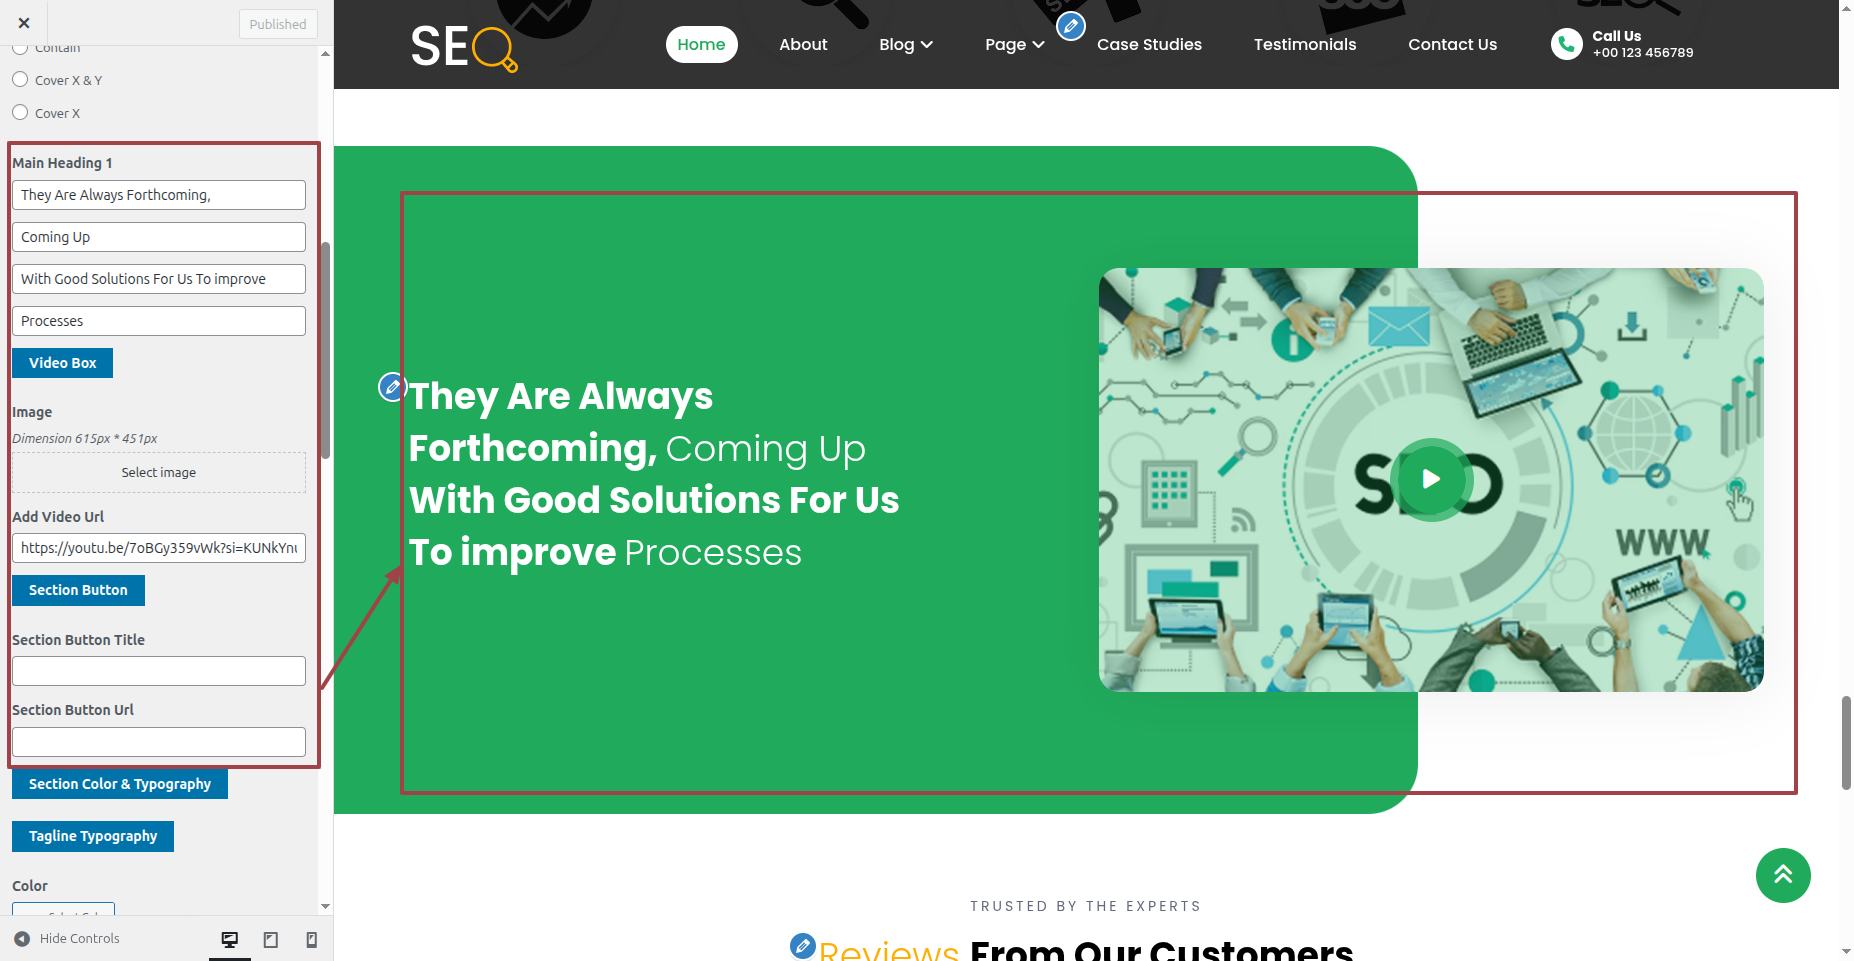
It will be shown in this format in the Goals Section.
Part Regarding The Testimonials Development
In reference to the Testimonials Configuration.
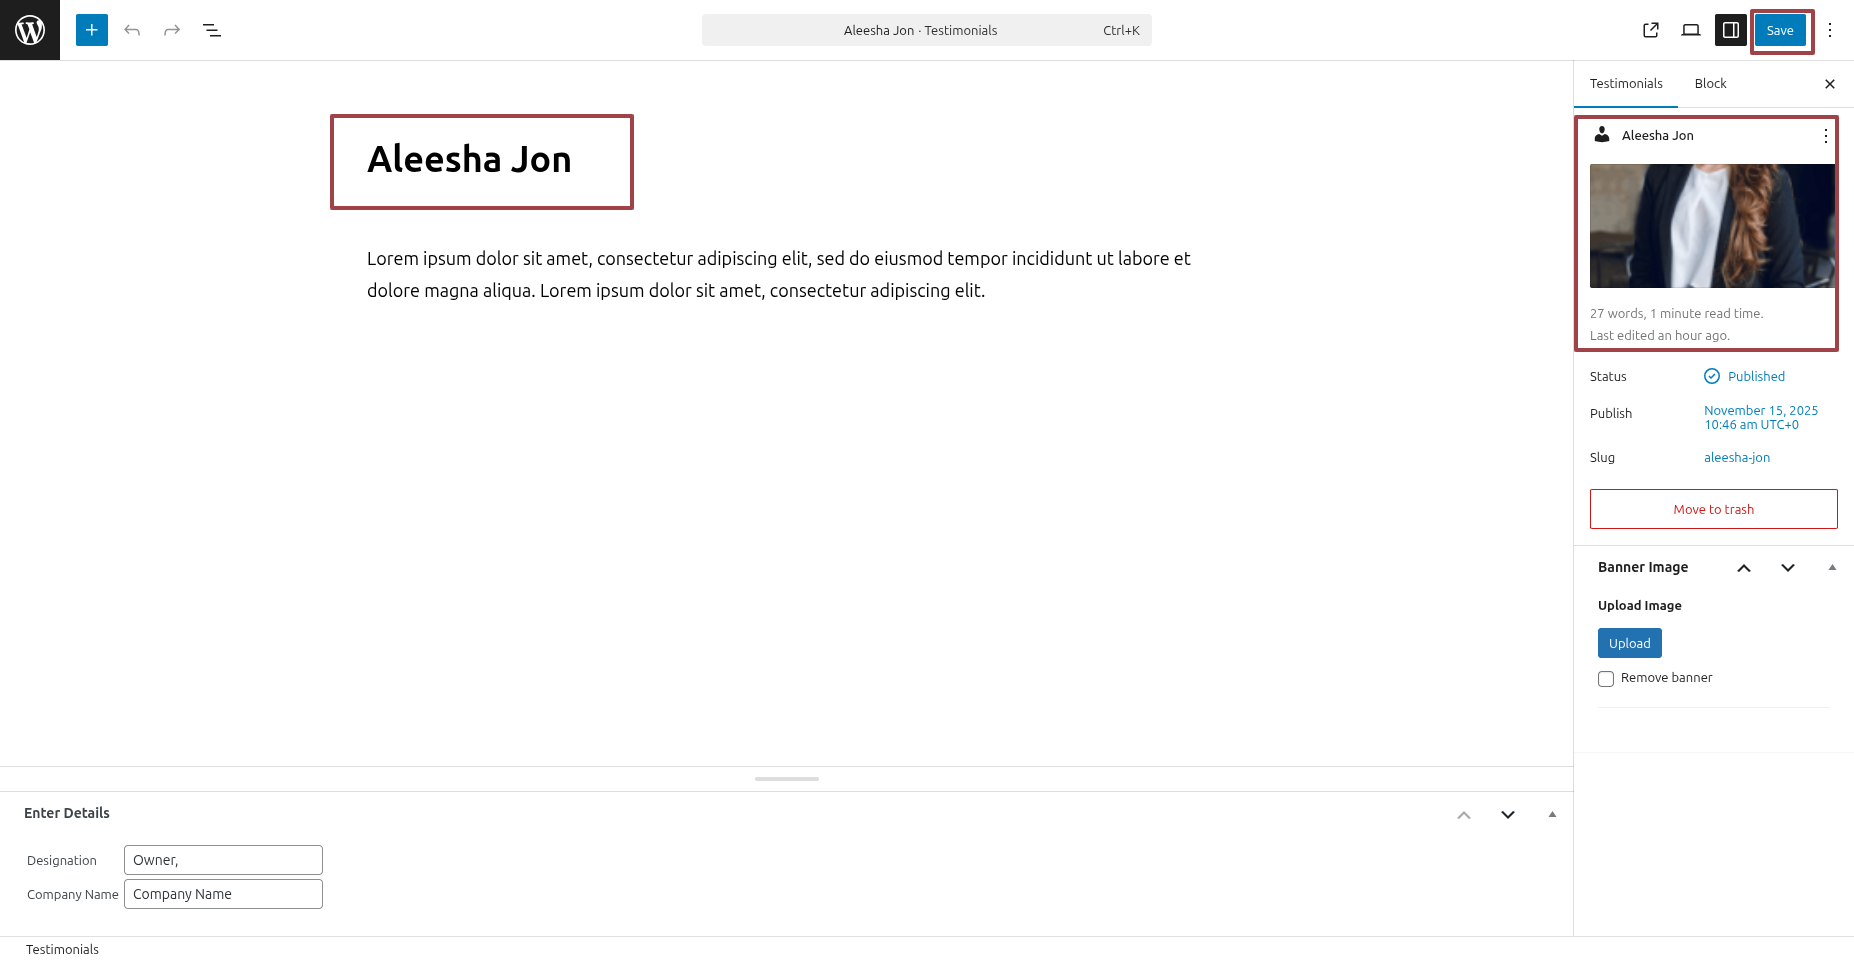
It is imperative that we install SEO Expert Pro Posttype plugin before moving on to the Testimonials section. following the SEO Expert Pro Posttype The process of installing a plugin. Testimonials will be available on the Dashboard.
Step 1 Open "Dashbord" to change the theme ===> By selecting "Testimonials" ===> click the "Add New Post" option.
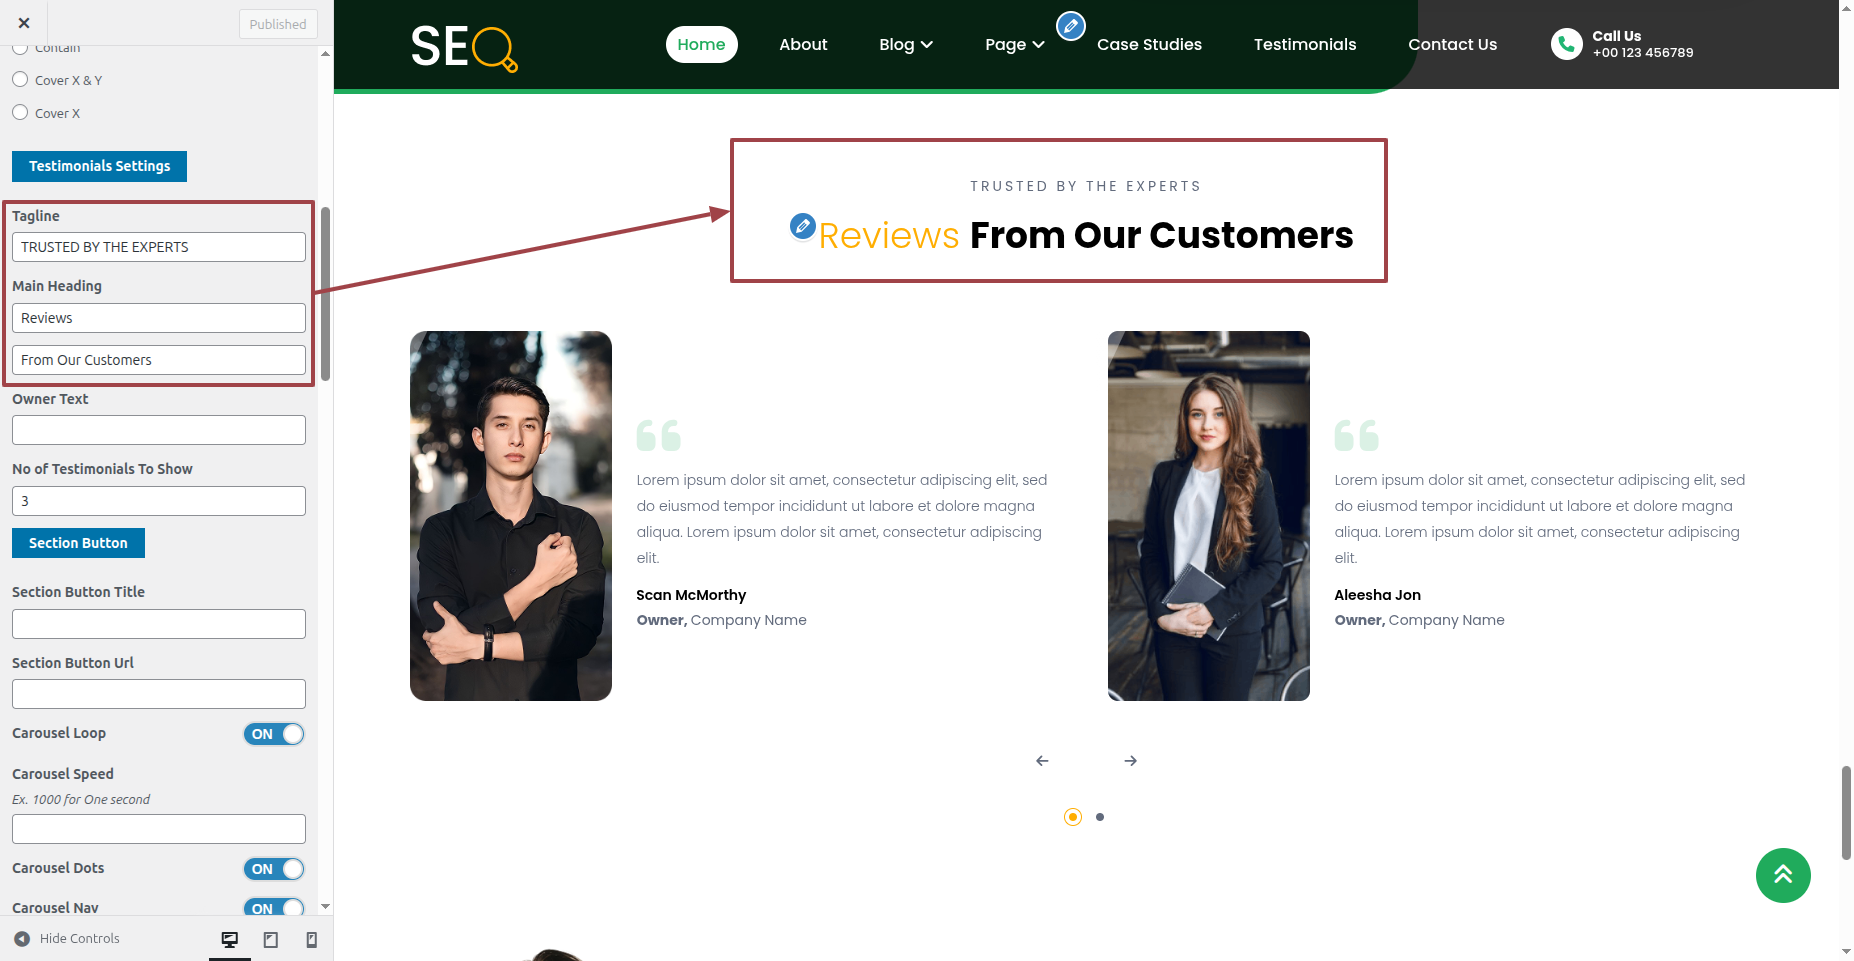
Step 1 Open "Appearance" to change the theme ===> By selecting "Customize" ===> Go now to the "Theme Settings " ===> Move on to "Testimonials"
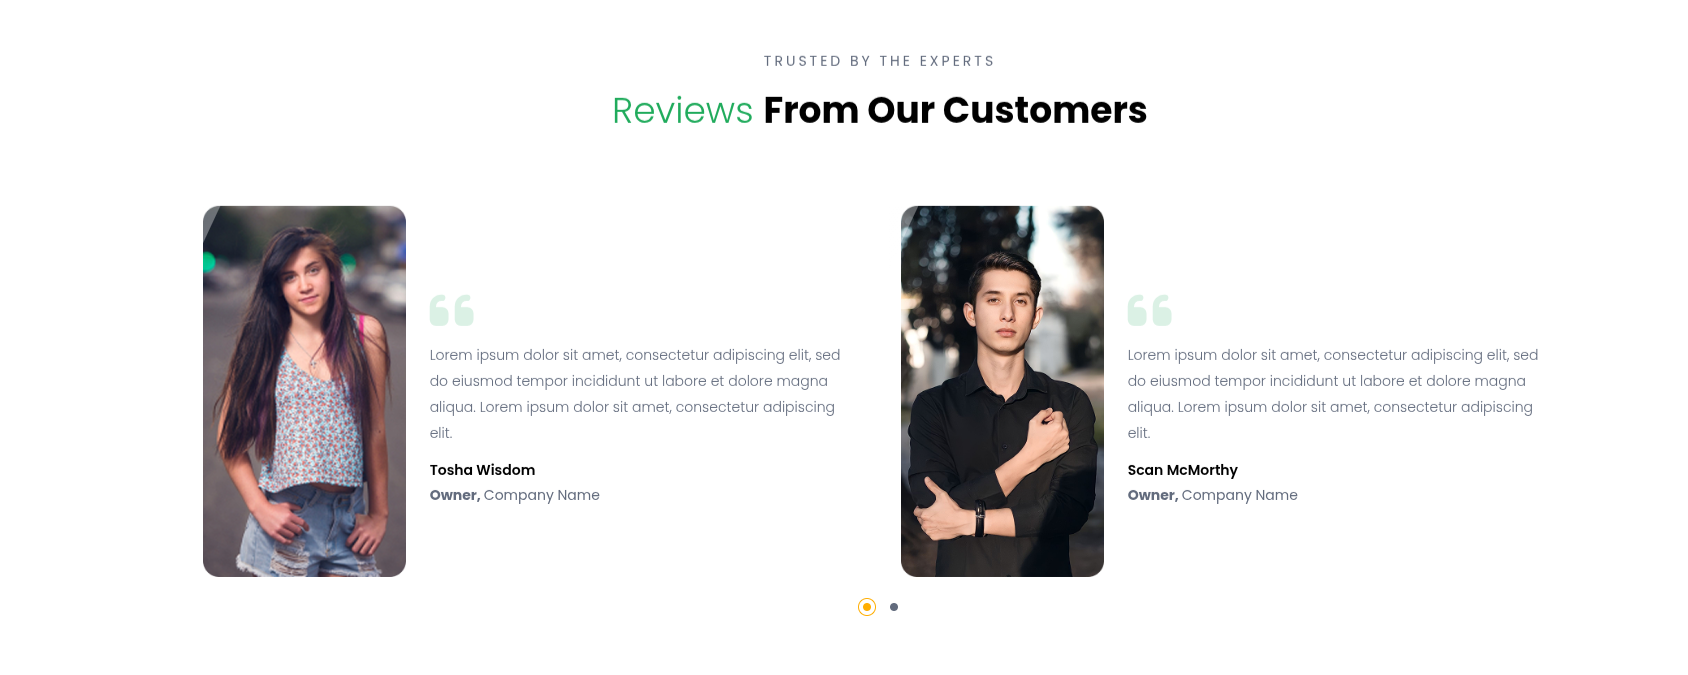
It will be shown in this format in the Testimonials Section.
Part Regarding The Contact Us Development
In reference to the Contact Us Configuration.
It is imperative that we install Contact Form 7 plugin before moving on to the Contact section. following the Contact Form 7 The process of installing a plugin. Contact will be available on the Dashboard. .
Step 1 Open "Dashbord" to change the theme ===> By selecting "Contact" click the "Add New " option.
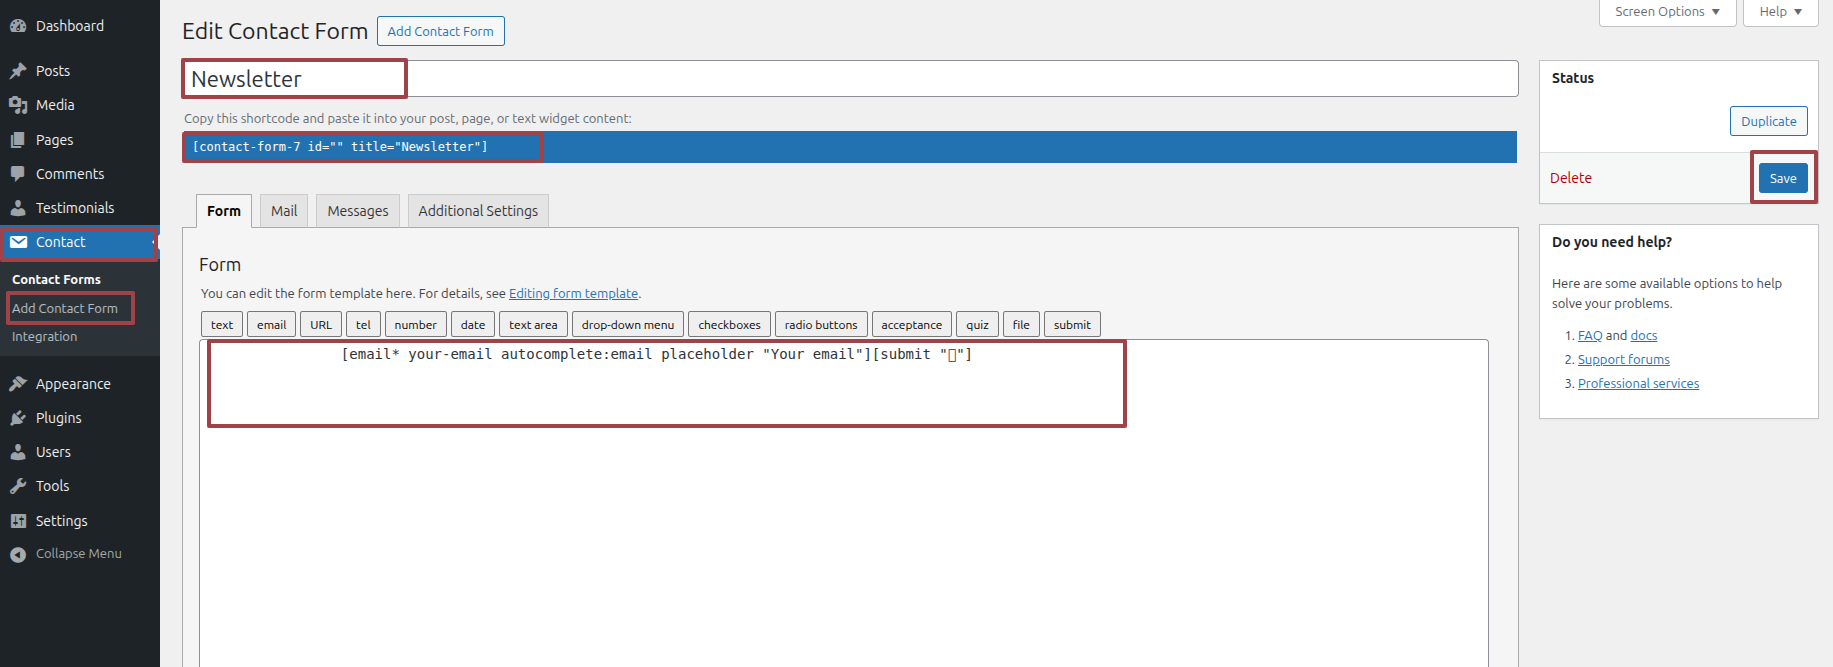
Step 2 Open "Appearance" to change the theme ===> By selecting "Customize" ===> Go now to the "Theme Settings " ===> Move on to "Contact Us"
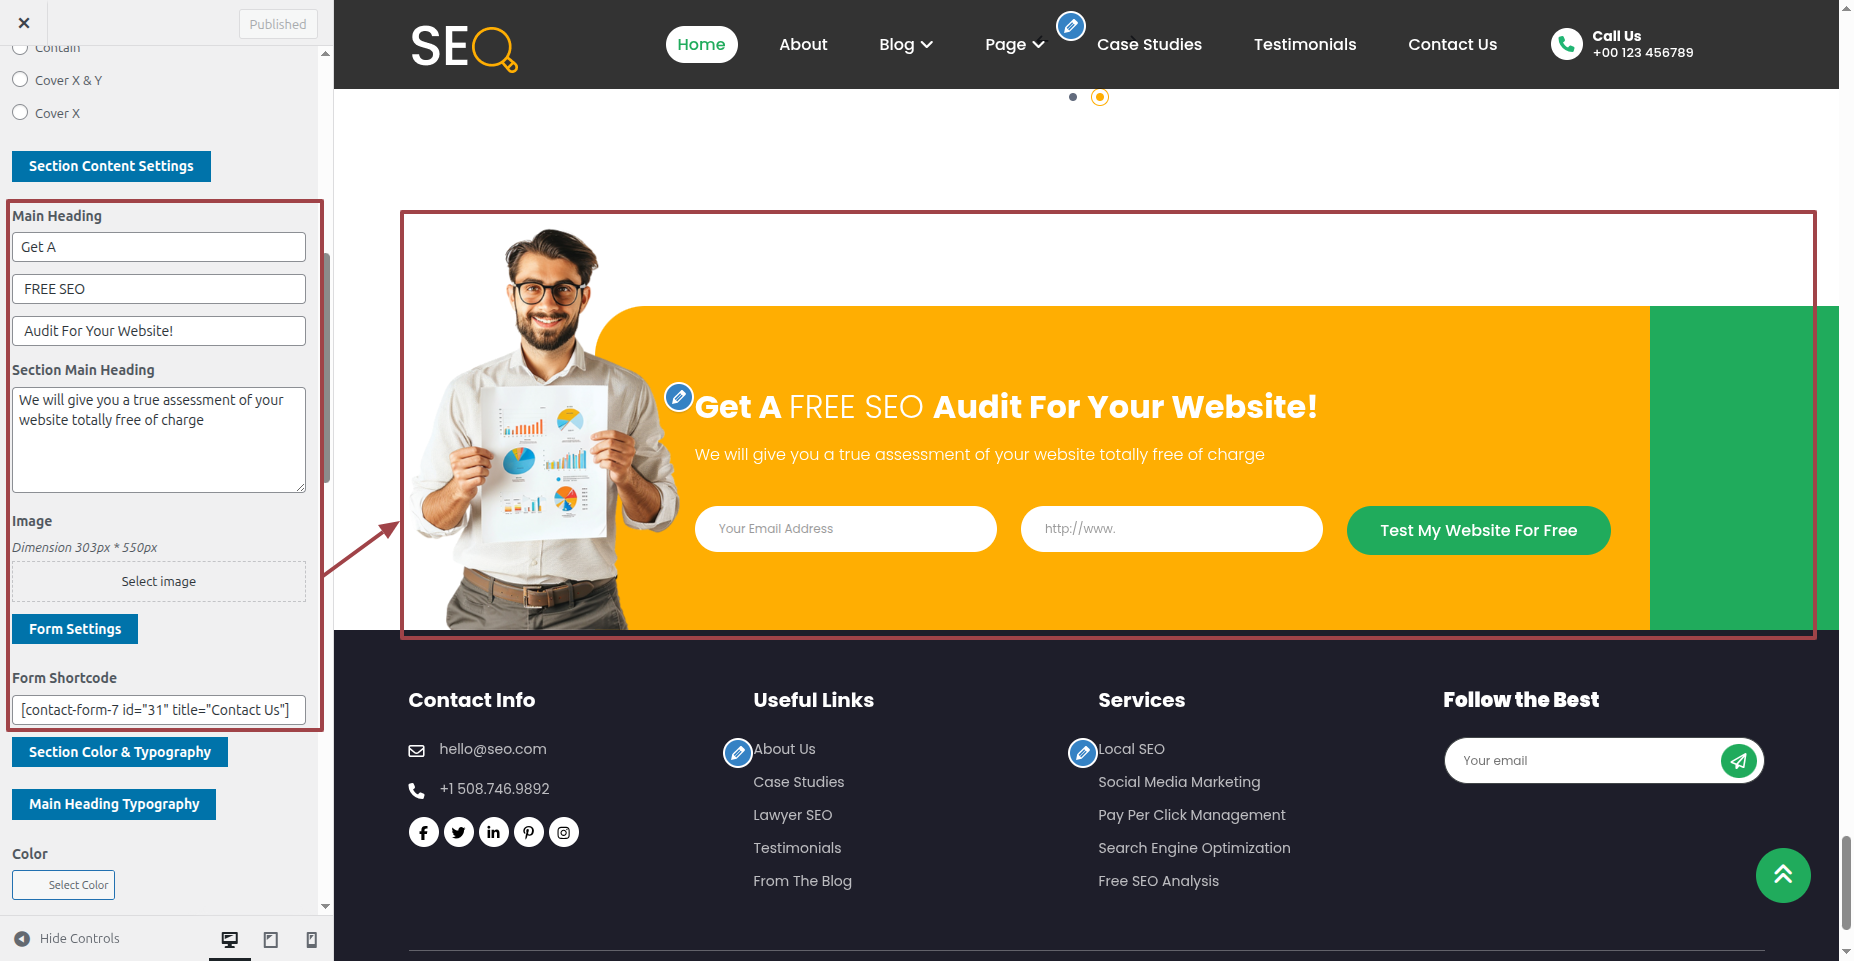
It will be shown in this format in the Contact Us Section.

Part Regarding The Footer Development
In reference to the Footer Configuration.
It is necessary to add Classic widget plugins before you may add widgets.
Step 1 Open "Dashbord" to change the theme ===> By selecting "Appearance" ===> click the "Widgets" option.
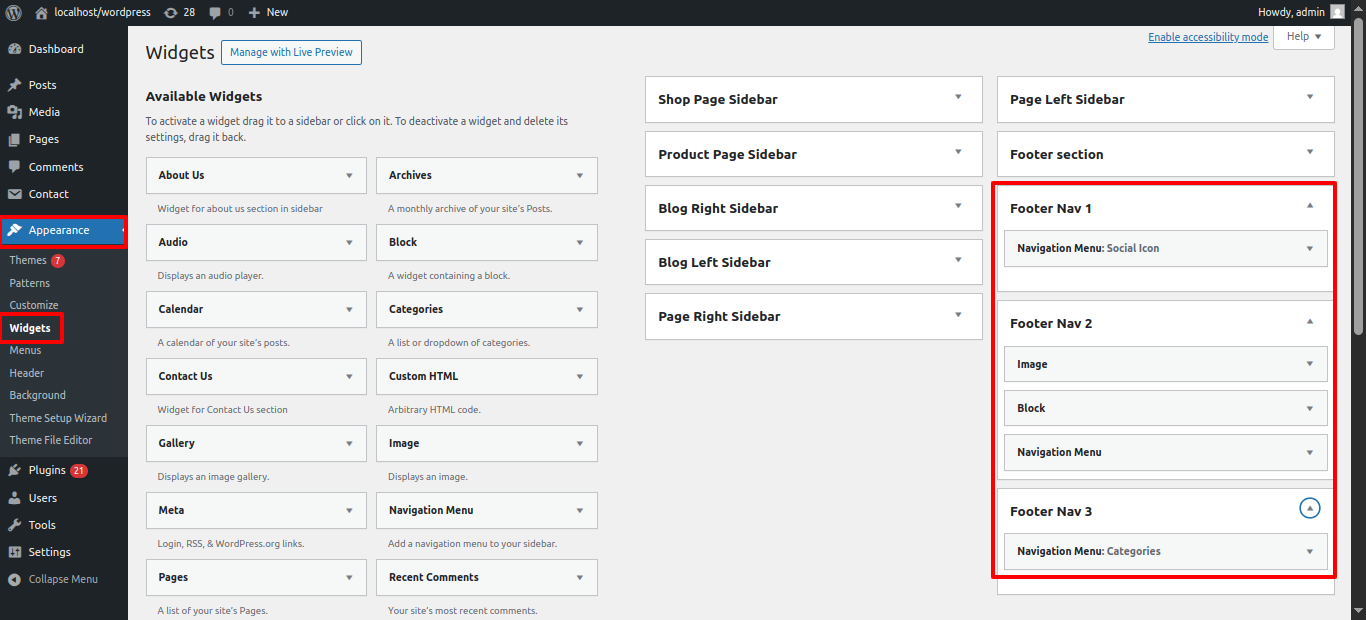
Step 2 Open "Appearance" to change the theme ===> By selecting "Customize" ===> Go now to the "Theme Settings". ===> Move on to "Footer"
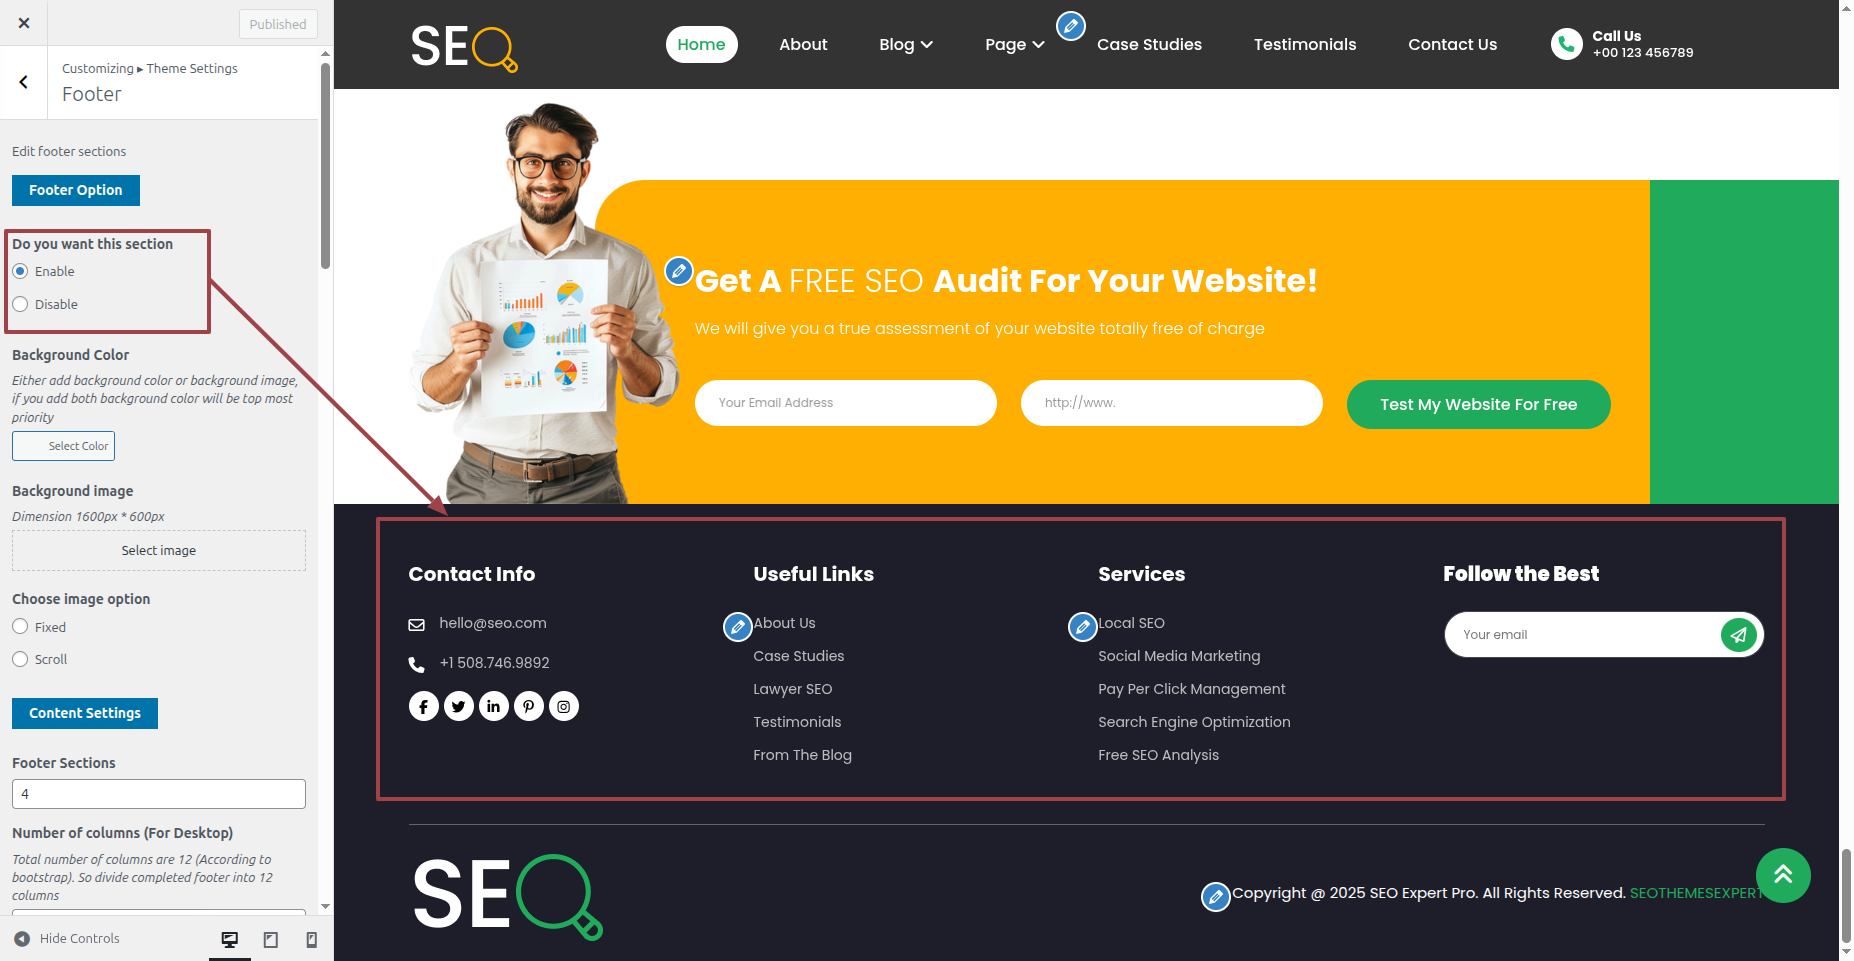
It will be shown in this format in the Footer.

Part Regarding The Copyright Text Development
In reference to the Copyright Text Configuration.
Step 1 Open "Appearance" to change the theme ===> By selecting "Customize" ===> Go now to the "Theme Settings". ===> Move on to "Copyright"
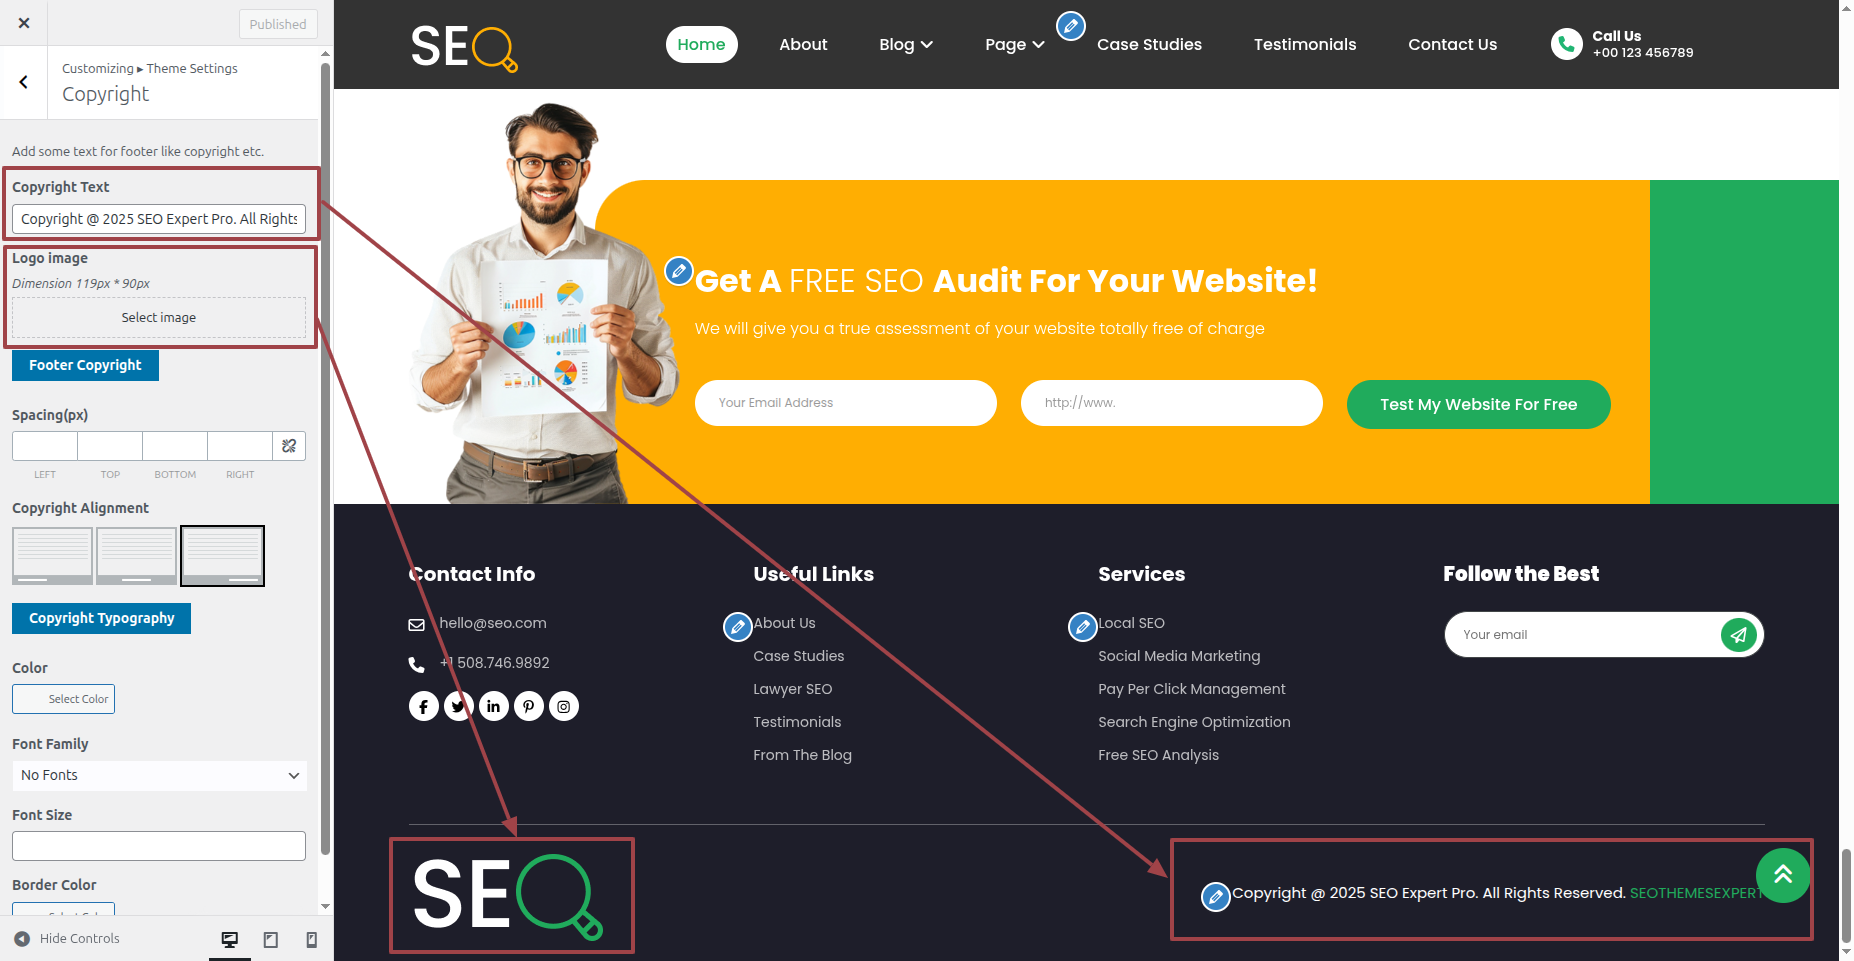
It will be shown in this format in the Copyright Text.

Part Regarding The Contact Development
In reference to the Contact Configuration.
It is imperative that we install Contact Form 7 plugin before moving on to the Contact section. following the Contact Form 7 The process of installing a plugin. Contact will be available on the Dashboard. .
Step 1 Open "Dashbord" to change the theme ===> By selecting "Contact" ===> click the "Add New " option.
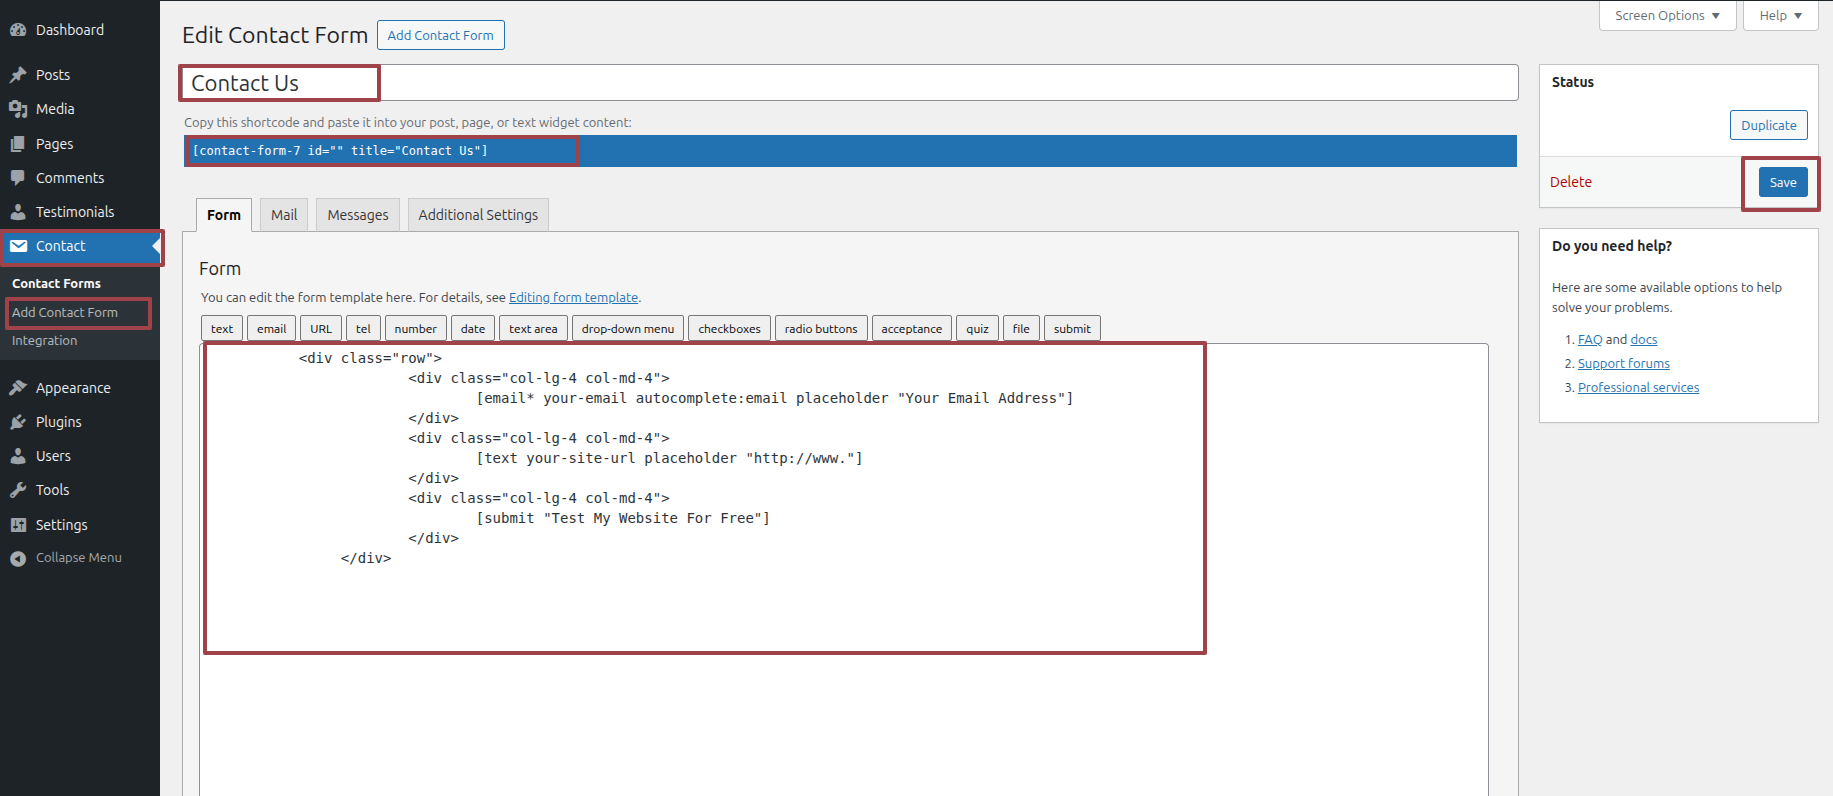
Step 2 Open "Appearance" to change the theme ===> By selecting "Customize" ===> Go now to the "Theme Settings " ===> Move on to "Contact "
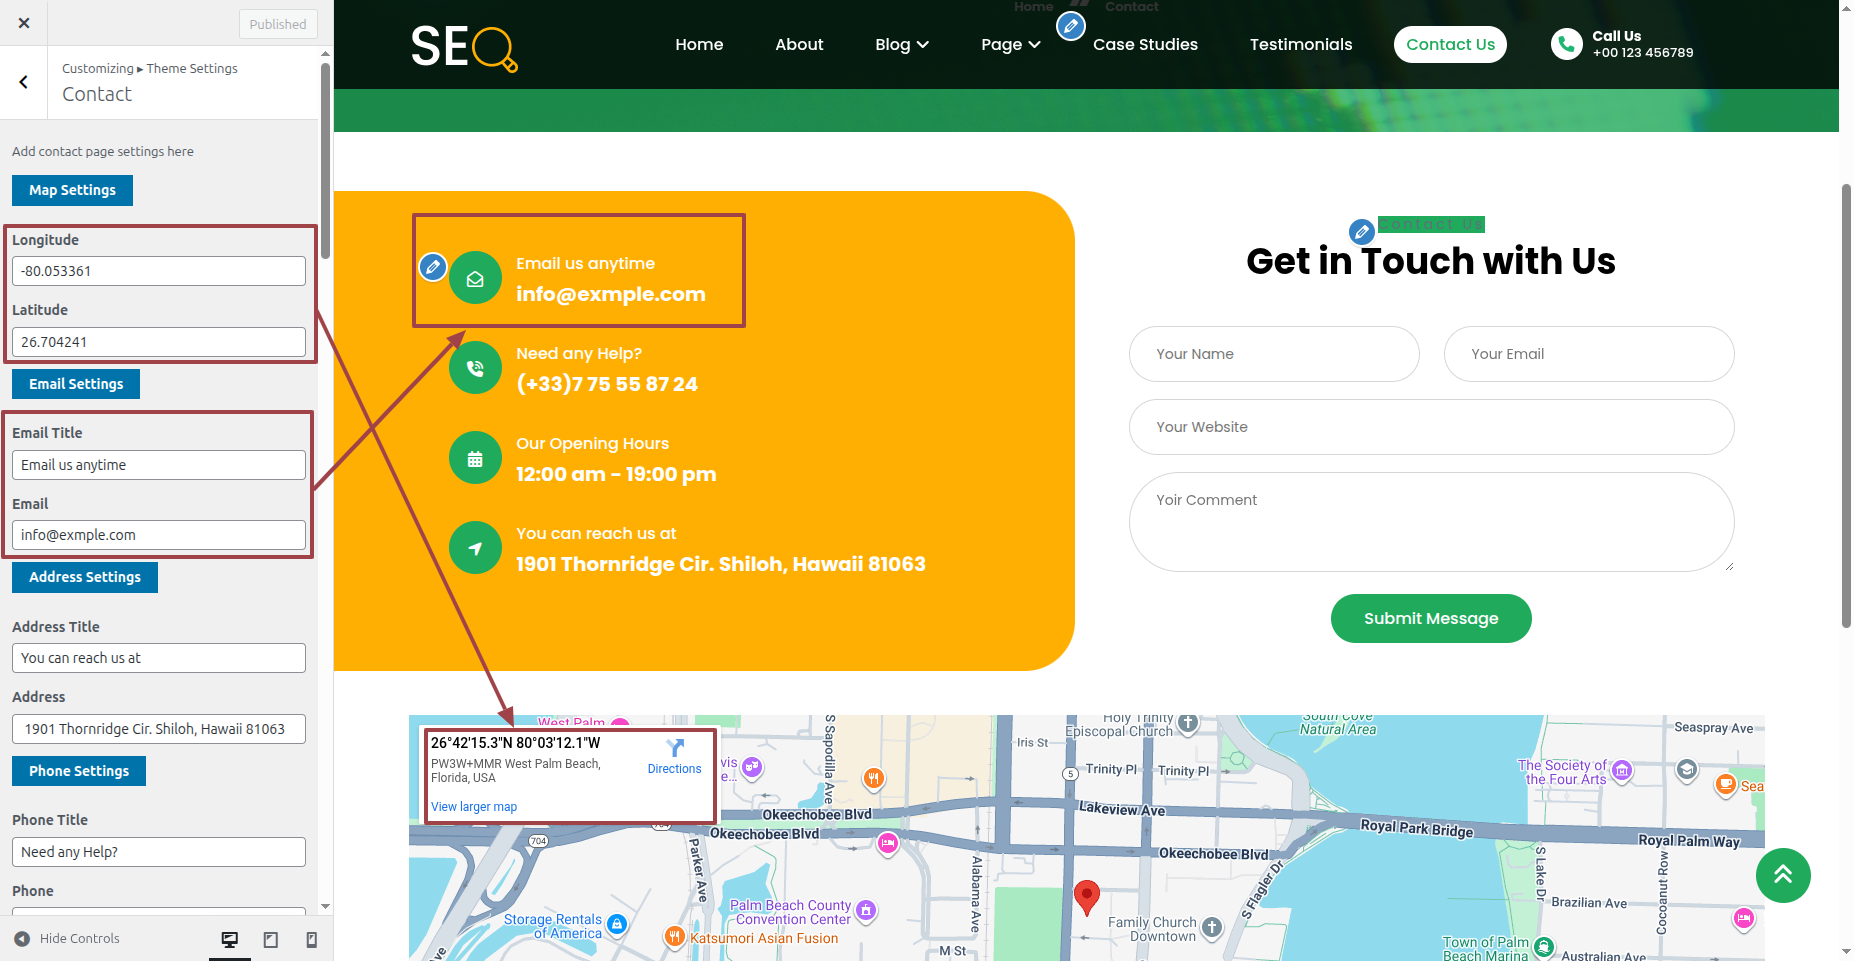
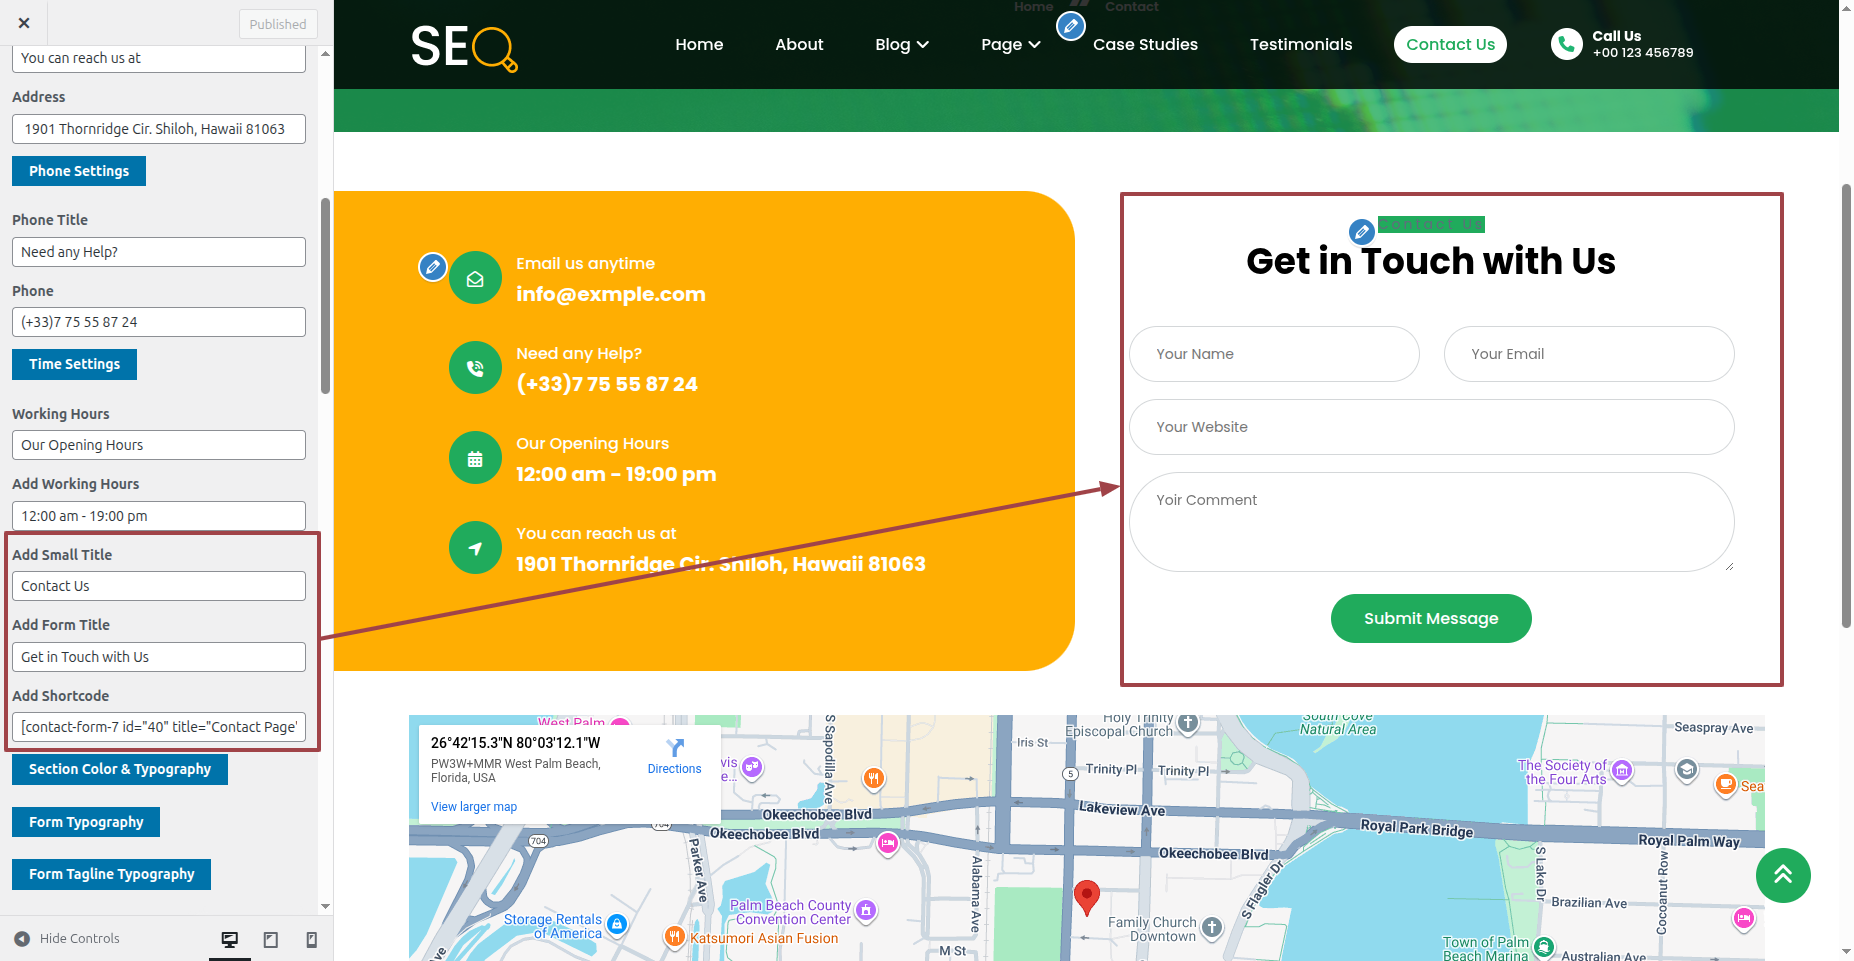
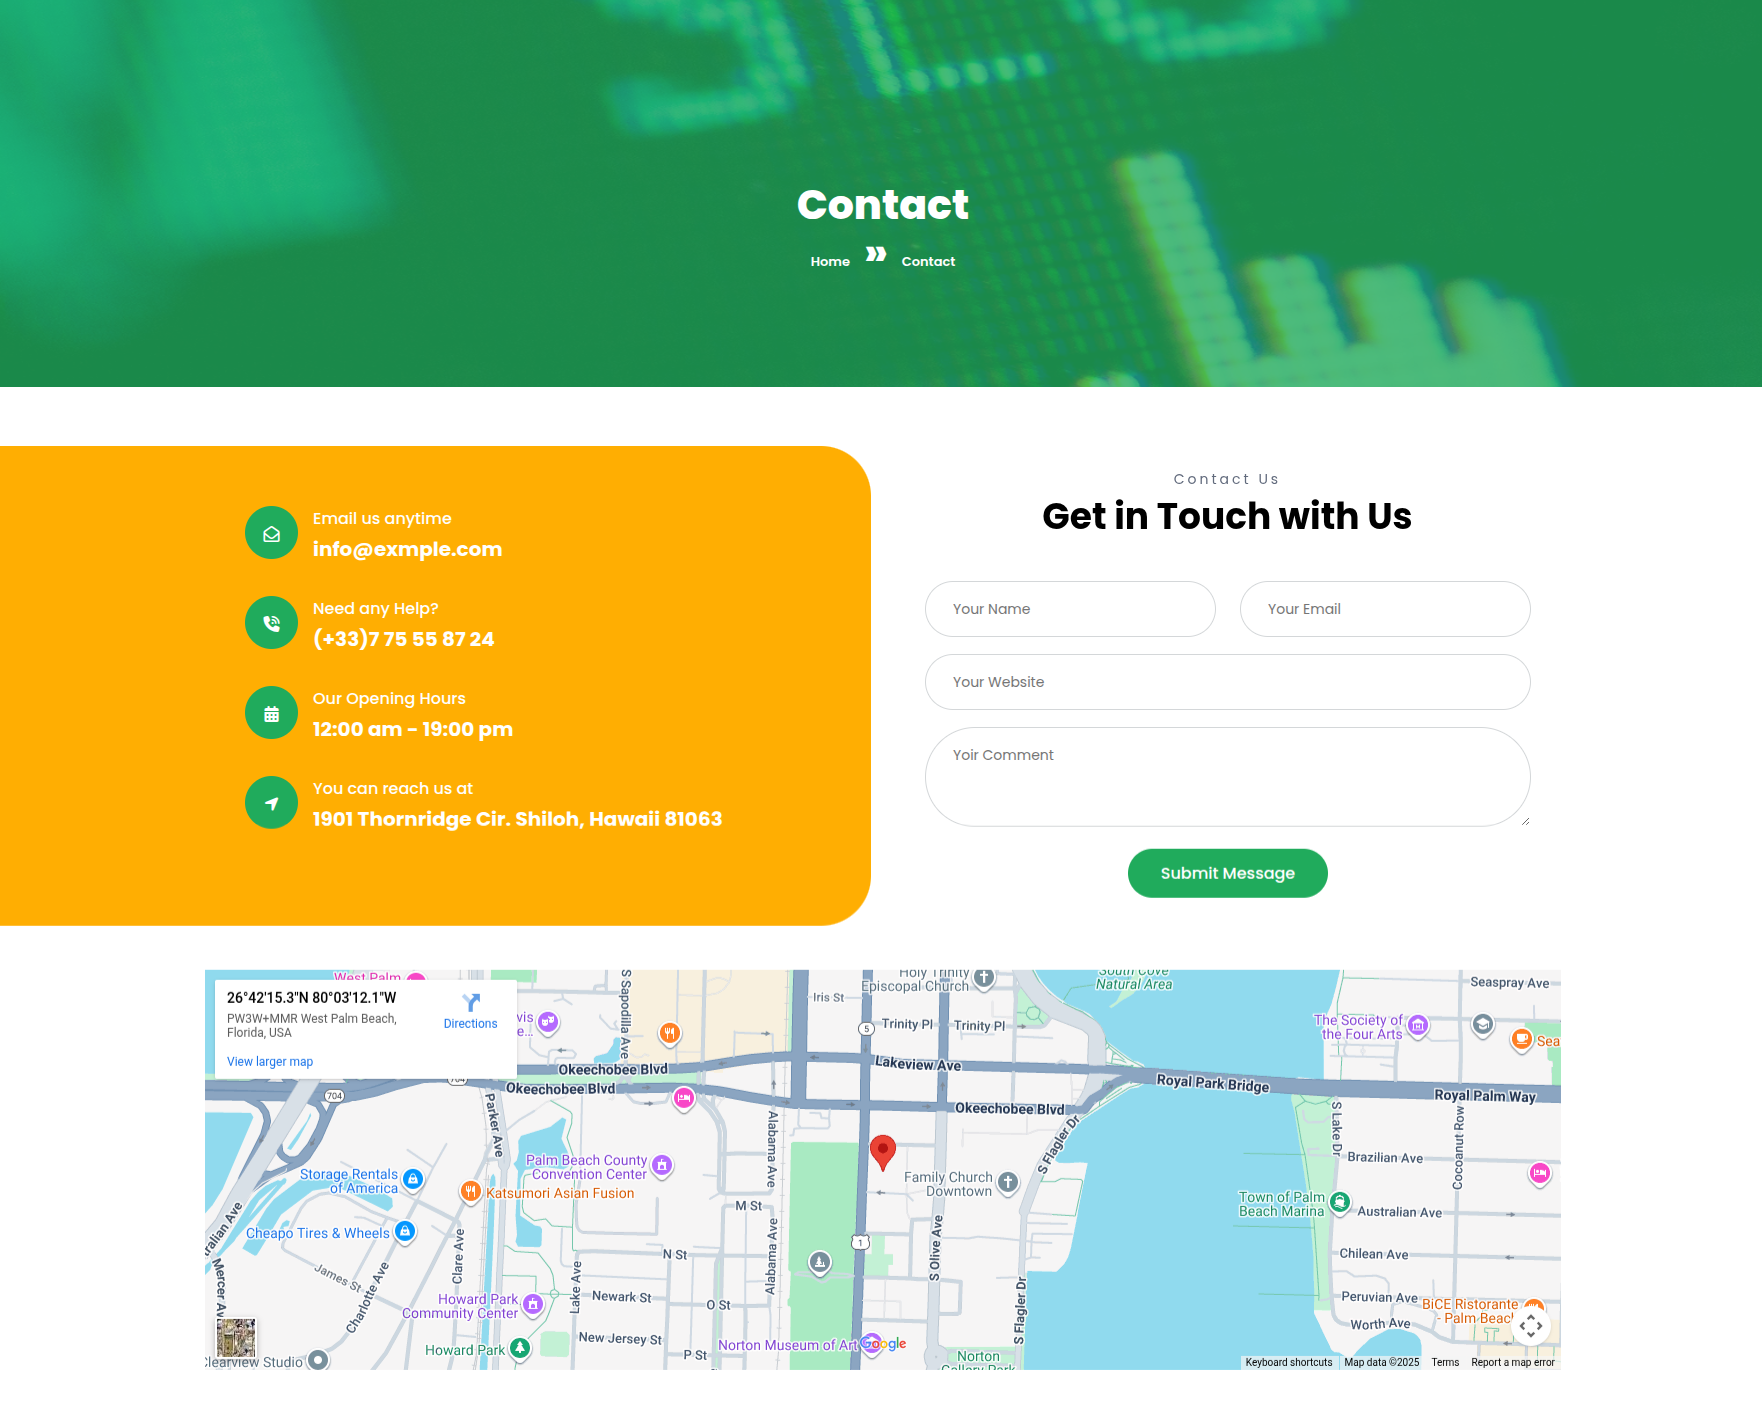
It will be shown in this format in the Contact Section.