
Coffee Tea
Theme Documentation
- By drakearthur
- support: Coffee Tea
What is the installation process for the templates?
There is not much to the process of installing a template.
Step 1 These steps will walk you through installing a theme using WordPress Administrator.
Start by going to your WordPress admin panel.
Open "Appearance" to change your theme's settings. ===> then choose "Themes"
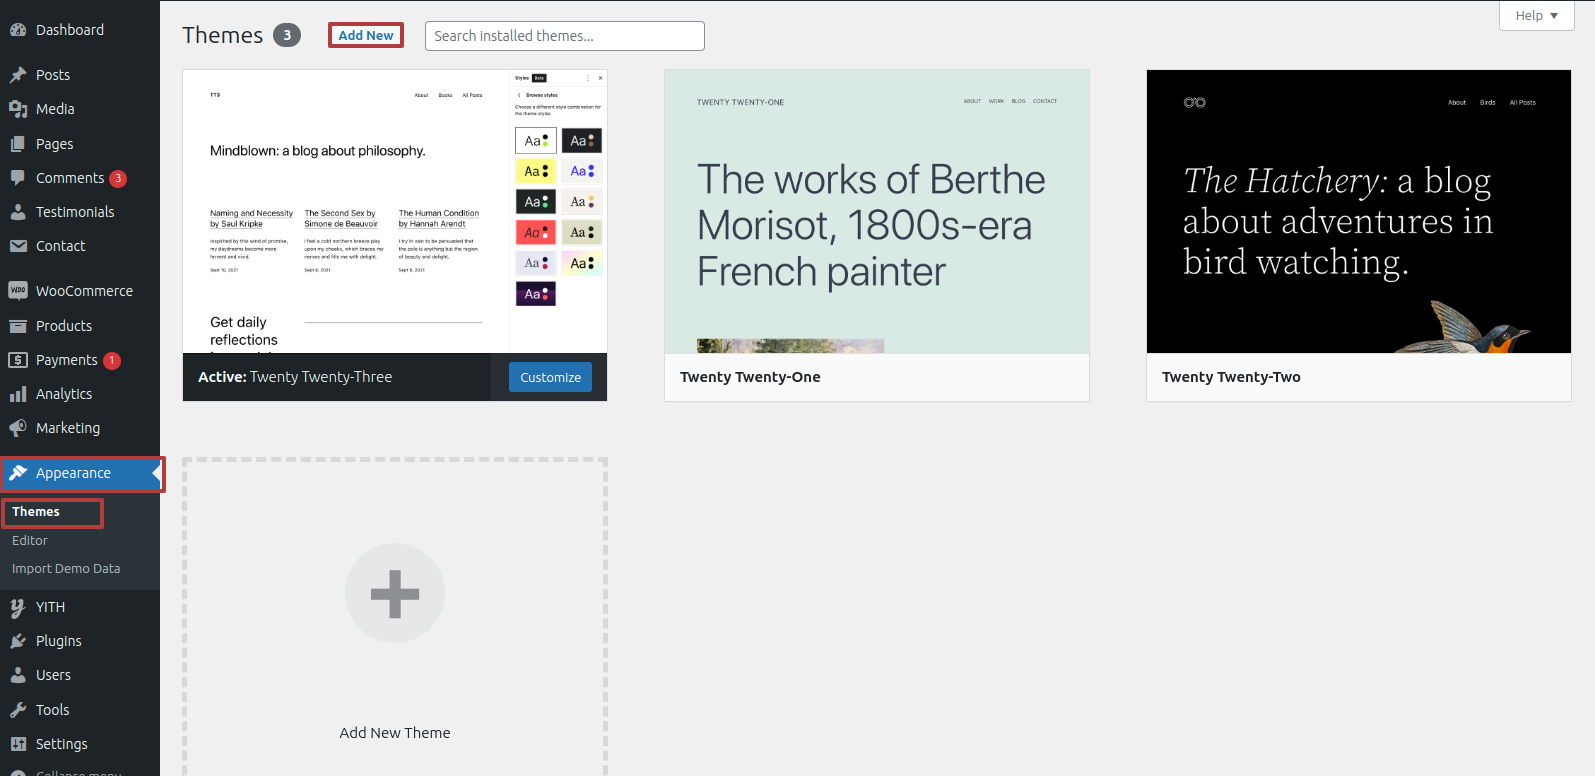
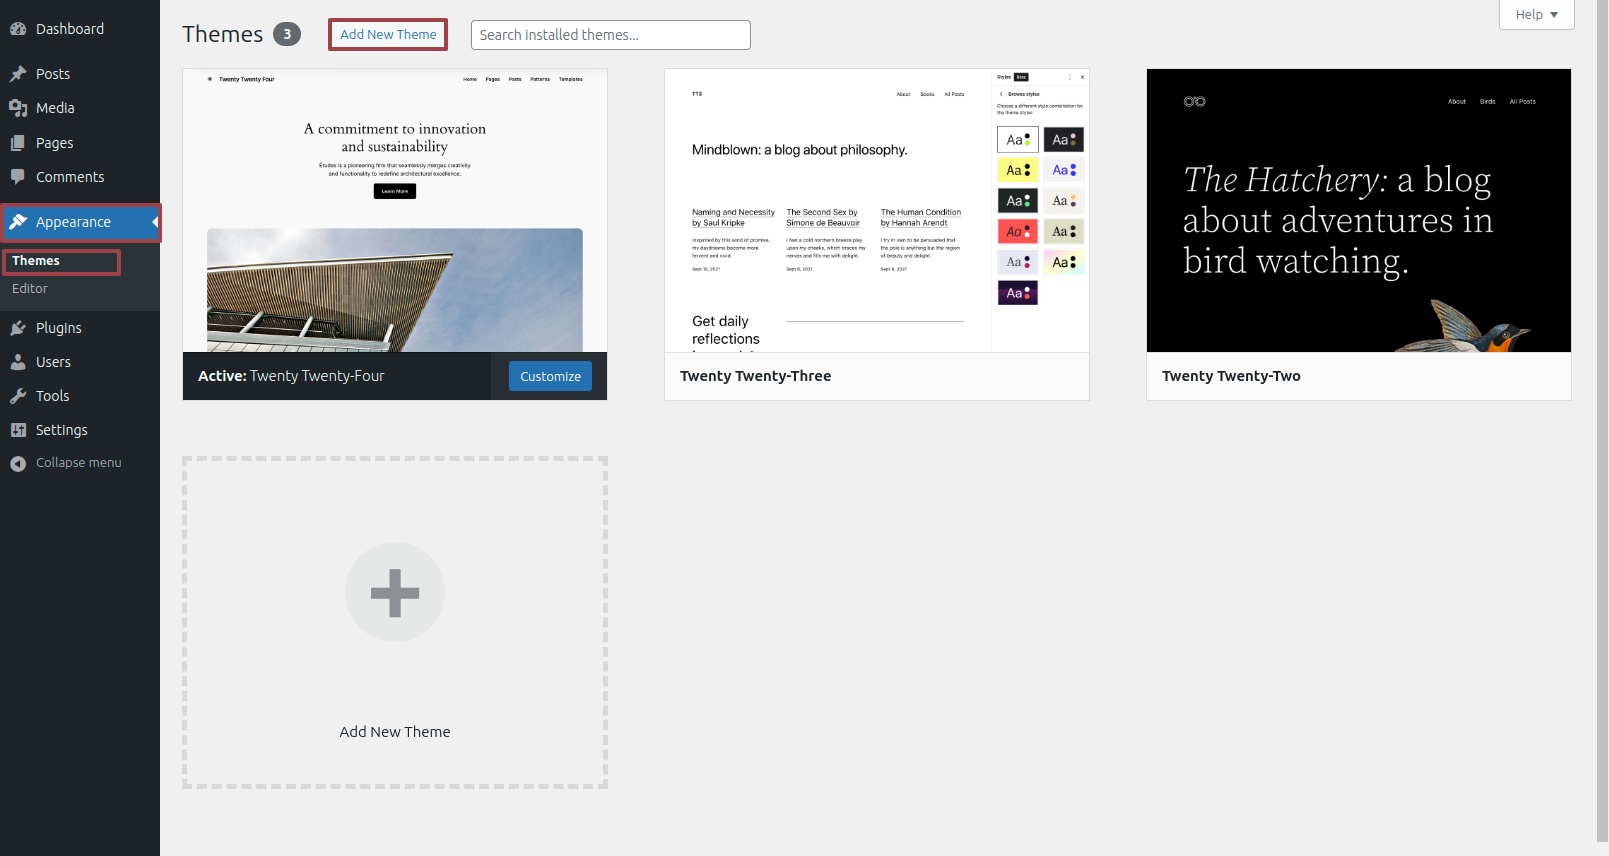
Step 2 After arriving at the themes page,choose"Add New" from the drop-down menu
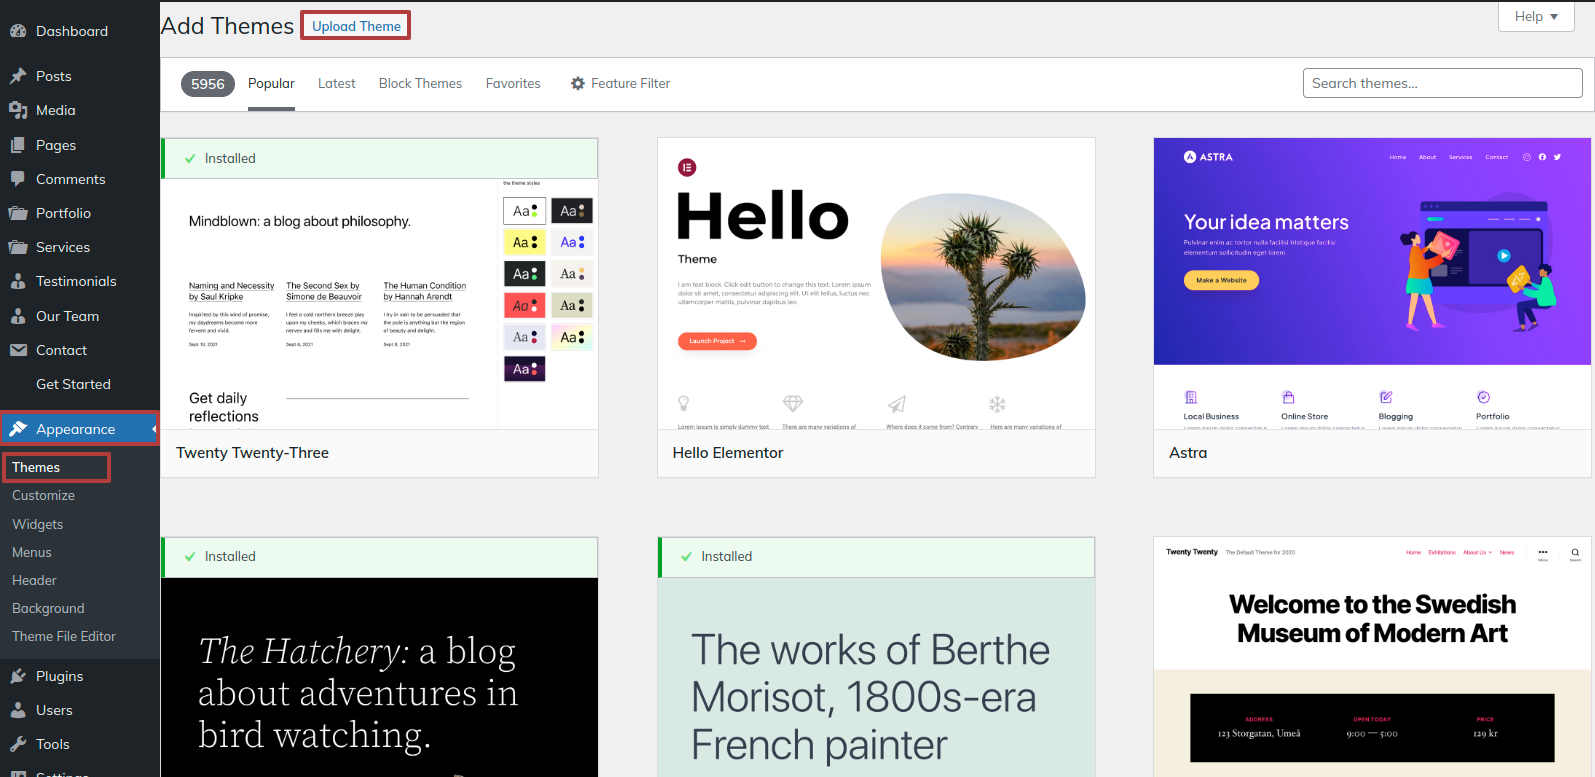
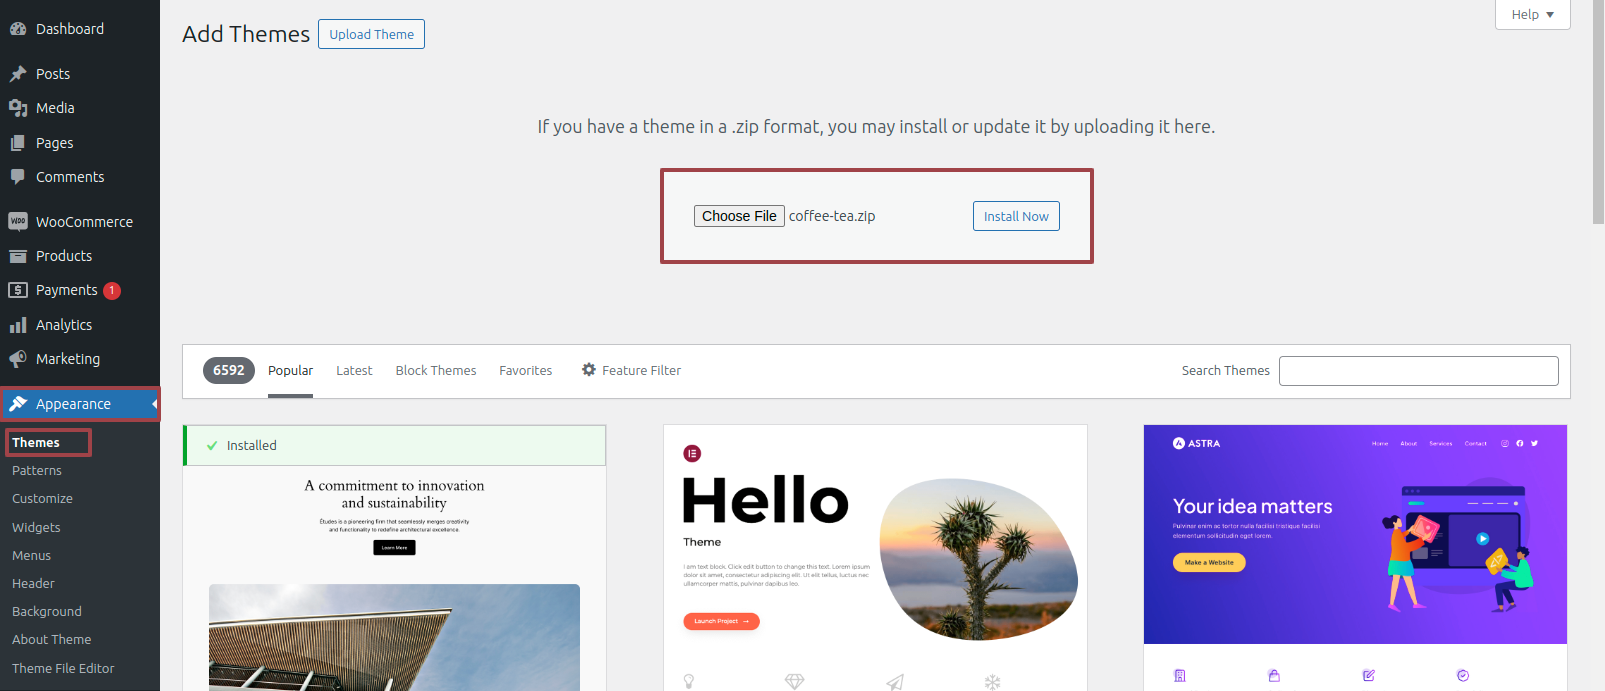
Step 3 It is important to click the "Upload Theme" button.
Step 4 Once you've selected your favourite coffee-tea.zip theme, click the Browse and Now Installing buttons.
WordPress will now install the preferred theme and provide you a success message along with a preview of the theme that you may activate.
Guidelines For Install Demo Importer
Your full website can be built up quickly and easily if you use demo content so you have to follow the steps given below.
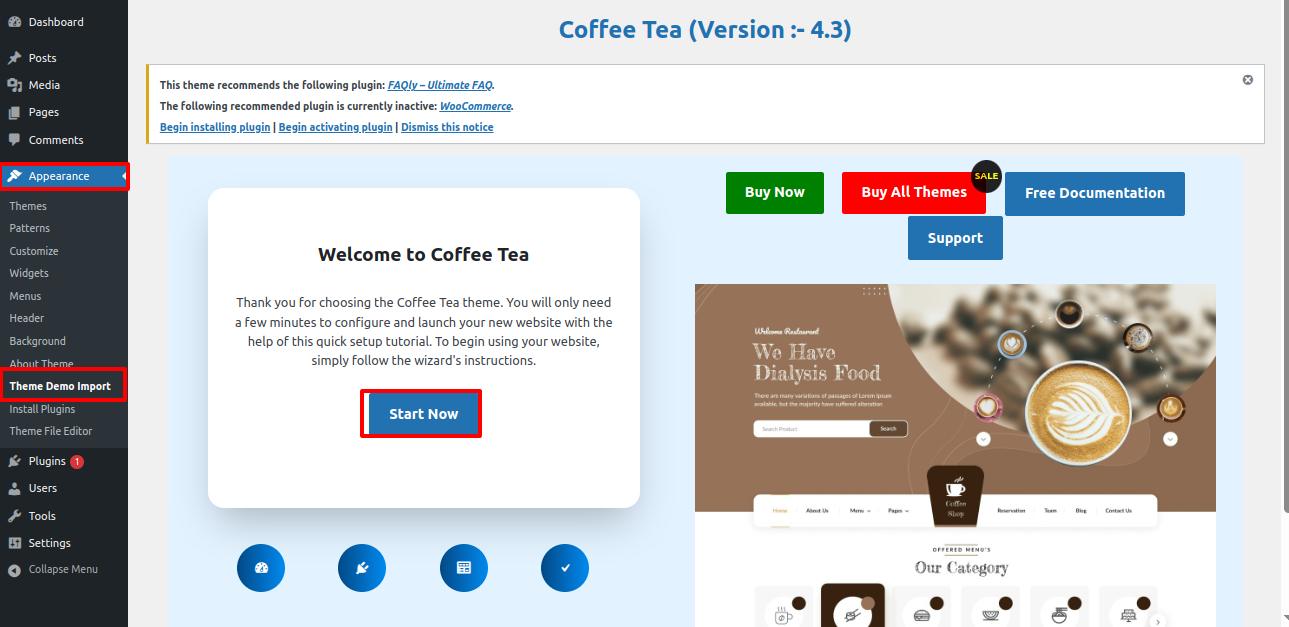
Step 1 Open "Dashbord" ===> By selecting "Appearance" ===> Go now to the "Theme Demo Import" ===> clicking "Start Now"is required.
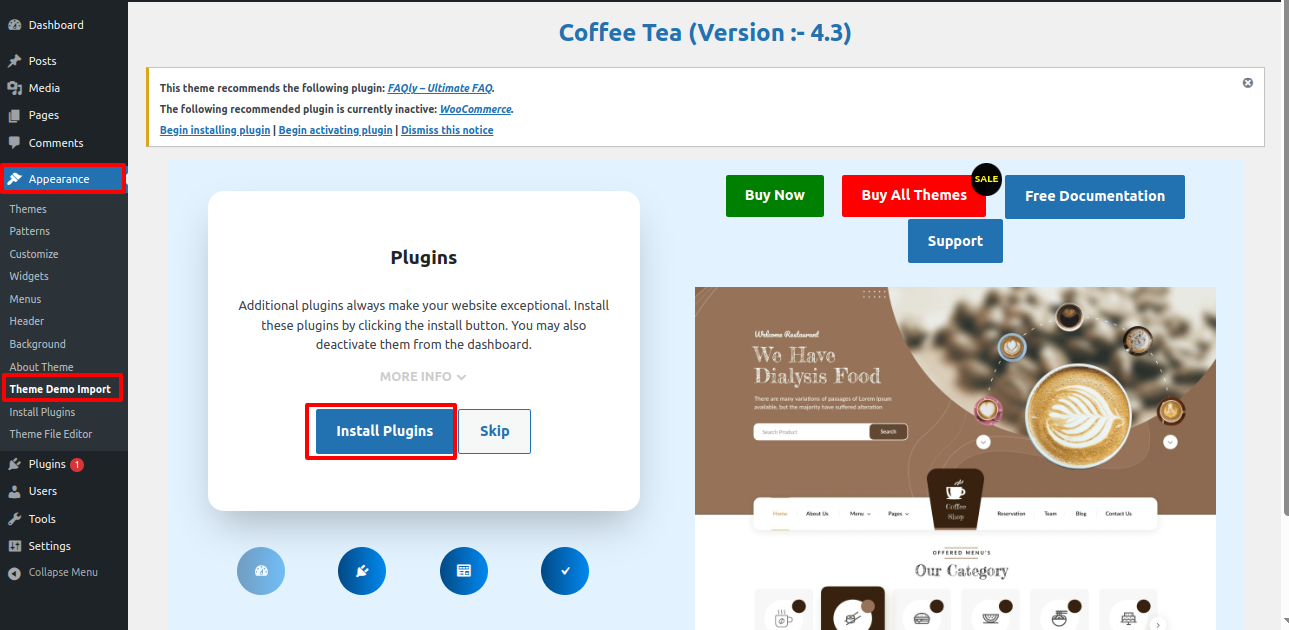
Step 2 Press the "Install Plugins" button to install the required plugins.
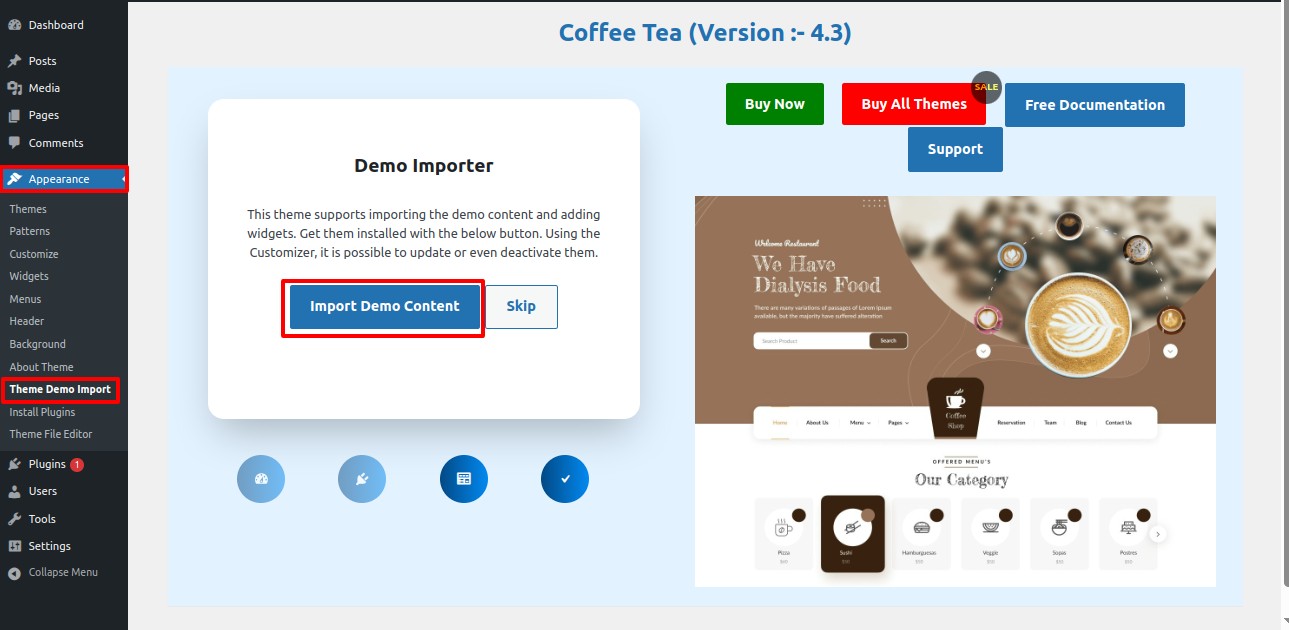
Step 3 Press the "Import Demo Content" button to import the demo.
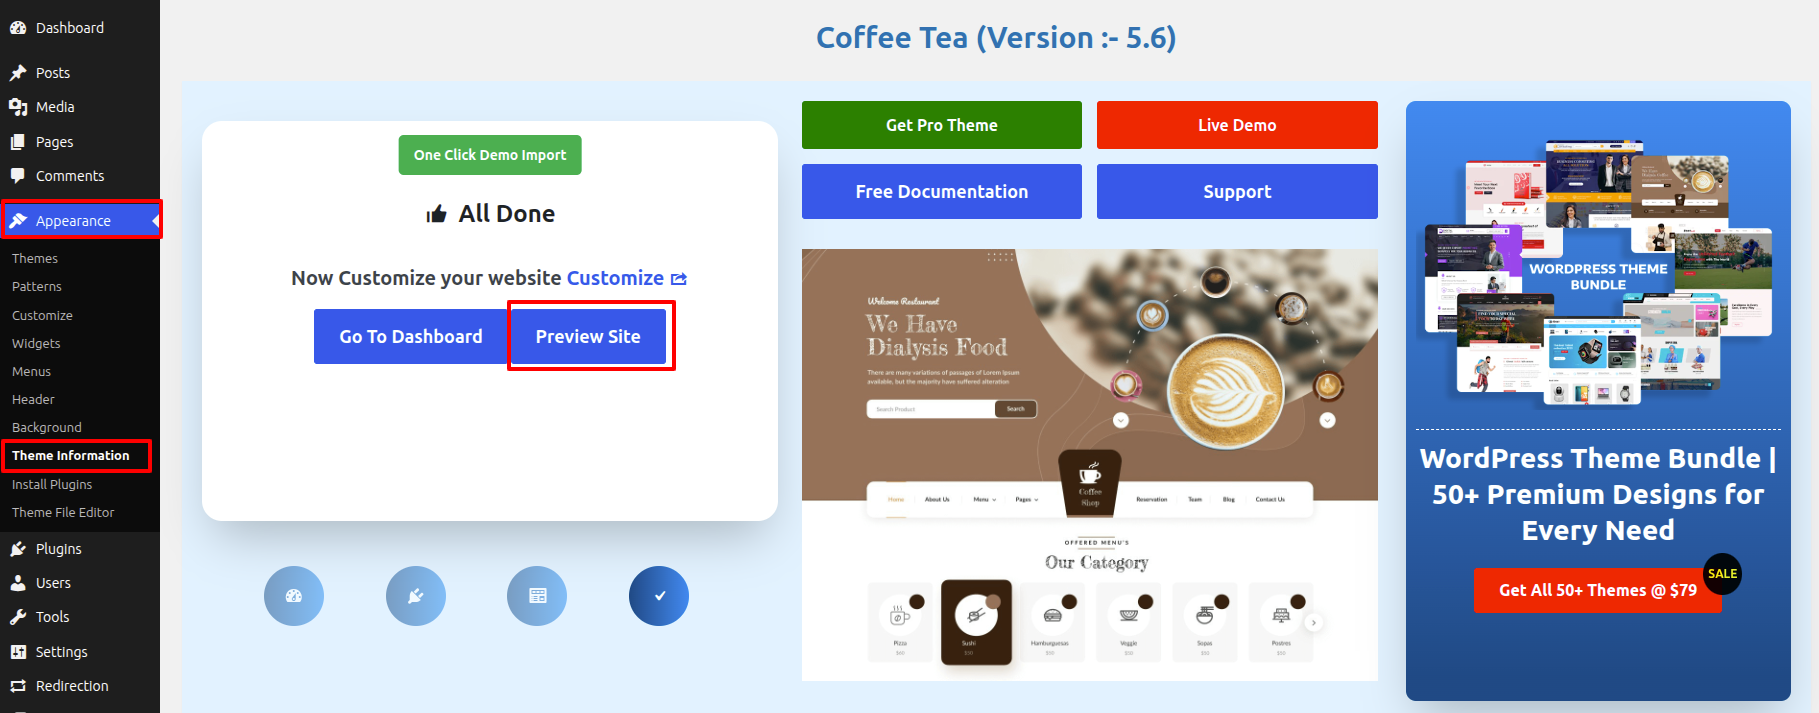
Step 4 Press the "Preview Site" button to view the homepage.
It will be shown in this format in the Frontpage Section.
In what way may I set up Navigation?
Section Concerning the Creation of the Navigation
Step 1 To begin creating a new page, navigate to the "Dashbord",after selecting "Pages", click the "Add new" option.
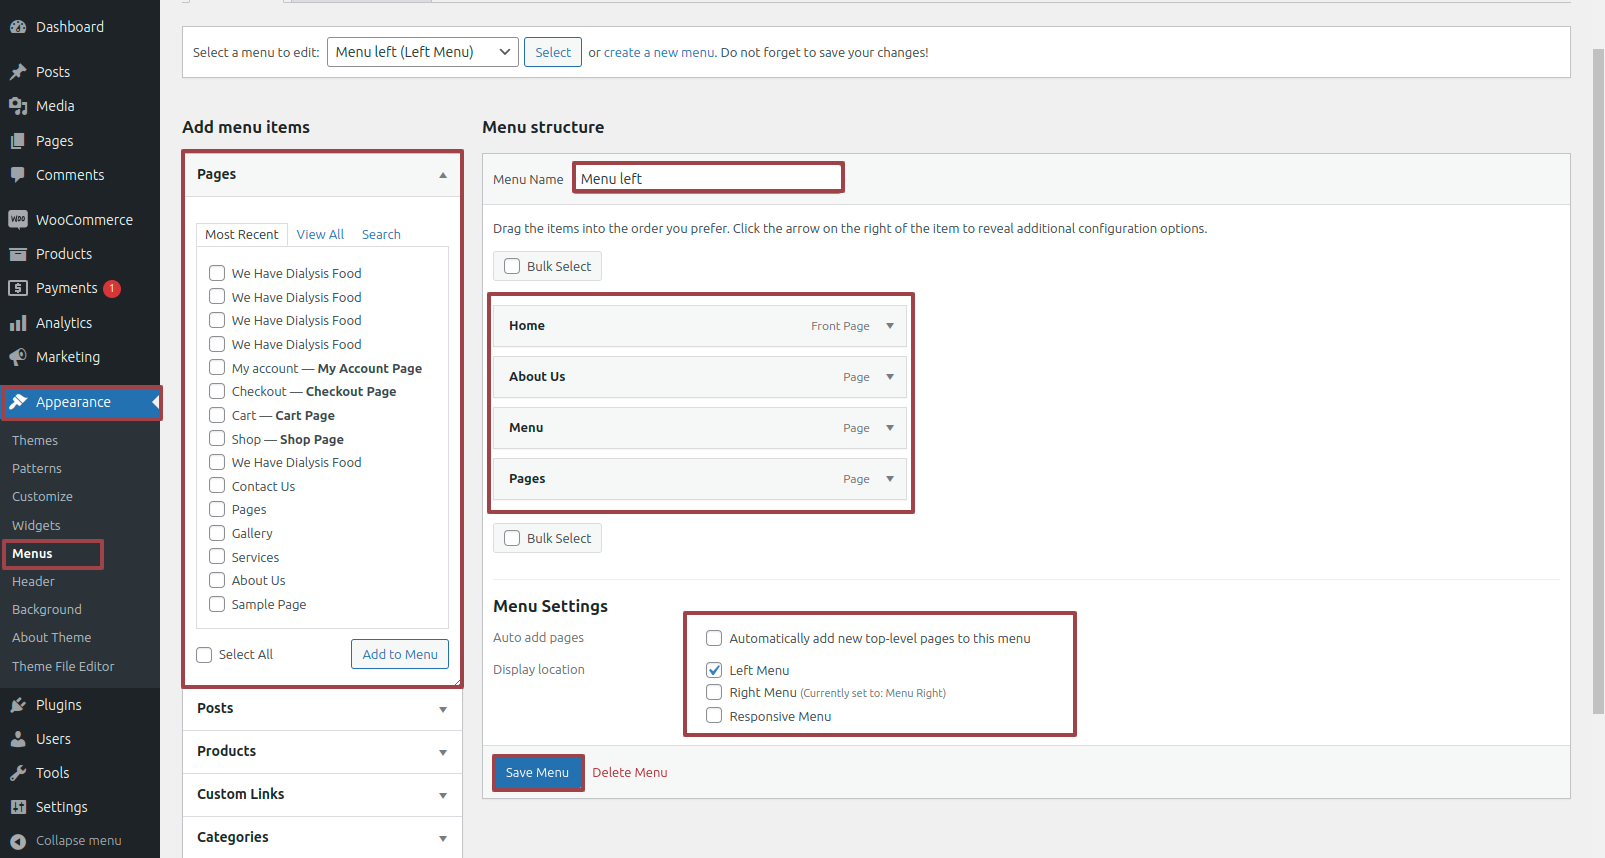
Step 2 Navigate to "Appearance" and choose Menu.
Step 3 It is possible to construct a menu by choosing New Menu.
Step 4 After naming the menu, click the Save button located in the Menu Name field.
Step 5 After creating the menu, select the desired pages by checking the boxes next to them. To rearrange the parts, you have to drag the relevant section.
Step 6 prefer where the footer menu will appear using the checkboxes.
Step 7 If the Primary Menu option is checked, Menu Stars will show up on the header.
To get a better idea, look at this screenshot.
Part Regarding Creating the Site Identity
Including the header with the logo.
Step 1 Open "Appearance" ===> By selecting "Customize" ===> Go now to the "header" ===> Move on to "Site Identity."
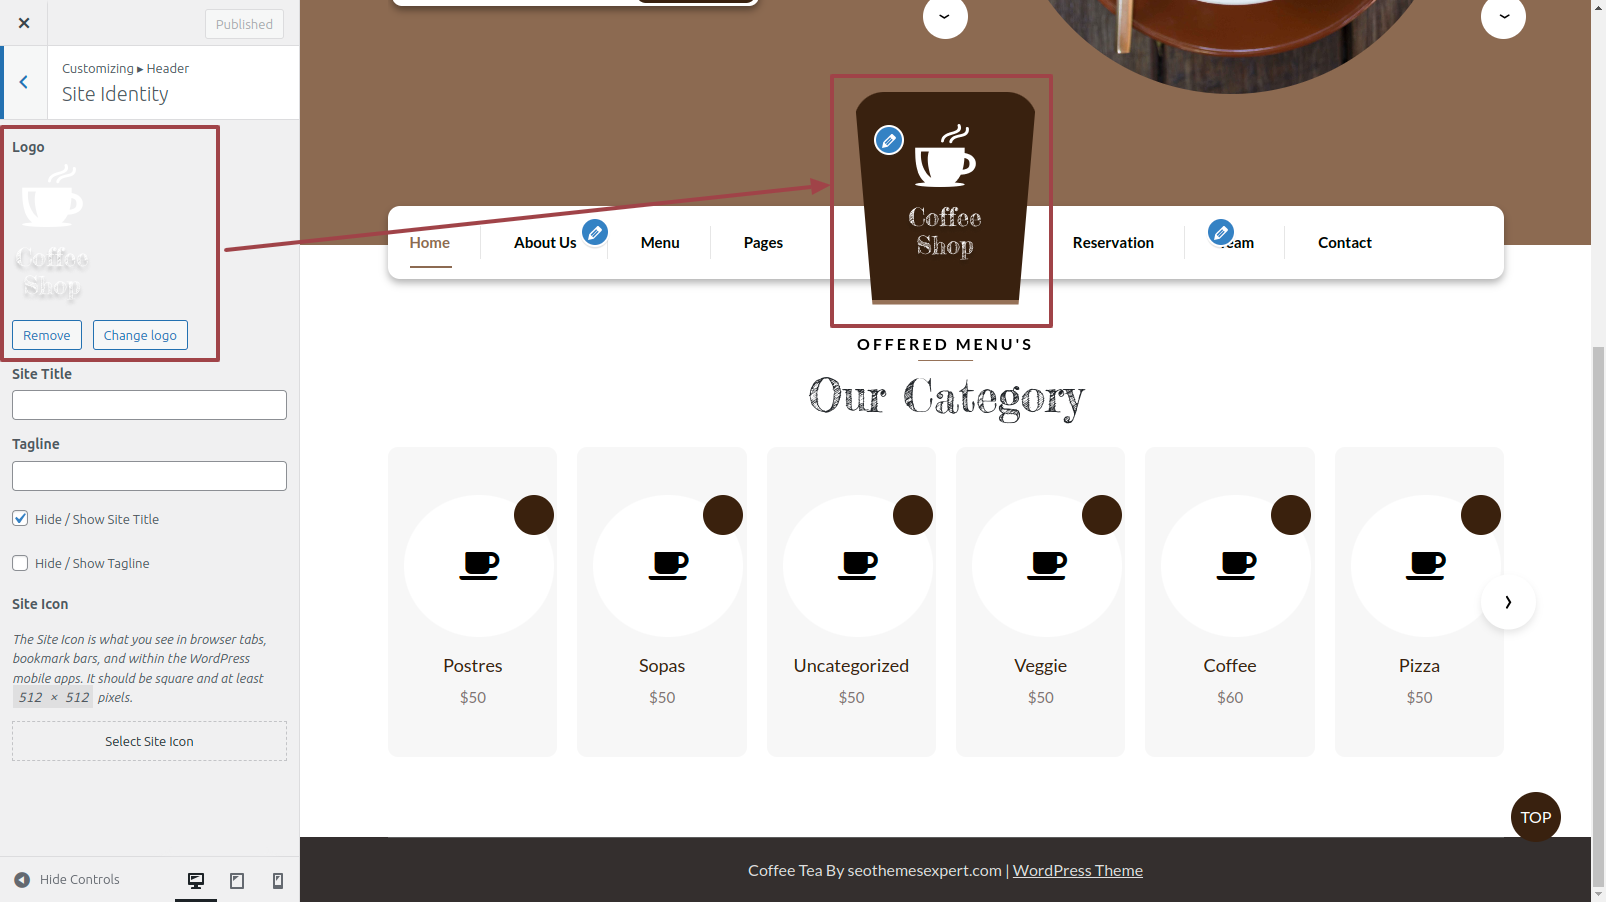
It will be shown in this format in the Header Section.

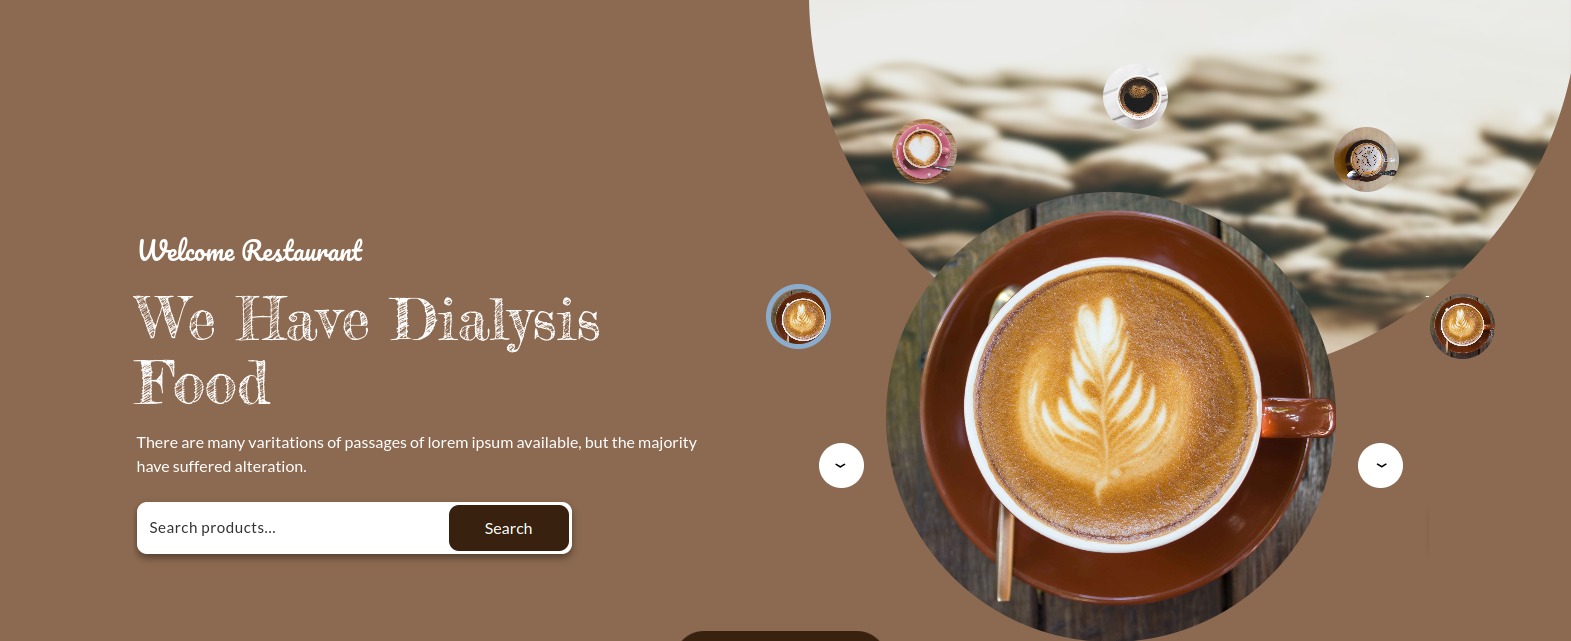
Part Regarding The Slider Development
In reference to the Slider Configuration.
Step 1 Open "Dashbord" ===> By selecting "Page" ===> Go now to the "Add New."
Step 2 Open "Appearance" ===> By selecting "Customize" ===> Go now to the "Frontpage Section" ===> Move on to "Slider Section."

It will be shown in this format in the Slider Section.
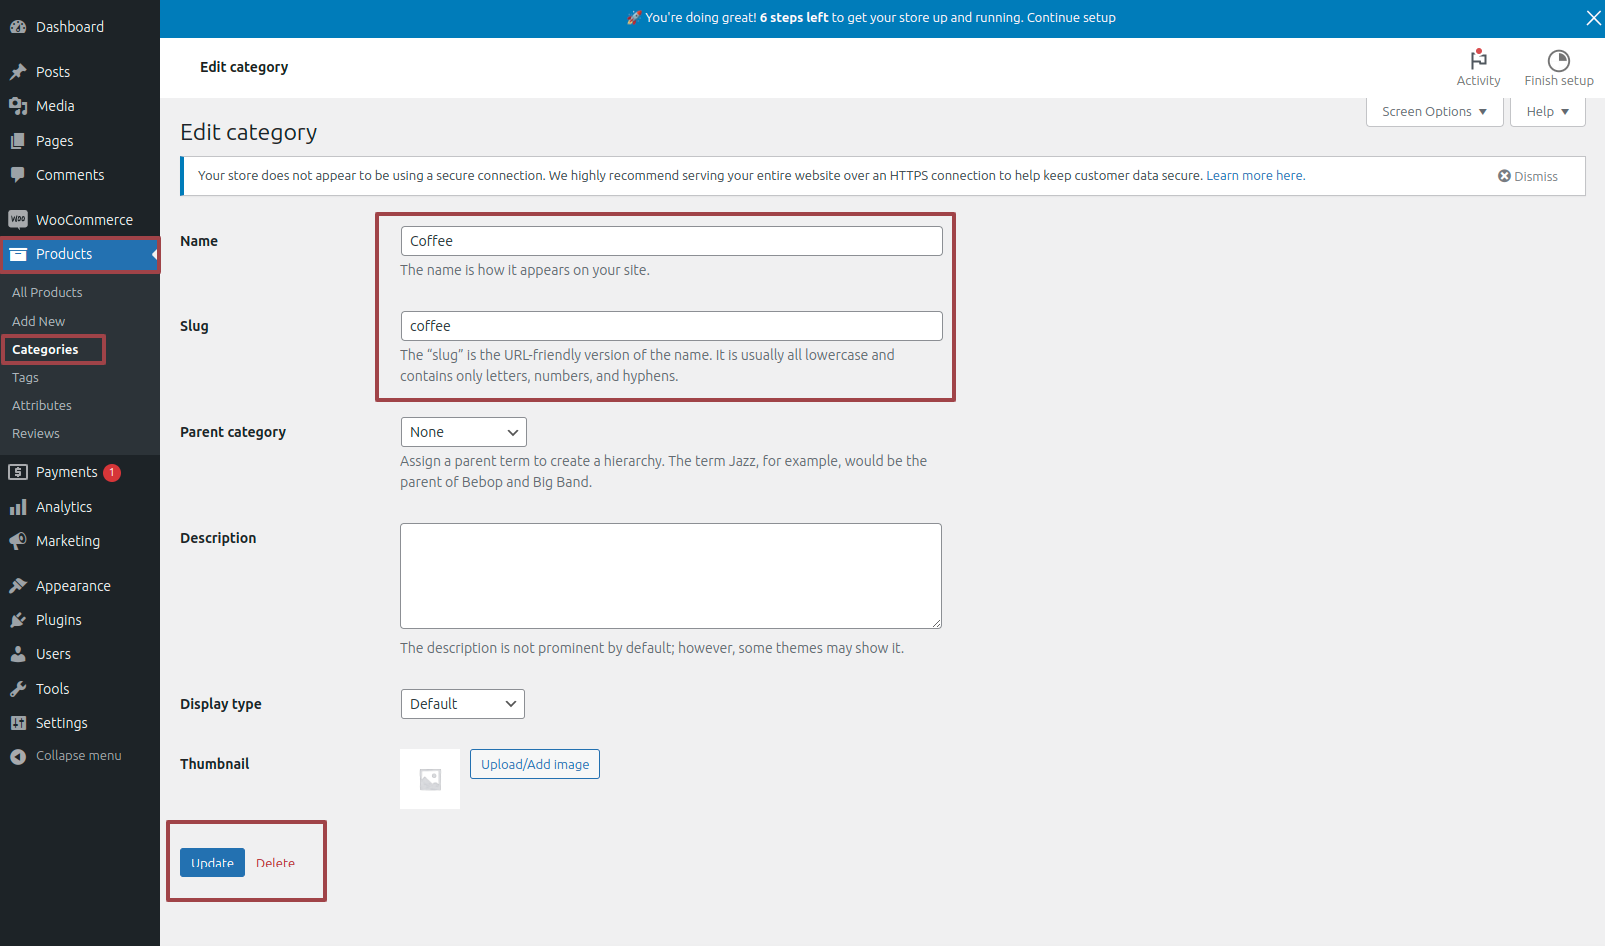
Part Regarding The Our Category Development
In reference to the Our Category Configuration.
It is imperative that we install WooCommerce plugin before moving on to the Our Category section. following the WooCommerce The process of installing a plugin. Products will be available on the Dashbord.
Step 1 Open "Dashbord" ===> By selecting "Products" ===> Go now to the "Categories"
Step 2 Open "Appearance" ===> By selecting "Customize" ===> Go now to the "Frontpage Section" ===> Move on to "Our Category Section"
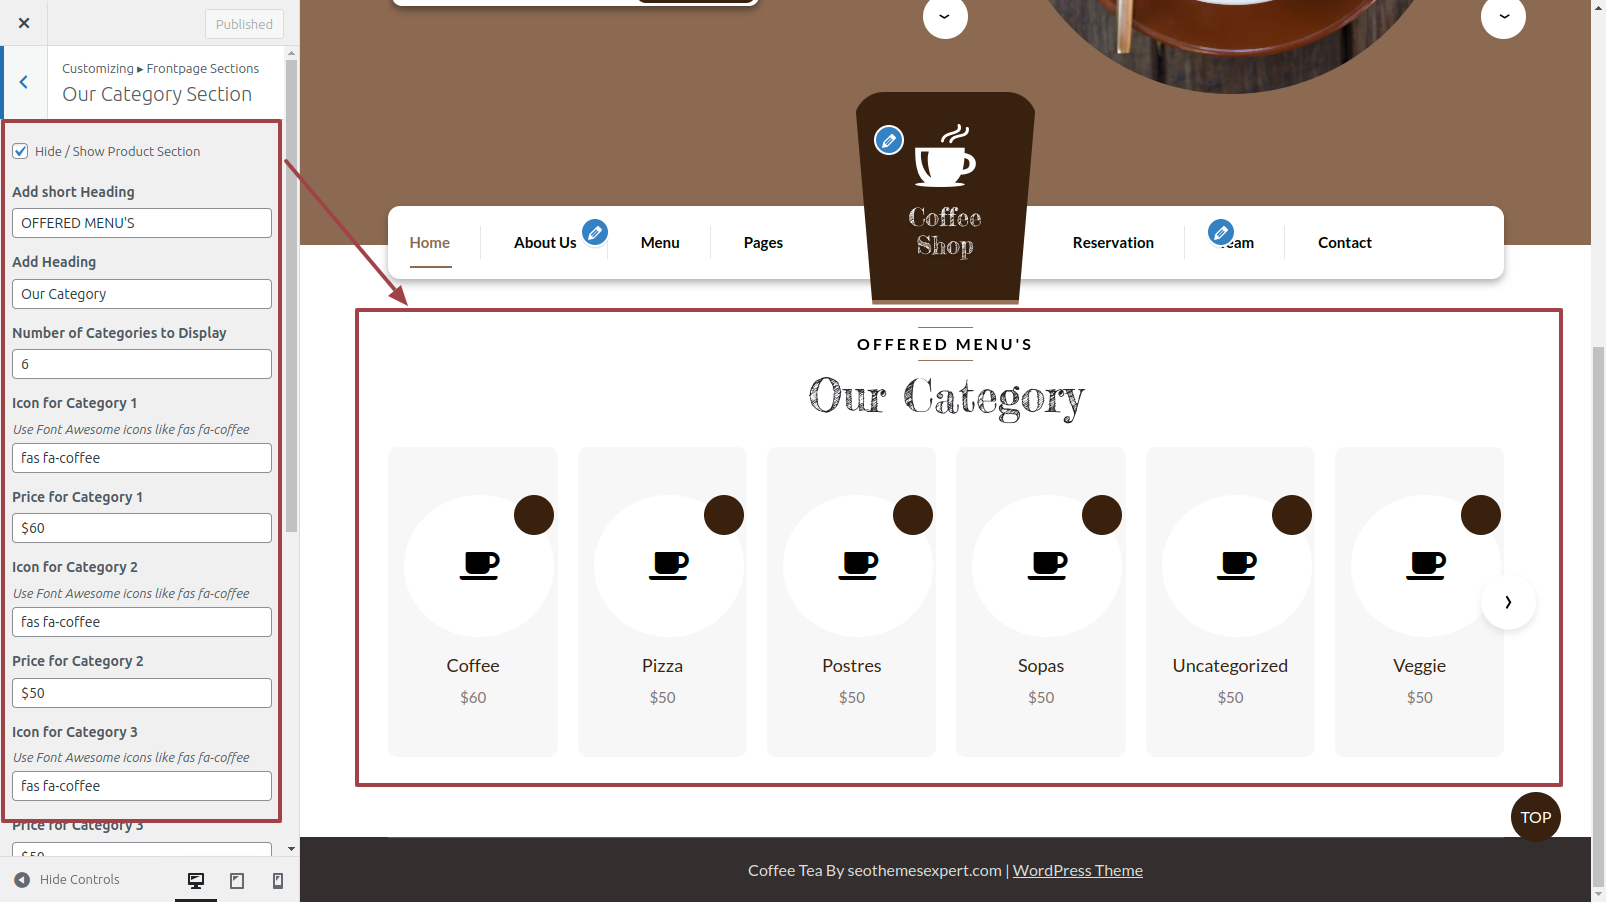
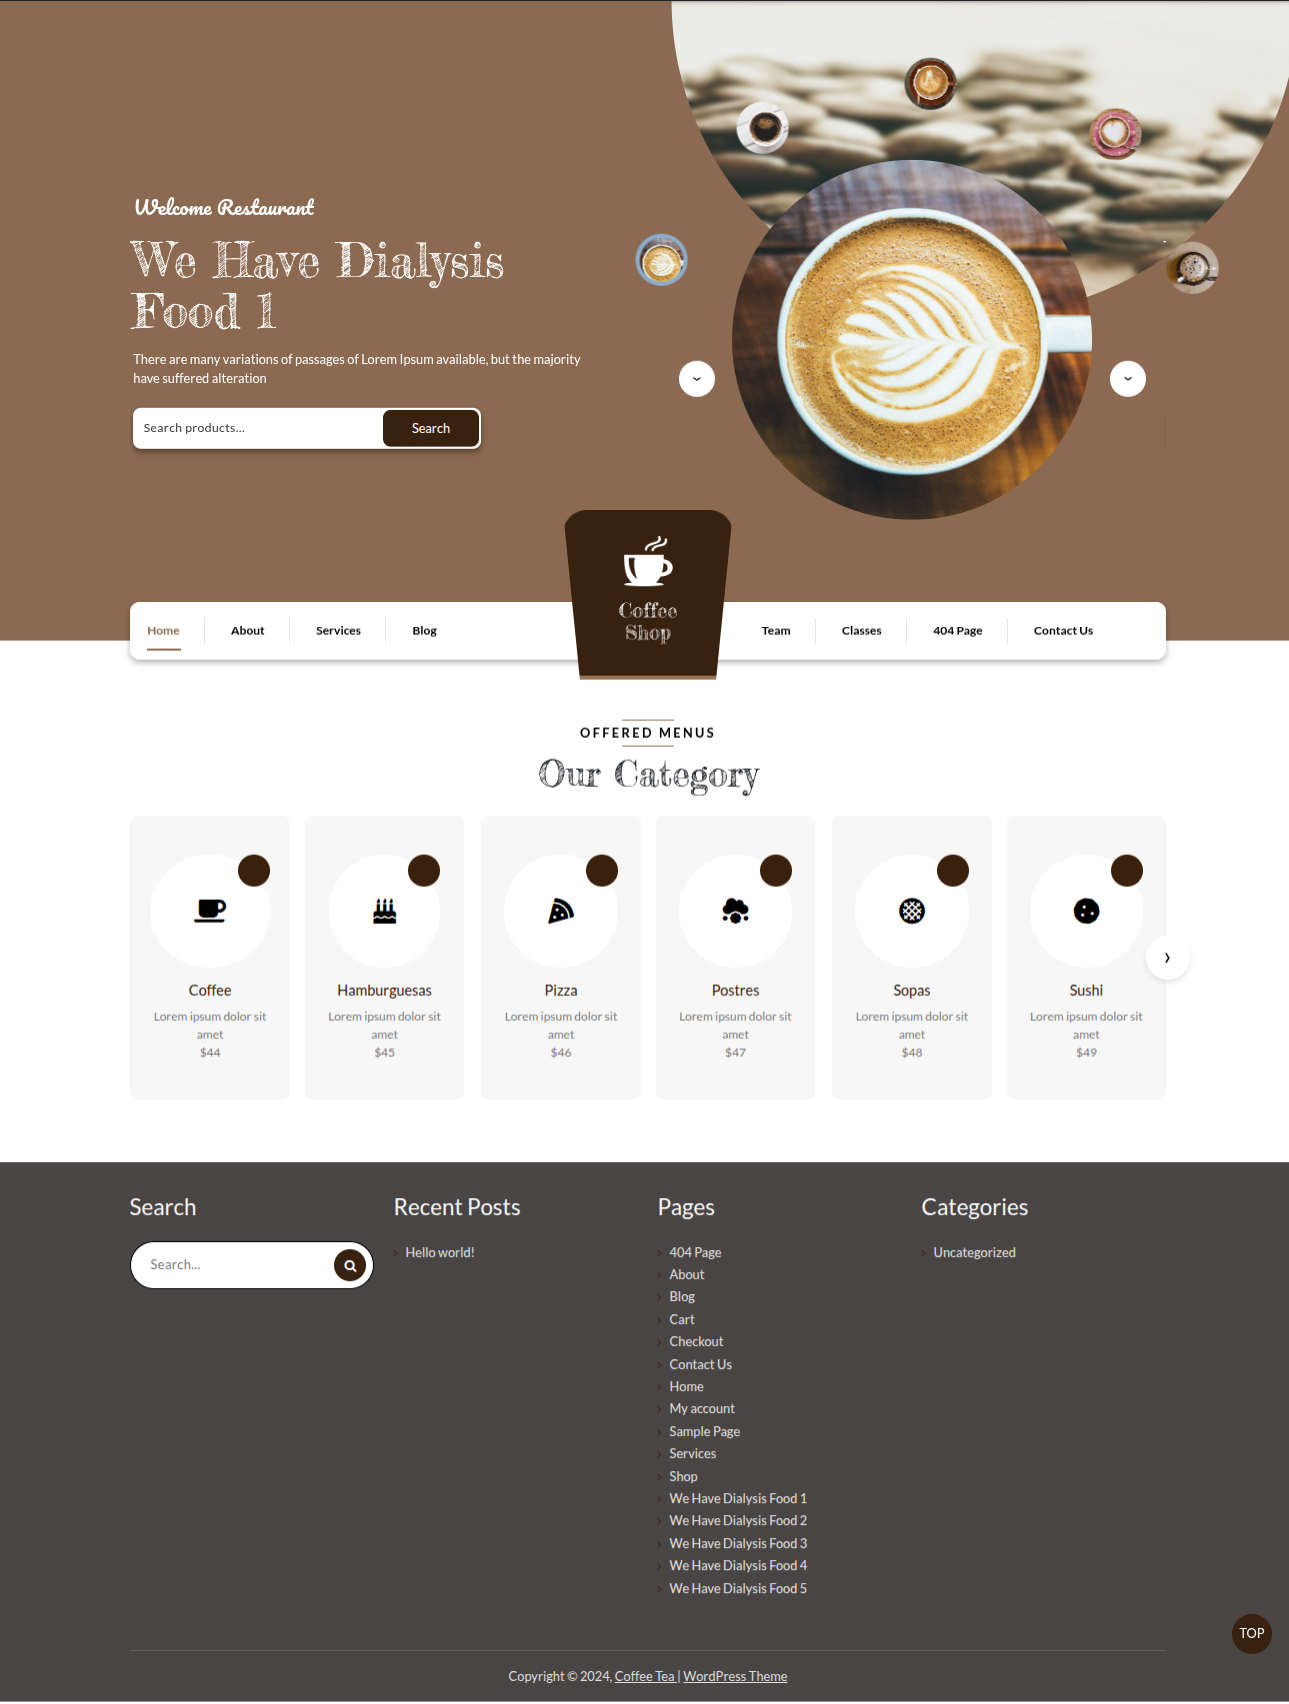
It will be shown in this format in the Our Category Section.

Part Regarding The Footer Bottom Development
In reference to the Footer Bottom Configuration.
Step 1 Open "Appearance" ===> By selecting "Customize" ===> Go now to the "Footer". ===> Move on to "Footer Bottom"
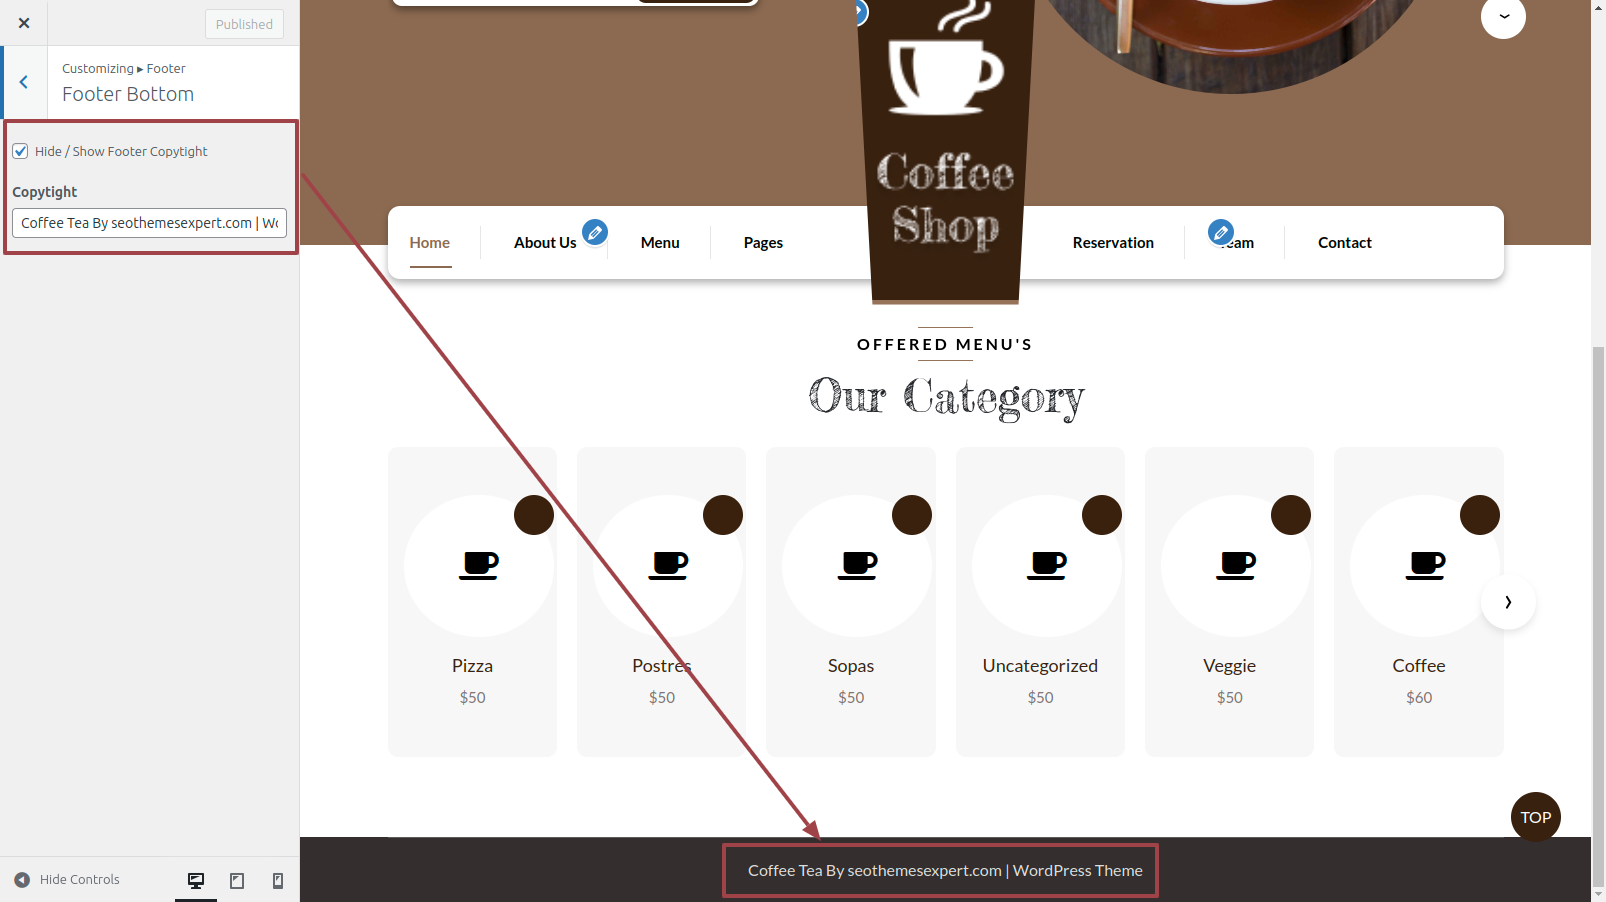
It will be shown in this format in the Footer Bottom.
